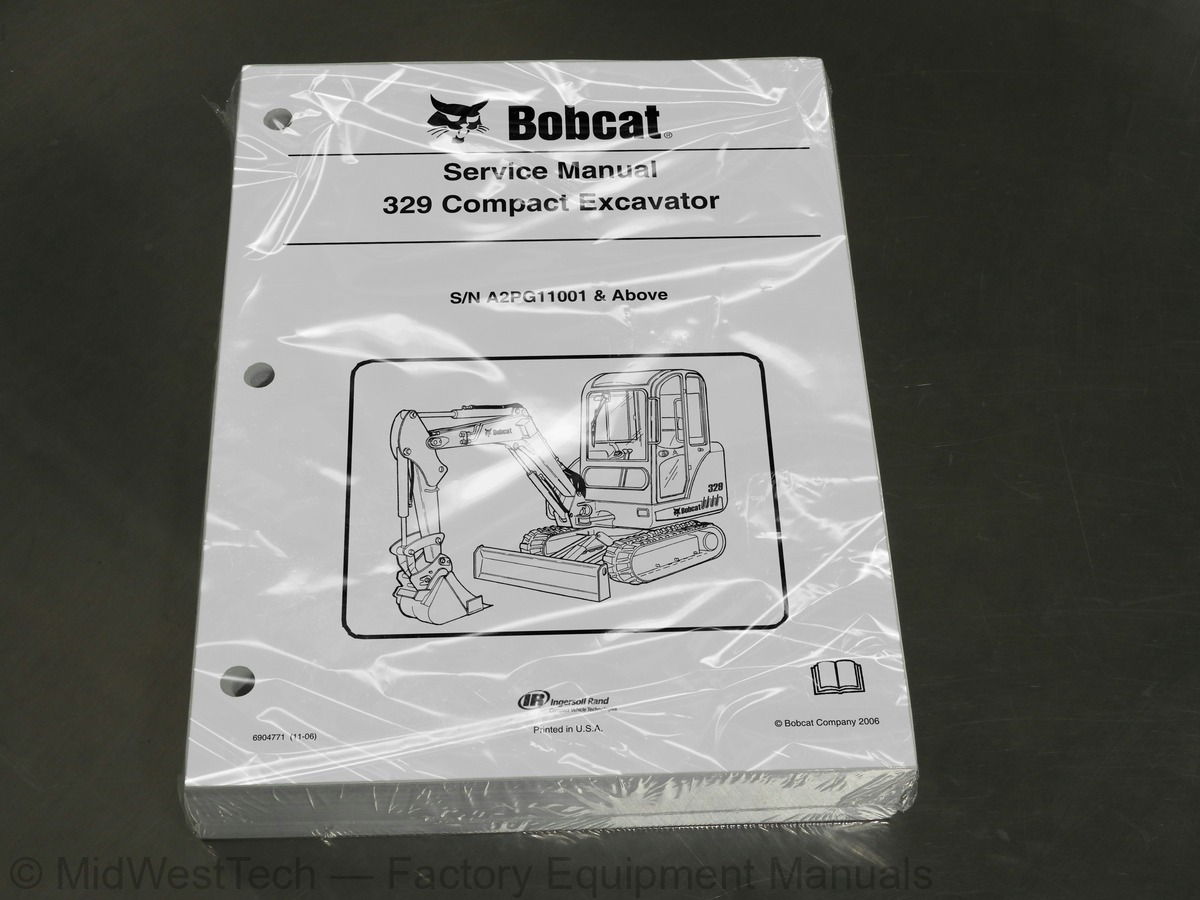
Bobcat 329 Compact Excavator Service Manual
730 pages · Publication 6904771_11_06
Added to your cart. View cart
- Models
- 329
- Serial coverage
- SN A2PG11001 & above
- Manual type
- Service Manual
- Pages
- 730
- Publication
- 6904771_11_06
- Condition
- Brand new
What's inside
From the manual's own table of contents: 16 sections, 520 entries. See sample pages (PDF, 415 KB)
SAFETY INSTRUCTIONS1 topic
- Fire Prevention
SERIAL NUMBER LOCATIONS2 topics
- Excavator Serial Number
- Engine Serial Number
SAFETY AND MAINTENANCE21 topics
- LIFTING AND BLOCKING THE EXCAVATOR
- Procedure
- UPPERSTRUCTURE SLEW LOCK
- Operation
- LIFTING THE EXCAVATOR
- Procedure
- OPERATOR CAB (ROPS / TOPS)
- Description
- Cab Door
- Front Window
- Front Wiper
- Window Washer Reservoir
- Right Side Window
- Heating, Ventilation And Air Conditioning Duct
- TRANSPORTING THE EXCAVATOR ON A TRAILER
- Loading And Unloading
- Fastening
- TAILGATE
- Opening And Closing
- Adjusting The Bumper
- Adjusting The Latch
RIGHT SIDE COVER46 topics
- Opening And Closing
- Adjusting The Latch
- SERVICE SCHEDULE
- Chart
- AIR CLEANER SERVICE
- Daily Check
- Replacing Filter Elements
- ENGINE COOLING SYSTEM
- Cleaning
- Checking Level
- Removing And Replacing Coolant
- FUEL SYSTEM
- Fuel Specifications
- Filling The Fuel Tank
- Fuel Filter
- Draining The Fuel Tank
- Removing Air From The Fuel System
- ENGINE LUBRICATION SYSTEM
- Checking And Adding Engine Oil
- Engine Oil Chart
- Removing And Replacing Oil And Filter
- HYDRAULIC SYSTEM
- Checking And Adding Fluid
- Hydraulic Fluid Chart
- Removing And Replacing Hydraulic Filters
- Removing And Replacing Hydraulic Fluid
- LUBRICATING THE EXCAVATOR
- Lubrication Locations
- TRAVEL MOTOR
- Checking And Adding Oil
- Removing And Replacing Oil
- SPARK ARRESTOR MUFFLER
- Cleaning Procedure
- ALTERNATOR BELT
- Belt Adjustment
- Belt Replacement
- SEAT BELT
- Inspection And Maintenance
- PIVOT PINS
- Inspection And Maintenance
- EXCAVATOR STORAGE AND RETURN TO SERVICE
- Storage
- Return to Service
- STOPPING THE ENGINE AND LEAVING THE EXCAVATOR
- Procedure
- Emergency Exits
HYDRAULIC SYSTEM150 topics
- HYDRAULIC/HYDROSTAIC SCHEMATICS
- HYDRAULIC SYSTEM INFORMATION
- Glossary Of Hydraulic / Hydrostatic Symbols
- Troubleshooting The Hydraulic Circuit
- Troubleshooting The Cylinder Circuit
- Troubleshooting The Swing (Upperstructure Slew) Circuit
- Troubleshooting The Travel Circuit
- BOOM CYLINDER
- Testing
- Removal And Installation
- Parts Identification
- Disassembly
- Assembly
- ARM CYLINDER
- Testing
- Removal And Installation
- Parts Identification
- Disassembly
- Assembly
- BOOM SWING CYLINDER
- Testing
- Removal And Installation
- Parts Identification
- Disassembly
- Assembly
- BUCKET CYLINDER
- Testing
- Removal And Installation
- Parts Identification
- Disassembly
- Assembly
- BLADE CYLINDER
- Testing
- Removal And Installation
- Parts Identification
- Disassembly
- Assembly
- MAIN RELIEF VALVE
- Testing And Adjusting The Main Relief Valve
- PORT RELIEF VALVES
- Testing And Adjusting Port Relief Valve Pressure
- CROSSPORT RELIEF VALVES
- Testing And Adjusting The Crossport Relief Valves
- PRESSURE REDUCING VALVE
- Testing And Adjusting The Pressure Reducing Valve
- HYDRAULIC CONTROL VALVE
- Description
- Removal And Installation
- Control Valve Identification
- Disassembly
- Right Travel Valve Section Disassembly And Assembly
- Boom Swing Valve Section Disassembly And Assembly
- Boom Valve Section Disassembly And Assembly
- Left Travel Valve Section Disassembly And Assembly
- Arm Valve Section Disassembly And Assembly
- Bucket Valve Section Disassembly And Assembly
- Auxiliary Valve Section Disassembly And Assembly
- Boost Valve Section Disassembly And Assembly
- Blade Valve Section Disassembly And Assembly
- Slew Valve Section Disassembly And Assembly
- Assembly
- HYDRAULIC PUMP
- Description
- Torque Adjustment
- Testing The Piston Pump
- Testing The Gear Pump
- Testing Auxiliary Hydraulic Flow
- Removal And Installation
- Coupler Removal And Installation
- Parts Identification (Gear Pump)
- Parts Identification (Piston Pump)
- Disassembly
- Gear Pump Disassembly
- Gear Pump Assembly
- Piston Pump Disassembly
- Piston Pump Assembly
- Assembly
- MANIFOLD ASSEMBLY / ACCUMULATOR
- Description
- Removal And Installation
- Parts Identification
- Disassembly
- Assembly
- Description
- Removal and installation
- Parts Identification
- Disassembly
- Assembly
- SWIVEL JOINT
- Description
- Removal And Installation
- Parts Identification
- Disassembly
- Assembly
- SWING MOTOR
- Description
- Removal And Installation
- Parts Identification
- Disassembly
- Assembly
- SWING MOTOR DRIVE CARRIER
- Description
- Removal And Installation
- Parts Identification
- Disassembly
- Assembly
- CONTROL PATTERN SELECTOR VALVE
- Description
- Removal And Installation
- Parts Identification
- Disassembly
- Assembly
- RIGHT CONTROL LEVER (JOYSTICK)
- Description
- Testing
- Handle Removal And Installation
- Removal And Installation
- Parts Identification
- Disassembly
- Assembly
- LEFT CONTROL LEVER (JOYSTICK)
- Description
- Testing
- Handle Removal And Installation
- Removal And Installation
- Parts Identification
- Disassembly
- Assembly
- HYDRAULIC FILTER
- Description
- Housing Removal and Installation
- CASE DRAIN FILTER
- Description
- Housing Removal And Installation
- HYDRAULIC RESERVOIR
- Description
- Removal And Installation
- OIL COOLER
- Description
- Removal And Installation
- DIRECT TO TANK VALVE
- Desciption
- Removal And Installation
- Parts Identification
- Disassembly And Assembly
- BUILDUP VALVE
- Description
- Removal And Installation
- Parts Identification
- Disassembly And Assembly
UNDERCARRIAGE23 topics
- BLADE
- Description
- Removal And Installation
- TRACK FRAME COMPONENTS
- Description
- Track Lug Height
- Checking Tension
- Adjusting Tension
- Rubber Track Removal And Installation
- Steel Track Removal And Installation
- Idler (Front) Removal And Installation
- Idler (Front) Parts Identification
- Idler (Front) Disassembly
- Idler (Front) Assembly
- Coil Spring Assembly And Cylinder Disassembly And Assembly
- Roller Removal and Installation
- Roller Parts Identification
- Roller Disassembly
- Roller Assembly
- Track Guide Removal And Installation
- Track Damage Identification
- SWING CIRCLE GEAR
- Removal And Installation
UPPERSTRUCTURE & SWING SECTION85 topics
- UPPERSTRUCTURE
- Description
- Removal
- Installation
- CANOPY
- Removal And Installation
- Door Removal And Installation
- Front Window Removal And Installation
- Right Side Rear Sliding Window Removal And Installation
- Right Side Front Sliding Window Removal And Installation
- Glass Removal
- Right Side Front And Rear Sliding Window Weather Strip Removal And Installation
- Right Side Front And Rear Sliding Window Wiper Strip Removal And Installation
- Glass Installation
- SEAT AND SEAT MOUNT
- Seat Mount Removal And Installation
- Seat Removal And Installation
- RIGHT CONSOLE
- Description
- Console Cover Removal And Installation
- Console Frame Removal And Installation
- LEFT CONSOLE
- Description
- Joystick Console Cover (Bottom) Removal And Installation
- Joystick Console Cover (Top) Removal And Installation
- Compression Spring Removal And Installation
- Compression Spring Disassembly And Assembly
- Lever Removal And Installation
- Joystick Console Frame Removal And Installation
- Joystick Console Frame Disassembly And Installation
- Left Rear Console Cover Removal And Installation
- Left Rear Console Frame Removal And Installation
- Left Rear Console Frame Disassembly And Assembly
- BLADE CONTROL
- Removal And Installation
- Disassembly And Assembly
- Linkage Removal And Installation
- Linkage Disassembly And Assembly
- Removal and Installation (S/N A2PG11001 - A2PG11093)
- Removal And Installation (S/N A2PG11094 & Above)
- Disassembly And Assembly (S/N A2PG11094 & Above)
- FLOOR MAT AND FLOOR PANEL
- Description
- Removal And Installation
- BOOM SWING PEDAL
- Description
- Removal And Installation
- Disassembly And Assembly
- Linkage Removal And Installation
- TRAVEL LEVERS / PEDALS
- Description
- Adjustment
- Removal And Installation
- Disassembly And Assembly
- FUEL TANK
- Removal And Installation
- HORN
- Removal And Installation (Earlier Models)
- Removal And Installation (Later Models)
- SWING FRAME
- Description
- Removal And Installation
- Hose Routing
- Bushing Removal And Installation
- Swing Frame Bushing Removal And Installation
- BOOM
- Description
- Removal And Installation
- Description
- Removal And Installation
- Arm To Boom Bushing Removal And Installation
- Arm To Bucket And Bucket Link Bushing Removal And Installation
- BUCKET
- Removal And Installation (Pin-On X-Change)
- Removal And Installation (Bolt-On X-Change)
- Removal And Installation (Pin-On Attachment)
- Bucket Teeth Removal And Installation
- Bucket Side Cutting Edge Removal And Installation
- Removal And Installation
- Latch Removal And Installation
- X-CHANGE
- Pin-On Removal And Installation
- Pin-On Disassembly and Assembly
- RIGHT SIDE COVER
- Removal And Installation
ELECTRICAL SYSTEM AND ANALYSIS43 topics
- ELECTRICAL SCHEMATICS
- ELECTRICAL SYSTEM INFORMATION
- Glossary Of Electrical Symbols
- Harness Connectors
- Troubleshooting
- Description
- Fuse And Relay Locations / Identification
- BATTERY
- Removal And Installation
- Servicing
- Using A Booster Battery (Jump Starting)
- ALTERNATOR
- Belt Adjustment
- Belt Replacement
- Charging System Inspection
- Description
- Tests
- Alternator Output Test
- Full Field Test
- Alternator Regulator Test
- Alternator Regulator Test With Voltmeter
- Removal And Installation
- Parts Identification
- STARTER
- Testing
- Removal And Installation
- Parts Identification
- LIGHTS
- Upperstructure Light Removal And Installation
- Upperstructure Light Disassembly And Assembly
- Boom Light Removal And Installation (Earlier Models)
- Boom Light Disassembly And Assembly (Earlier Models)
- Boom Light Removal And Installation (Later Models)
- Boom Light Bulb Replacement (Later Models)
- MAGNETIC LOCKOUT SENSOR
- Testing Left Console Magnetic Lockout Sensor
- Left Console Magnetic Lockout Sensor Removal And Installation
- FUEL LEVEL SENDER
- Removal And Installation
- Testing
- DIAGNOSTICS SERVICE CODES
- Description
- Service Codes List
ENGINE SERVICE64 topics
- ENGINE INFORMATION
- Description
- Specifications
- Torque Values
- Troubleshooting
- Removal And Installation
- Engine Mount Replacement
- Compression - Checking
- ENGINE SPEED CONTROL
- Removal And Installation
- AIR CLEANER
- Removal And Installation
- Radiator Removal And Installation
- Water Pump Removal And Installation
- Water Pump Disassembly And Assembly
- Thermostat Housing Removal And Installation
- Testing The Thermostat
- LUBRICATION SYSTEM
- Oil Pan Removal And Installation
- Oil Pump Removal And Installation
- Oil Pump Inspection
- Engine Oil Pressure - Testing
- Fuel Camshaft Removal And Installation
- Fuel Camshaft Governor Disassembly And Assembly
- Fuel Shutoff Solenoid - Checking
- Fuel Shutoff Solenoid Removal And Installation
- Fuel Injection Pump Removal And Installation
- Injection Pump - Timing
- Fuel Injector Removal And Installation
- Fuel Injector Nozzle Pressure - Checking
- Nozzle Spray Condition
- Valve Seat Tightness
- CYLINDER HEAD
- Glow Plug - Testing
- Glow Plug Removal And Installation
- Valve Clearance Adjustment
- Valve Timing - Checking
- Cylinder Head Removal And Installation
- Cylinder Head Disassembly and Assembly
- Cylinder Head - Servicing
- Cylinder Head Top Clearance
- Valve Guide - Checking
- Reconditioning The Valve And Valve Seat
- Valve Spring
- Valve Tappets
- Rocker Arm And Shaft - Checking
- CRANKSHAFT AND PISTONS
- Piston And Connecting Rod Removal And Installation
- Piston And Connecting Rod - Servicing
- Cylinder Bore Checking
- Connecting Rod Alignment
- Crankshaft And Bearings Removal And Installation
- Crankshaft And Bearings - Servicing
- CAMSHAFT AND TIMING GEARS
- Timing Gearcase Cover Removal And Installation
- Timing Gears Backlash - Checking
- Idler Gear And Shaft Removal And Installation
- Camshaft - Servicing
- Idler Gear And Shaft Servicing
- FLYWHEEL AND HOUSING
- Flywheel Housing Removal And Installation
- Hydraulic Pump Coupler Removal And Installation
- Flywheel Removal And Installation
- Rear End Plate Removal And Installation
HEATER36 topics
- HEATER SYSTEM (EARLIER MODELS)
- Description
- Components
- HEATER SYSTEM (LATER MODELS)
- Description
- Components
- REGULAR MAINTENANCE (EARLIER MODELS)
- Filter Element Removal And Installation
- Heater Coil
- REGULAR MAINTENANCE (LATER MODELS)
- Filter Element Removal And Installation
- Heater Coil
- TROUBLESHOOTING (EARLIER MODELS)
- Blower Motor Does Not Operate
- Blower Motor Operates Normally, But Air Flow Is Insufficient
- Electrical System
- TROUBLESHOOTING (LATER MODELS)
- Blower Motor Does Not Operate
- Blower Motor Operates Normally, But Air Flow Is Insufficient
- Electrical System
- HEATER UNIT (EARLIER MODELS)
- Removal And Installation
- HEATER UNIT (LATER MODELS)
- Removal And Installation
- HEATER COIL (EARLIER MODELS)
- Removal And Installation
- HEATER COIL (LATER MODELS)
- Removal And Installation
- BLOWER FAN (EARLIER MODELS)
- Removal And Installation
- BLOWER FAN (LATER MODELS)
- Removal And Installation
- HEATER VALVE (EARLIER MODELS)
- Removal And Installation
- HEATER VALVE (LATER MODELS)
- Removal And Installation
SPECIFICATIONS33 topics
- EXCAVATOR SPECIFICATIONS
- Dimensions
- Performance
- Controls
- Engine
- Hydraulic System
- Hydraulic Cylinders
- Hydraulic Cycle Times
- Electrical
- Instrumentation
- Drive System
- Slew System
- Undercarriage
- Crawler Track Design
- Capacities
- Fuel Tank
- Tracks
- Type
- Ground Pressure
- TORQUE SPECIFICATIONS FOR BOLTS
- Torque For General SAE Bolts
- Torque For General Metric Bolts
- HYDRAULIC CONNECTION SPECIFICATIONS
- O-ring Face Seal Connection
- Straight Thread O-ring Fitting
- Tubelines And Hoses
- Flare Fitting
- Port Seal Fitting
- HYDRAULIC FLUID SPECIFICATIONS
- Specifications
- CONVERSIONS
- Decimal And Millimeter Equivalents
- U.S. To Metric Conversion Chart
Inside this manual
Real pages from this service manual (730 pages). Open the sample pages (PDF, 414 KB)
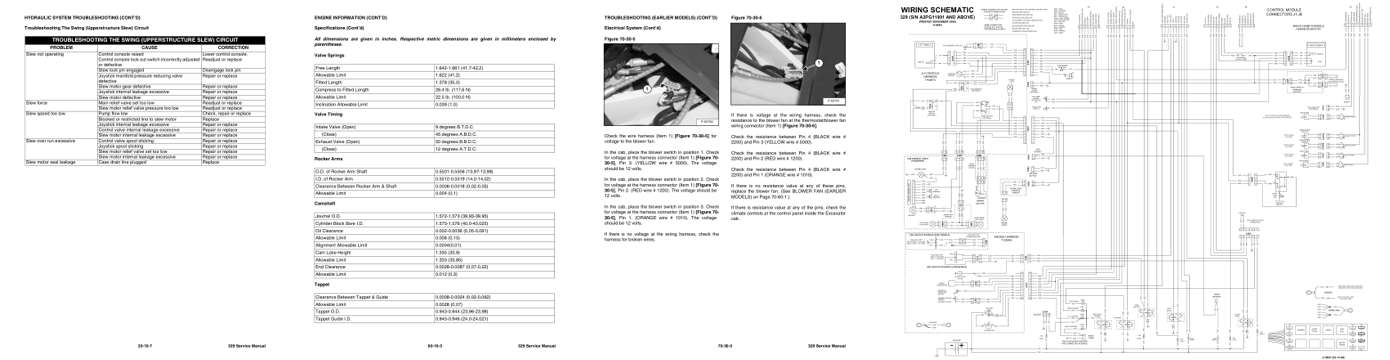
- Troubleshooting, page 87: HYDRAULIC SYSTEM TROUBLESHOOTING (CONT’D)
- Specifications, page 593: ENGINE INFORMATION (CONT’D)
- Diagram, page 681: TROUBLESHOOTING (EARLIER MODELS) (CONT’D)
- Foldout diagram, page 551: BATTERY FEED 1000-1999 RED, RED/WHT, RNG
Other manuals for this machine
Save 10% on 2 manuals, 15% on 3 or more. Other manuals for the 329 are listed below. Editions cover different serial number ranges: check the serial coverage and tick only the ones that match your machine.
Added to your cart. View cart
This is a service manual
Here's how it compares to the other manual types.
Service manual
Factory repair procedures and technical information such as specifications, troubleshooting, and wiring and hydraulic diagrams, for the models and systems the manual covers. See What's inside for its topics.
Operator's manual
Safe operation, controls, maintenance schedules, lubrication points, inspections, and basic checks. Repair procedures are in the service manual.
Parts manual
Illustrated diagrams with factory part numbers for identifying components and ordering parts. Repair procedures are in the service manual.
Engine service manuals are sometimes sold separately, since certain machine models were offered with more than one engine option.
What it's used for
Factory manual for in-house farm and construction shop use. Straightforward, complete, and easy to follow. It contains the OEM information dealership service departments and parts counters use to diagnose problems, identify components, and perform maintenance or repairs correctly.
Service shops and owner/operators who repair their own equipment
Identifying correct parts and seeing how assemblies come apart and go back together
Keeping equipment running with less downtime
Factory manual, 730 pages
Quantity one is the manual described above.
Fast free USA shipping
Ships in 1 business day.
60-day returns
Free if the mistake is ours. A manual ordered in error must come back unopened in its shrink-wrap; you pay return shipping and a 20% restocking fee applies. Return policy
Binder not included
Manuals over about 300 pages may need a standard 3-ring binder, which you can buy locally to keep the pages organized for shop use.
Other editions and similar models
Questions about model, serial number, engine coverage or contents? Contact us before purchasing and we'll help confirm it's the right manual. Please verify the manual type, machine model, serial number range and engine coverage before purchasing: manuals ordered in error carry a 20% restocking fee (return policy).