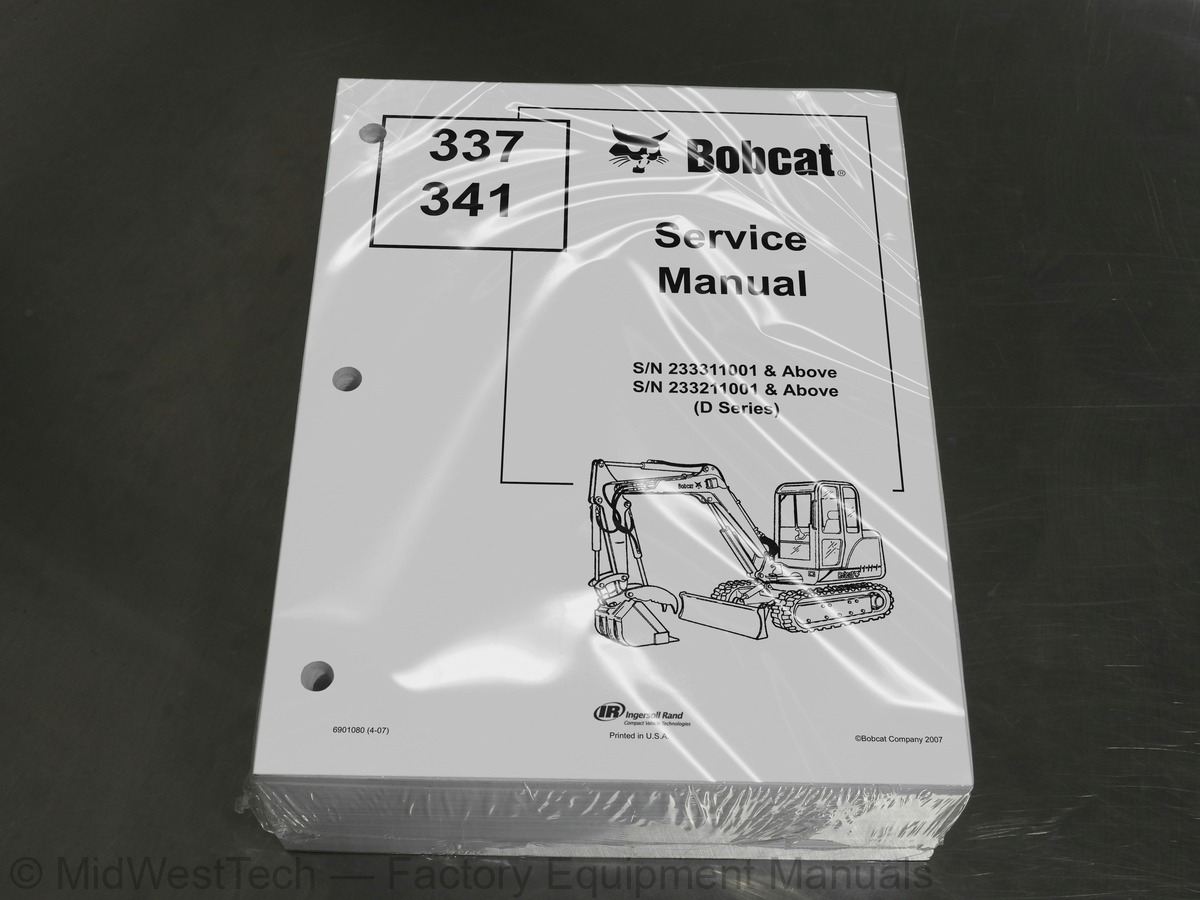
Bobcat 337, 341 D Series Excavator Service Manual
901 pages · Publication 6901080_4_07
Added to your cart. View cart
- Models
- 337, 341 D Series
- Serial coverage
- SN 233311001 & above, SN 233211001 & above
- Manual type
- Service Manual
- Pages
- 901
- Publication
- 6901080_4_07
- Condition
- Brand new
What's inside
From the manual's own table of contents: 13 sections, 351 entries. See sample pages (PDF, 498 KB)
SAFETY INSTRUCTIONS6 topics
- Fire Prevention
- SERIAL NUMBER LOCATIONS
- Hydraulic Excavator Serial Number
- Engine Serial Number
- DELIVERY REPORT
- BOBCAT EXCAVATOR IDENTIFICATION
LIFTING AND BLOCKING THE EXCAVATOR53 topics
- Procedure
- LIFTING THE EXCAVATOR
- 3-Point Lift Procedure
- OPERATOR CAB
- Emergency Exit
- Cab Door
- TRANSPORTING THE EXCAVATOR
- Procedure
- Opening And Closing The Tailgate
- Adjusting The Bumper
- Adjusting The Latch
- Opening And Closing The Tailgate
- Adjusting The Bumper
- Adjusting The Striker
- SERVICE SCHEDULE
- AIR CLEANER SERVICE
- Checking
- Replacing The Filters
- HEATER AIR FILTER
- Fresh Air Filter
- Recirculation Filter (Early Models Only)
- COOLING SYSTEM
- Cleaning The Cooling System
- Checking Coolant Level
- Replacing The Coolant (Early Models)
- Replacing The Coolant (Later Models)
- FUEL SYSTEM
- Fuel Specifications
- Filling The Fuel Tank
- Removing Water From The Fuel Filter
- Fuel Filter
- Draining The Fuel Tank
- Removing Air From The Fuel System
- ENGINE LUBRICATION SYSTEM
- Checking Engine Oil (Early Models)
- Replacing Oil And Filter (Early Models)
- Checking Engine Oil (Later Models)
- Replacing Oil And Filter (Later Models)
- HYDRAULIC SYSTEM
- Checking And Adding Fluid (Early Models)
- Checking And Adding Fluid (Later Models)
- Replacing The Hydraulic Oil (Early Models)
- Replacing The Hydraulic Oil (Later Models)
- Replacing the Hydraulic Filter
- Replacing the Case Drain Filter
- Diagnostic Couplers
- LUBRICATION OF THE EXCAVATOR
- Procedure
- TRAVEL MOTOR
- Checking Oil Level
- Draining The Travel Motor
- SPARK ARRESTOR MUFFLER (IF EQUIPPED)
- Servicing
HYDRAULIC/HYDROSTATIC SCHEMATIC167 topics
- HYDRAULIC SYSTEM INFORMATION
- Troubleshooting Chart
- Description
- BOOM CYLINDER
- Testing
- Removal And Installation
- Parts Identification
- Disassembly
- Assembly
- ARM CYLINDER
- Testing
- Removal and Installation
- Parts Identification
- Disassembly
- Assembly
- BOOM SWING CYLINDER
- Testing
- Removal And Installation
- Parts Identification
- Disassembly
- Assembly
- BUCKET CYLINDER
- Testing
- Removal And Installation
- Parts Identification
- Disassembly
- Assembly
- BLADE CYLINDER
- Testing
- Removal And Installation
- Parts Identification
- Disassembly
- Assembly
- CLAMP CYLINDER
- Testing
- Removal And Installation
- Parts Identification
- Disassembly
- Assembly
- MAIN RELIEF VALVE
- PORT RELIEF VALVES
- Port Relief Valve Pressure Setting
- Parts Identification
- Adjustment Procedure
- CROSSPORT RELIEF VALVE
- Testing And Adjusting The Crossport Relief Valve
- Removal And Installation
- Disassembly And Assembly
- PRESSURE REDUCING VALVE
- Description
- HYDRAULIC CONTROL VALVE ASSEMBLY
- Removal And Installation
- Control Valve Identification
- Disassembly And Assembly
- Swing Valve Section (Slew Valve Section)
- Boom Offset Valve Section
- Blade Valve Section
- Bucket Valve Section
- Arm Valve Section
- Boom Valve Section
- Auxiliary Valve Section
- Right Side Travel Valve Section
- Left Side Travel Valve Section
- Inlet Section
- HYDRAULIC PUMP
- Hydraulic Pump Work Sheet
- Pump Testing
- Test Fitting Installation
- Torque Limiter Adjustment
- Removal And Installation
- Coupler Removal And Installation
- Torque Limiter Valve Parts Identification
- Torque Limiter Valve Removal
- Torque Limiter Valve Disassembly
- Torque Limiter Valve Assembly
- Initial Torque Limiter Valve Setting
- Torque Limiter Valve Installation
- Pump Control Parts Identification
- Pump Control Removal And Installation
- Pump Control Disassembly And Assembly
- Parts Identification
- Disassembly
- Assembly
- MANIFOLD ASSEMBLY/ACCUMULATOR
- Description
- Testing Pilot Pressure
- Adjusting The Pilot Pressure
- Removal And Installation
- Manifold Assembly/Accumulator Parts Identification (S/N 233311636 & Below, S/N 233211536 & Below)
- Manifold Assembly/Accumulator Parts Identification (S/N 233311637 & Above, S/N 233211537 & Above)
- Checking Oil Level
- Draining And Refilling
- Removal And Installation
- Parts Identification
- Disassembly
- Assembly
- SWIVEL JOINT
- Removal And Installation
- Parts Identification
- Disassembly
- Assembly
- SWING MOTOR
- Removal And Installation
- Disassembly
- Inspection
- Assembly
- SWING MOTOR DRIVE CARRIER
- Removal And Installation
- Parts Identification
- Checking The Drive Carrier Shaft End Play
- Disassembly
- Inspection
- Assembly
- CONTROL PATTERN SELECTOR VALVE
- Removal And Installation
- Disassembly
- Assembly
- Testing
- Handle Removal And Installation
- Joystick Assembly Removal And Installation
- Parts Identification
- Disassembly And Assembly
- Testing
- Handle Removal And Installation
- Joystick Assembly Removal And Installation
- Parts Identification
- Disassembly And Assembly
- Testing
- Handle Removal And Installation
- Joystick Assembly Removal And Installation
- Parts Identification
- Disassembly
- Assembly
- Testing
- Handle Removal And Installation
- Joystick Assembly Removal And Installation
- Parts Identification
- Disassembly
- Assembly
- TRAVEL CONTROL VALVE
- Removal and Installation
- Disassembly And Assembly
- HYDRAULIC FILTER
- Removal And Installation
- HYDRAULIC FLUID RESERVOIR
- Removal And Installation
- OIL COOLER
- Removal And Installation
- DUAL SEQUENCE VALVE
- Removal And Installation
- Disassembly And Assembly
- DIRECT TO TANK VALVE
- Removal And Installation
- Disassembly And Assembly
- BUILD UP VALVE
- Removal And Installation
- Disassembly And Assembly
- CASE DRAIN FILTER
- Removal And Installation
- REMOVING AIR FROM HYDRAULIC SYSTEM
- Procedure
- BOOM OFFSET LOCK VALVE
- Description
- Removal And Installation
- Parts Identification
- Disassembly
- Assembly
BLADE39 topics
- Removal And Installation
- TRACKS
- Track Lug Height
- Rubber Track Clearance
- Rubber Track Adjustment
- Steel Track Clearance
- Steel Track Adjustment
- Rubber Track Removal And Installation
- Steel Track Removal
- Steel Track Installation
- Track Shoe Removal And Installation
- TRACK FRAME
- Disassembly And Assembly
- Parts Identification
- Disassembly
- Assembly
- Parts Identification
- Disassembly
- Assembly
- Parts Identification
- Disassembly
- Assembly
- Parts Identification
- Disassembly And Assembly
- TRACK DAMAGE IDENTIFICATION
- Cutting Of Steel Cords
- Abrasion Of Embedded Metals
- Separation Of Embedded Metals
- Separation Of Embedded Metals Due To Corrosion
- Cuts On The Lug Side Rubber
- Cracks On The Lug Side Rubber Due To Fatigue
- Lug Abrasion
- Cracks And Cuts On The Lug Side Rubber
- Abrasion Of The Track Roller Side
- Cuts On The Edges Of Track Roller Side
- SWING CIRCLE GEAR
- Removal And Installation
- Swing Bearing Removal
- Swing Bearing Installation
UPPERSTRUCTURE73 topics
- Removal
- Installation
- ROPS CANOPY
- Removal And Installation
- Door Removal And Installation
- Front Window Removal And Installation
- Lower Front Window Removal And Installation
- Right Side Rear Sliding Window Removal And Installation (Two Piece Side Window)
- Right Side Front Sliding Window Removal And Installation (Two Piece Side Window)
- Right Side Rear Sliding Window Removal And Installation (Three Piece Side Window)
- Right Side Front Sliding Window Removal And Installation (Three Piece Side Window)
- Right Side Panel And Window Assembly Removal And Installation
- Door, Left Side, Rear & Upper Front Window Removal And Installation
- SEAT AND SEAT MOUNT
- Removal and Installation
- RIGHT CONSOLE
- Console Cover Removal And Installation
- Console Base Removal And Installation
- LEFT CONSOLE
- Lower Console Cover Removal And Installation
- Upper Console Cover Removal And Installation
- Compression Spring Removal And Installation
- Lock Lever Removal And Installation
- Upper Console Removal And Installation
- Console Switch Removal And Installation
- Disassembly And Assembly
- Console Base Removal And Installation
- ENGINE SPEED CONTROL
- Removal And Installation
- BLADE CONTROL
- Lever Removal And Installation
- Linkage Removal And Installation
- Linkage Bar Removal And Installation
- Lower Linkage Removal And Installation
- Lower Linkage Disassembly And Assembly
- RIGHT PEDAL AND LINKAGE
- Pedal Removal And Installation
- Pedal Disassembly And Assembly
- Lower Linkage Removal And Installation
- Lower Linkage Disassembly And Assembly
- Bellcrank Removal And Installation
- TRAVEL CONTROLS
- Removal And Installation
- Disassembly And Assembly
- Adjustment
- CONTROL LINKAGE ASSEMBLY
- Removal And Installation
- FLOOR MAT AND FLOOR PANELS
- Removal And Installation
- FUEL TANK
- Removal And Installation
- HORN
- Removal And Installation
- SWING FRAME
- Boom Swing Bracket Removal And Installation
- Boom Swing Bracket Hose Installation
- Swing Bracket Bushing Removal
- Swing Bracket Bushing Installation
- Boom Pivot Pin Bushing Installation (S/N 233311405 & Above And 233211373 & Above)
- BOOM
- Removal And Installation
- Boom Pivot Pin Bushings Removal And Installation (S/N 233311405 & Above And 233211373 & Above)
- Removal And Installation
- BUCKET
- Bucket Teeth Removal And Installation
- TAILGATE
- Removal And Installation
- Release Rod Removal And Installation (S/N 233311549 & Below, S/N 233211442 & Below)
- X-CHANGE™
- Removal And Installation
- Parts Identification
- Disassembly
- Assembly
Inside this manual
Real pages from this service manual (901 pages). Open the sample pages (PDF, 498 KB)

- Diagram, page 663: SWITCHED
- Troubleshooting, page 806: BASIC TROUBLESHOOTING (CONT'D)
- Specifications, page 858: 337 HYDRAULIC EXCAVATOR SPECIFICATIONS
- Foldout diagram, page 68: COMPONENTS
Other manuals for this machine
Save 10% on 2 manuals, 15% on 3 or more. Other manuals for the 337 are listed below. Editions cover different serial number ranges: check the serial coverage and tick only the ones that match your machine.
Added to your cart. View cart
This is a service manual
Here's how it compares to the other manual types.
Service manual
Factory repair procedures and technical information such as specifications, troubleshooting, and wiring and hydraulic diagrams, for the models and systems the manual covers. See What's inside for its topics.
Operator's manual
Safe operation, controls, maintenance schedules, lubrication points, inspections, and basic checks. Repair procedures are in the service manual.
Parts manual
Illustrated diagrams with factory part numbers for identifying components and ordering parts. Repair procedures are in the service manual.
Engine service manuals are sometimes sold separately, since certain machine models were offered with more than one engine option.
What it's used for
Factory manual for in-house farm and construction shop use. Straightforward, complete, and easy to follow. It contains the OEM information dealership service departments and parts counters use to diagnose problems, identify components, and perform maintenance or repairs correctly.
Service shops and owner/operators who repair their own equipment
Identifying correct parts and seeing how assemblies come apart and go back together
Keeping equipment running with less downtime
Factory manual, 901 pages
Quantity one is the manual described above.
Fast free USA shipping
Ships in 1 business day.
60-day returns
Free if the mistake is ours. A manual ordered in error must come back unopened in its shrink-wrap; you pay return shipping and a 20% restocking fee applies. Return policy
Binder not included
Manuals over about 300 pages may need a standard 3-ring binder, which you can buy locally to keep the pages organized for shop use.
Other editions and similar models
Questions about model, serial number, engine coverage or contents? Contact us before purchasing and we'll help confirm it's the right manual. Please verify the manual type, machine model, serial number range and engine coverage before purchasing: manuals ordered in error carry a 20% restocking fee (return policy).