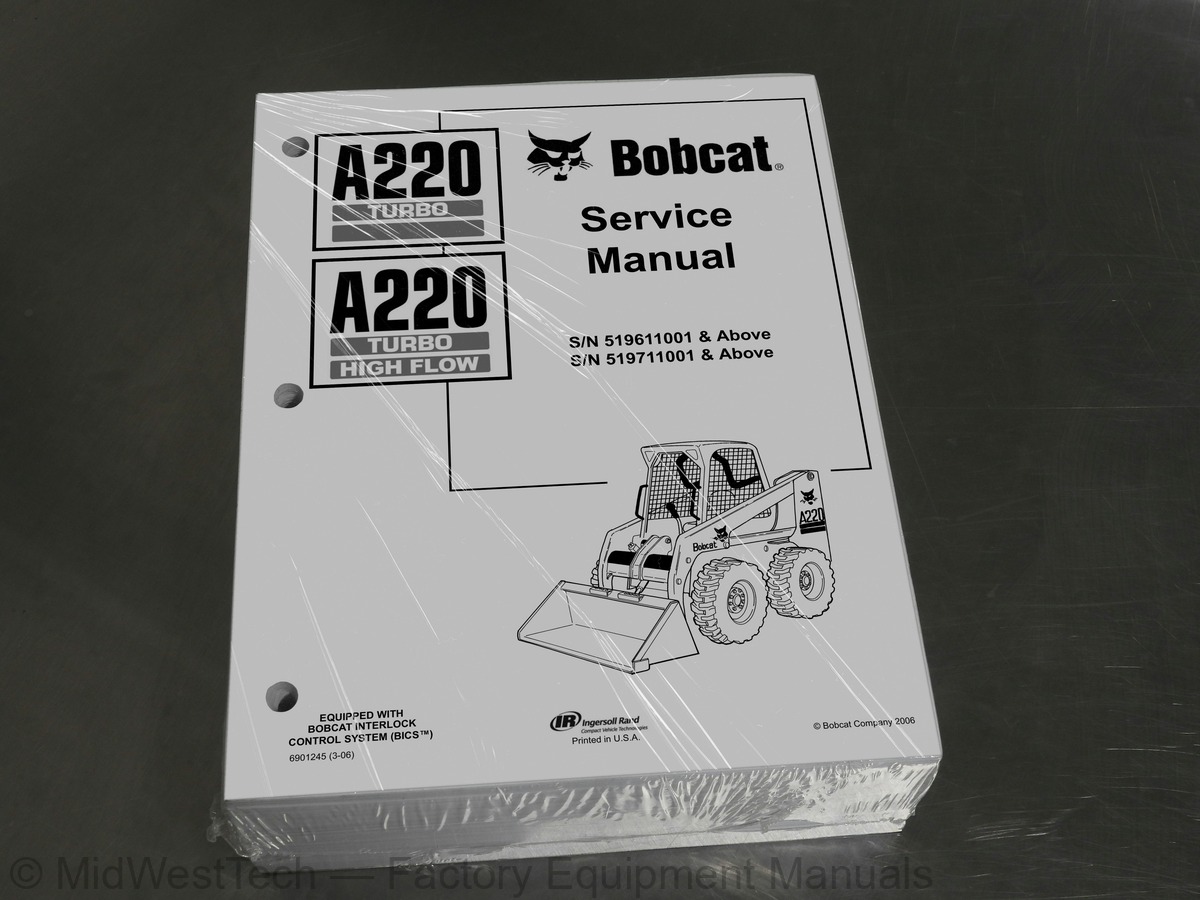
Bobcat A220 Turbo, A220 Turbo High Flow Skid Steer Loader Service Manual
982 pages · Publication 6901245_3_06
Added to your cart. View cart
- Models
- A220 Turbo, A220 Turbo High Flow
- Serial coverage
- SN 519611001 & above, SN 519711001 & above
- Manual type
- Service Manual
- Pages
- 982
- Publication
- 6901245_3_06
- Condition
- Brand new
What's inside
From the manual's own table of contents: 21 sections, 577 entries. See sample pages (PDF, 615 KB)
FOREWORD7 topics
- SAFETY INSTRUCTIONS
- Fire Prevention
- SERIAL NUMBER LOCATION
- Loader Serial Number
- Engine Serial Number
- DELIVERY REPORT
- BOBCAT LOADER IDENTIFICATION
LIFTING AND BLOCKING THE LOADER51 topics
- Procedure
- LIFT ARM SUPPORT DEVICE
- Engaging The Lift Arm Support Device
- Disengaging The Lift Arm Support Device
- OPERATOR CAB
- Raising The Operator Cab
- Lowering The Operator Cab
- Emergency Exit
- TRANSPORTING THE LOADER
- Procedure
- TOWING THE LOADER
- Procedure For Non-Two-Speeds
- Procedure For Two-Speeds
- REMOTE START
- Procedure For Loader Without Attachment Control Harness
- Procedure For Loader With Attachment Control Harness
- Procedure
- SERVICE SCHEDULE
- Chart
- AIR CLEANER SERVICE
- Replacing Filter Element
- ENGINE COOLING SYSTEM
- Cleaning The Cooling System
- FUEL SYSTEM
- Fuel Specifications
- Filling The Fuel Tank
- Fuel Filter
- Removing Air From The Fuel System
- ENGINE LUBRICATION SYSTEM
- Checking Engine Oil
- Replacing Oil And Filter
- HYDRAULIC/HYDROSTATIC SYSTEM
- Checking And Adding Fluid
- Hydraulic/Hydrostatic Filter Replacement
- Replacing Hydraulic Fluid
- Steering Filter Replacment
- FINAL DRIVE TRANSMISSION (CHAINCASE)
- Checking And Adding Oil
- Replacing The Oil
- FAN GEARBOX
- Checking And Adding Oil
- BOB-TACH
- Inspection And Maintenance
- POWER BOB-TACH (OPTION)
- Inspection And Maintenance
- LUBRICATING THE LOADER
- Procedure
- TIRE MAINTENANCE
- Wheel Nuts
- Tire Rotation
- Tire Mounting
HYDRAULIC/HYDROSTATIC SCHEMATICS100 topics
- HYDRAULIC SYSTEM INFORMATION
- Troubleshooting
- Tighten Procedures
- CYLINDER (LIFT)
- Checking
- Removal And Installation
- Parts Identification
- Disassembly
- Assembly
- CYLINDER (TILT)
- Checking
- Removal And Installation
- Rod End Seal
- Parts Identification
- Disassembly
- Assembly
- CYLINDER (POWER BOB-TACH)
- Checking
- Removal And Installation
- Parts Identification
- Disassembly
- Assembly
- CYLINDER (STEERING)
- Removal (Front)
- Removal (Rear)
- MAIN RELIEF VALVE
- Checking The Main Relief Valve At Front Auxiliary Hydraulics
- Removal And Installation
- Adjustment
- HYDRAULIC CONTROL VALVE
- Actuator Removal And Installation (In Loader)
- Removal And Installation
- Actuator Removal And Installation (Out Of Loader)
- BICS™ Valve Removal And Installation
- BICS™ Valve Lift Arm By-Pass Orifice Removal And Installation
- BICS™ Valve Check Valve Removal And Installation
- BICS™ Valve Lock Valve Removal And Installation
- BICS™ Valve Solenoid Removal And Installation
- BICS™ Valve Solenoid Testing
- Identification Chart
- Lift Base End Restrictor
- Load Check Valve
- Main Relief Valve
- Port Relief Valve
- Anti-Cavitation Valve/Port Relief Valve
- Anti-Cavitation Valve
- Lift Spool Removal And Installation
- Tilt Spool Removal And Installation
- Lift And Tilt Spool Disassembly And Assembly
- Auxiliary Spool Removal And Installation
- Auxiliary Electric Solenoid Disassembly And Assembly
- Port-Auxiliary Section Disassembly
- Cleaning And Inspection
- LIFT ARM BY-PASS CONTROL VALVE
- Inspecting
- Removal And Installation
- Disassembly And Assembly
- HYDRAULIC PUMP
- Checking The Output Of The Auxiliary Pump
- Checking The Output Of The Steering Pump
- Removal And Installation
- Parts Identification
- Disassembly And Assembly
- HYDRAULIC PUMP (HI FLOW)
- Checking The Output Of The High Flow Pump
- Removal And Installation
- Parts Identification
- Disassembly And Assembly
- HYDRAULIC/HYDROSTATIC FILTER
- Housing Removal And Installation
- HYDRAULIC FLUID RESERVOIR
- Draining The Fluid Reservoir
- Removal And Installation
- Hydraulic Fluid Screen
- BUCKET POSITION VALVE
- Solenoid Removal And Installation
- Solenoid Testing
- Removal And Installation
- Disassembly And Assembly
- SELECT VALVE
- Checking The High Flow Pump Relief Valve
- Removal And Installation
- Disassembly And Assembly
- Solenoid Testing
- REAR AUXILIARY DIVERTER VALVE
- Disassembly
- Inspection
- Solenoid Testing
- Assembly
- POWER BOB-TACH BLOCK (EARLY MODELS)
- Removal And Installation
- Disassembly And Assembly
- POWER BOB-TACH BLOCK (LATER MODELS)
- Removal And Installation
- Disassembly And Assembly
- AUXILIARY PRESSURE RELEASE (ACCUMULATOR) (Early models)
- Removal and Installation
- FRONT AUXILARY HYDRAULIC COUPLER BLOCKFront Auxiliary hydraulic coupler Block (S/N 519611124 & Above)
- Removal and Installation
- Disassembly And Assembly
HYDROSTATIC SYSTEM INFORMATION48 topics
- Troubleshooting Chart
- Replenishing Valve Function
- HYDROSTATIC MOTOR
- Removal And Installation
- Parts Identification
- Disassembly
- Inspection
- Assembly
- HYDROSTATIC MOTOR (TWO-SPEED)
- Removal And Installation
- Parts Identification
- Disassembly
- Inspection
- Assembly
- HYDROSTATIC MOTOR CARRIER
- Removal And Installation
- Parts Identification
- Assembly
- CHARGE PRESSURE
- Testing
- Removal And Installation
- HYDROSTATIC PUMP
- Pump Controller Removal And Installation
- Hydrostatic Pump Calibration
- Removal And Installation
- Parts Identification (Right Half)
- Parts Identification (Left Half)
- System Check Relief Valves (High Pressure Relief, Charge Check & By-Pass Valve)
- Charge Relief Valve
- Pump Separation
- Shaft Seal And Shaft Replacement
- Shaft Seal And Shaft Installation
- Charge Pump Removal
- Charge Pump Inspection
- Charge Pump Installation
- Disassembly
- Inspection
- Assembly
- Pump Neutral Adjustment
- Pump Controller Neutral Adjustment
- DRIVE BELT
- Shield Removal And Installation
- Adjustment
- Replacement
- Tensioner Pulley Removal And Installation
- Tensioner Pulley Tension Spring
- OIL COOLER (SEAL TO CONNECT) (STC)
- Hydraulic Oil Cooler Removal and Installation
BRAKE22 topics
- Disc Removal And Installation
- BRAKE (TWO-SPEED) (EARLY MODELS)
- Block Removal And Installation
- Block Disassembly And Assembly
- BRAKE (TWO SPEED) (LATER MODELS)
- Block Removal And Installation
- Block Disassembly And Assembly
- STEERING BLOCK
- Wiring Diagram
- Removal And Installation
- DRIVE COMPONENTS
- Axle Seal Removal And Installation
- Axle, Sprocket And Bearings Removal And Installation
- Drive Chain Removal And Installation
- CHAINCASE
- Front Chaincase Cover Removal And Installation
- Rear Chaincase Cover Removal And Installation
- Removal
- Installation
- Disassembly
- Inspection
- Assembly
SEAT BAR51 topics
- Removal And Installation
- Assembling Components
- Compression Spring Disassembly And Assembly
- Gas Cylinder Removal And Installation (Dual Gas Spring)
- Gas Cylinder Removal And Installation (3rd Gas Spring)
- Gas Cylinder Bracket Disassembly and Assembly
- Removal And Installation
- OPERATOR SEAT (STANDARD)
- Removal And Installation
- Seat Belt Removal And Installation
- OPERATOR SEAT (SUSPENSION)
- Removal And Installation
- Slide Rail Removal And Installation
- Cushion Removal And Installation
- Back Removal And Installation
- Shock Removal And Installation
- Removal And Installation
- Bob-Tach Lever And Wedge
- Bob-Tach Stops
- Pivot Pin Bushing And Seal Replacement
- POWER BOB-TACH
- Inspection And Maintenance
- Power Bob-Tach Lever And Wedge
- Removal And Installation
- Pivot Pin Bushing And Seal Replacement
- LIFT ARMS
- Removal And Installation
- REAR GRILL
- Removal And Installation
- REAR DOOR
- Removal And Installation (Early Loaders)
- Adjusting The Rear Door Latch
- Striker Removal And Installation (Later Loaders)
- Adjusting The Striker (Later Loaders)
- Latch Removal And Installation (Later Loaders)
- FUEL TANK
- Removal And Installation
- Fuel Level Sender
- Fuel Pick-Up Screen/Check Valve
- CONTROL
- Joystick Testing (Right & Left)
- Joystick Removal (Right & Left)
- Joystick Boot Removal (Right & Left)
- Lever Assembly Removal (Right & Left)
- CONTROL PANEL
- Removal And Installation
- INSIDE ACCESS PANEL (EARLY MODELS)
- Panel Removal (Right)
- Panel Removal (Left)
- INSIDE ACCESS PANEL (LATER MODELS)
- Panel Removal (Right)
ELECTRICAL SCHEMATICS103 topics
- ELECTRICAL SYSTEM INFORMATION
- Troubleshooting Chart
- Description
- Fuse Location
- Relay Switch Location
- Solenoid Test
- BATTERY
- Removal And Installation
- Servicing The Electrical System
- Using A Booster Battery (Jump Starting)
- ALTERNATOR
- Adjusting The Alternator Belt
- Alternator Identification
- Charging System Check
- Alternator Voltage Test
- Low Voltage Test
- High Voltage Test
- Removal And Installation
- Rectifier Continuity (Diode) Test
- Alternator Regulator Test
- Disassembly
- Stator Continuity Test
- Stator Ground Test
- Rotor Continuity Test
- Rotor Ground Test
- Assembly
- STARTER (NIPPONDENSO)
- Checking
- Removal And Installation
- Removal And Installation (Cont’d)
- Parts Identification
- Disassembly
- Inspection And Repair
- No Load Test
- Assembly
- STARTER (VALEO)
- Checking
- Removal And Installation
- Removal And Installation (Cont’d)
- Parts Identification
- Disassembly And Assembly
- Inspection And Repair
- No Load Test
- INSTRUMENT PANEL
- Left Panel
- Right Panel - (Standard) (With Key Switch)
- Right Panel - (Deluxe) (With Keyless Start)
- Right Panel Set Up Display Options (Deluxe)
- Option and Field Accessory Panels (If Equipped)
- Standard Panel Removal And Installation (Right Side)
- Deluxe Panel Removal And Installation (Right Side)
- Standard & Deluxe Panel Removal And Installation (Left Side)
- LIGHTS
- Front Removal And Installation
- Rear Removal And Installation
- BOBCAT 2001 CONTROLLER (EARLY MODELS)
- Removal And Installation
- Identification Chart
- BOBCAT CONTROLLER
- Identification Chart
- Removal And Installation
- AWS CONTROLLER
- Removal
- Identification Chart
- SPEED SENSOR
- Testing
- Removal
- DIAGNOSTICS SERVICE CODES
- Display
- Number Codes List
- STEERING SOLENOID
- Removal
- BICS™ SYSTEM
- Inspecting The BICS™ Controller (Engine STOPPED - Key ON)
- Inspecting Deactivation Of The Auxiliary Hydraulics System (Engine STOPPED - Key ON)
- Inspecting The Seat Bar Sensor (Engine RUNNING)
- Inspecting The Traction Lock (Engine RUNNING)
- Inspecting The LIft Arm By-Pass Control
- Troubleshooting Chart
- Troubleshooting Guide
- SEAT BAR SENSOR
- Troubleshooting Chart
- Test
- Removal And Installation
- BICS™ Circuit Test
- TRACTION LOCK
- Troubleshooting Chart
- Removal And Installation
- Description Of The Control System
- Inspecting The Control System
- WHEEL POSITION SENSORS
- Operation
- Wheel Alignment (Failed Sensor)
- Testing
- Sensor Removal And Installation
- Wheel Alignment (Field Adjustment)
- Wheel Alignment (Calibration)
- SERVICE PC (LAPTOP COMPUTER)
- Connecting The Service PC To Remote Start Tool
- LIFT AND TILT ACTUATOR CALIBRATION
- Procedure
- ELECTRICAL/HYDRAULIC CONTROLS REFERENCE
- Controls Identification Chart
TROUBLESHOOTING76 topics
- Chart
- ENGINE SPEED CONTROL (EARLY MODELS)
- Removal
- Speed Control Stop
- Speed Control Cable
- ENGINE SPEED CONTROL (LATER MODELS)
- Removal
- Disassembly
- Speed Control Cable
- MUFFLER
- Removal And Installation
- AIR CLEANER
- Housing Removal And Installation
- RADIATOR
- Removal And Installation
- COOLING FAN
- Drive Tension Pulley Removal And Installation
- Gearbox/Blower Housing Removal And Installation
- Blower Removal And Installation
- Gearbox Parts Identification
- Gearbox Disassembly
- Gearbox Assembly
- Gearbox, Checking Backlash
- ENGINE COMPONENTS AND TESTS
- Engine Compression, Checking
- Glow Plug, Checking
- Fuel Shut-Off Solenoid Checking
- Fuel Shut-Off Solenoid Removal And Installation
- Fuel Injection Pump Removal
- Fuel Injection Pump Timing
- Fuel Injection Pump Installation
- Fuel Injector Removal And Installation
- Fuel Injector, Checking
- Fuel Injector Disassembly
- Fuel Injector Assembly
- Timing Belt Inspection
- Timing Belt Removal
- Timing Belt Installation
- Timing Belt, Replacement In The Loader
- Valve Clearance Adjustment
- Valve Timing, Checking
- Thermostat, Oil Pressure Control Valves & Heater Connections
- ENGINE
- Removal And Installation
- Mount Replacement
- FLYWHEEL AND HOUSING
- Flywheel Removal And Installation
- Ring Gear Removal And Installation
- Flywheel Housing Removal And Installation
- RECONDITIONING THE ENGINE
- Deutz Engine Tools Identification Chart
- Disassembly
- Assembly
- Cylinder, Checking
- Camshaft Bearing, Checking
- Camshaft Bearing, Removal And Installation
- Control Rod Guide Bushing Removal
- Control Rod Guide Bushing Installation
- Rear Cover Seal Removal And Installation
- Crankshaft, Checking
- Connecting Rod, Checking
- Piston, Checking
- Piston Pin, Checking
- Piston Rings Installation
- Piston Installation On The Connecting Rod
- Cylinder Head Disassembly
- Valves, Checking
- Valve Seats, Checking
- Valve Spring, Checking
- Cylinder Head Assembly
- Rocker Arm And Bracket, Checking
- Front Cover Disassembly
- Front Cover Assembly
- Turbo Charger Removal and Installation
- Crankshaft Gear Mounting Bolt Torque Procedure
- Governor Buffer Spring Adjustment
AIR CONDITIONING SYSTEM FLOW63 topics
- Principals
- Chart
- COMPONENTS
- Identification
- SAFETY
- Safety Equipment
- REGULAR MAINTENANCE
- Filter Elements Removal And Installation
- Compressor Drive Belt Inspection
- Cleaning The Condenser
- BASIC TROUBLESHOOTING
- Poor A/C Performance
- Cleaning The A/C Evaporator Coil & Heater Coil
- Receiver/Drier Sight Glass Inspection
- Compressor Drive Belt Inspection
- Checking The Electrical System
- Engine Coolant By-Passing The Heater Valve
- Heater Valve Not Opening Or Closing
- GENERAL AIR CONDITIONING SERVICE GUIDELINES
- Compressor Oil
- Compressor Oil Check
- Component Replacement And Refrigeration Leaks
- SYSTEM TROUBLESHOOTING CHART
- Gauge Pressure Related Troubleshooting
- Troubleshooting Tree
- TEMPERATURE/PRESSURE
- Chart
- AIR CONDITIONING SERVICE
- Chart
- SYSTEM CHARGING AND RECLAMATION
- Reclamation Procedure
- Charging Procedure With A Manifold Gauge Set
- Charging Procedure
- COMPRESSOR
- Removal And Installation
- Compressor Clutch Disassembly
- CONDENSER
- Removal And Installation
- RECEIVER/DRIER
- Removal And Installation
- PRESSURE RELIEF VALVE
- Removal and Installation
- PRESSURE SWITCH
- Removal And Installation
- EVAPORATOR/HEATER UNIT
- Removal And Installation
- Disassembly And Assembly
- THERMOSTAT
- Removal And Installation
- EXPANSION VALVE
- Removal And Installation
- EVAPORATOR
- Removal And Installation
- HEATER COIL
- Removal And Installation With A/C
- Removal And Installation Without A/C
- HEATER/AC FAN
- Removal And Installation
- Disassembly And Assembly
- Wire Connector Removal And Installation
- HEATER VALVE
- Removal And Installation
- Disassembly And Assembly
LOADER SPECIFICATIONS35 topics
- Machine Dimensions
- Performance
- Controls
- Engine
- Hydraulic System
- Electrical
- Drive System
- Capacities
- Tires
- ENGINE SPECIFICATIONS
- General
- Fuel System
- Valves, Valve Guide And Seat Insert
- Piston And Rings
- Connecting Rod
- Cylinder Head And Block
- Crankshaft And Main Bearings
- Camshaft And Bearings
- Oil Pump
- LOADER TORQUE
- Specifications
- TORQUE SPECIFICATIONS FOR BOLTS
- Torque For General SAE Bolts
- Torque For General Metric Bolts
- HYDRAULIC CONNECTION SPECIFICATIONS
- O-ring Face Seal Connection
- Straight Thread O-ring Fitting
- Tubelines And Hoses
- Flare Fitting
- O-ring Flare Fitting
- Port Seal Fitting
- HYDRAULIC FLUID SPECIFICATIONS
- Specifications
- CONVERSIONS
- Decimal And Millimeter Equivalents
Inside this manual
Real pages from this service manual (982 pages). Open the sample pages (PDF, 615 KB)

- Specifications, page 87: A220 HYDRAULIC/HYDROSTATIC SCHEMATIC
- Diagram, page 552: SPEED SENSOR (CONT'D)
- Troubleshooting, page 897: SYSTEM TROUBLESHOOTING CHART
- Foldout diagram, page 99: A220 HYDRAULIC/HYDROSTATIC SCHEMATIC
Other manuals for this machine
Save 10% on 2 manuals, 15% on 3 or more. Other manuals for the A220 Turbo, A220 Turbo High Flow are listed below. Editions cover different serial number ranges: check the serial coverage and tick only the ones that match your machine.
Added to your cart. View cart
This is a service manual
Here's how it compares to the other manual types.
Service manual
Factory repair procedures and technical information such as specifications, troubleshooting, and wiring and hydraulic diagrams, for the models and systems the manual covers. See What's inside for its topics.
Operator's manual
Safe operation, controls, maintenance schedules, lubrication points, inspections, and basic checks. Repair procedures are in the service manual.
Parts manual
Illustrated diagrams with factory part numbers for identifying components and ordering parts. Repair procedures are in the service manual.
Engine service manuals are sometimes sold separately, since certain machine models were offered with more than one engine option.
What it's used for
Factory manual for in-house farm and construction shop use. Straightforward, complete, and easy to follow. It contains the OEM information dealership service departments and parts counters use to diagnose problems, identify components, and perform maintenance or repairs correctly.
Service shops and owner/operators who repair their own equipment
Identifying correct parts and seeing how assemblies come apart and go back together
Keeping equipment running with less downtime
Factory manual, 982 pages
Quantity one is the manual described above.
Fast free USA shipping
Ships in 1 business day.
60-day returns
Free if the mistake is ours. A manual ordered in error must come back unopened in its shrink-wrap; you pay return shipping and a 20% restocking fee applies. Return policy
Binder not included
Manuals over about 300 pages may need a standard 3-ring binder, which you can buy locally to keep the pages organized for shop use.
Other editions and similar models
Questions about model, serial number, engine coverage or contents? Contact us before purchasing and we'll help confirm it's the right manual. Please verify the manual type, machine model, serial number range and engine coverage before purchasing: manuals ordered in error carry a 20% restocking fee (return policy).