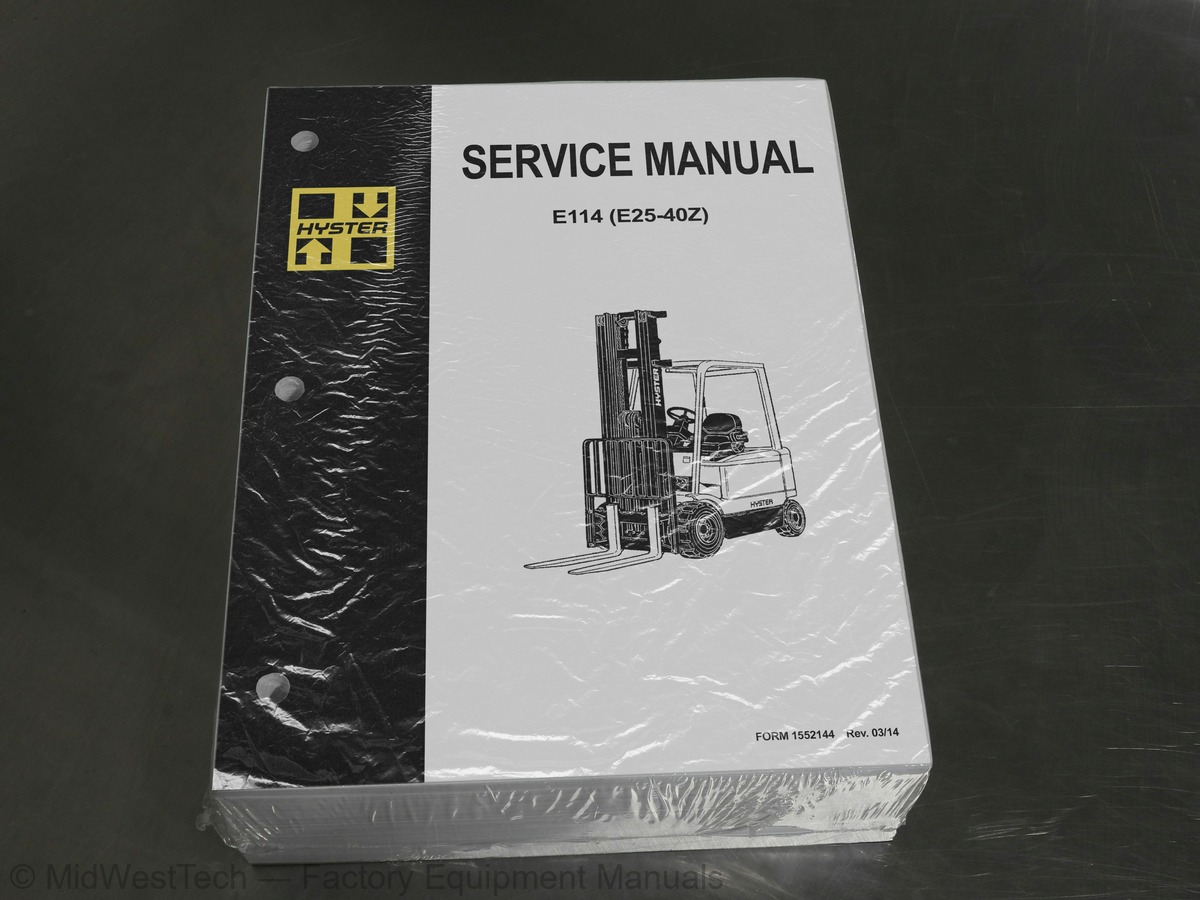
Hyster E114 (E25-40Z) Forklift Service Manual
1,121 pages · Publication 1552144
Added to your cart. View cart
- Models
- E114 (E25-40Z)
- Manual type
- Service Manual
- Pages
- 1,121
- Publication
- 1552144
- Condition
- Brand new
What's inside
From the manual's own table of contents: 156 sections, 553 entries. See sample pages (PDF, 241 KB)
Brush and Commutator Inspection4 topics
- Hydraulic Pump Motor and Traction Motor
- Steering Pump Motor
- Normal Commutator Surface
- Commutator Problems
Motors Repair6 topics
- Disassemble
- Traction Motor and Hydraulic Pump Motor
- Steering Pump Motor
- Assemble
- Traction Motor and Hydraulic Pump Motor
- Steering Pump Motor
Tests for Damaged Field and Armature7 topics
- Test for an Open Circuit in One Armature Winding
- Test for Short Circuit in One Armature Winding
- Test for Short Circuit to Armature Shaft
- Test for Open Circuit in Field Coil
- Test for Short Circuit in Field Coil
- Test for Short Circuit Between Field and Motor Case
- Brush Holder Test
Description and Operation2 topics
- Carriages
- Mast Mounts
Two-Stage Mast, Limited Free-Lift (LFL)1 topic
- Description and Operation
Fork Repair2 topics
- Remove
- Install
Show all 156 sections
Carriages Repair10 topics
- Standard Carriage, Remove
- Hang-On Sideshift Carriage, Remove
- Standard Carriage and Hang-On Sideshift Carriage, Repair
- Standard Carriage, Install
- Hang-On Sideshift Carriage, Install
- Integral Sideshift Carriage
- Remove
- Clean and Inspect
- Repair
- Install
Mast Repair6 topics
- Two-Stage LFL and Two-Stage FFL Masts, Disassemble
- Three-Stage FFL Mast
- Disassemble
- Mast and Chains, Clean and Inspect
- Two-Stage LFL and Two-Stage FFL Mast, Assemble
- Three-Stage FFL Mast, Assemble
Lift Cylinders Repair15 topics
- Main Lift Cylinders, Remove
- Free-Lift Cylinder, Remove
- Cylinders, Disassemble
- Two-Stage Full Free-Lift Mast, Right-Hand Main Lift Cylinder
- Two-Stage Full Free-Lift Mast, Left-Hand Main Lift Cylinder
- Two-Stage Limited Free-Lift Mast and Three-Stage Full Free-Lift
- Two-Stage Full Free-Lift Mast and Three-Stage Full Free-Lift Mas
- Clean and Inspect
- Cylinders, Assemble
- Two-Stage Full Free-Lift Mast, Right-Hand Main Lift Cylinder
- Two-Stage Full Free-Lift Mast, Left-Hand Main Lift Cylinder
- Two-Stage Limited Free-Lift Mast and Three-Stage Full Free-Lift
- Two-Stage Full Free-Lift Mast and Three-Stage Full Free-Lift Mas
- Main Lift Cylinders, Install
- Free-Lift Cylinder, Install
Header Hose Arrangements6 topics
- Two-Stage LFL Mast, New Hose Install
- Two-Stage LFL Mast, Adjust Hoses After Installation
- Two-Stage FFL Mast, New Hose Install
- Two-Stage FFL Mast, Adjust Hoses After Installation
- Three-Stage FFL Mast, New Hose Install
- Three-Stage FFL Mast, Adjust Hoses After Installation
Header Hose Arrangement1 topic
- Three-Stage FFL Mast, Adjust Hoses After Install
Lift and Tilt System Leak Check2 topics
- Lift Cylinders Leak Check
- Tilt Cylinders Leak Check
Description1 topic
- Hydraulic System
Operation3 topics
- Hydraulic Gear Pump
- Rotator Actuator Valve
- Steering Pump
Hydraulic Tank Repair7 topics
- Inspect
- Small Leaks, Repair
- Large Leaks, Repair
- Clean
- Steam Method
- Chemical Solution Method
- Additional Methods for Tank Repair
Filter Replacement8 topics
- Remove
- Install
- Remove
- Install
- Remove
- Install
- Remove
- Install
Hydraulic Pump Repair2 topics
- Pump Seal Replace and Pump Assemble
- Assemble Pump on Motor
Steering Pump Repair1 topic
- Pump, Assemble and Install
Rotary Actuator Valve Repair1 topic
- Disassemble, Clean, and Inspect
Specifications6 topics
- Relief Valve Pressures*
- Hydraulic Tank Capacity (dipstick full mark)
- Hydraulic Pump Capacities - All Models Except E3.50-5.50XL, E4.5
- Hydraulic Pump Capacities - Models E3.50-5.50XL, E4.50XLS (E70-1
- Steering
- Steering Housing and Steering Control Unit
Manual hydraulic Control Valve17 topics
- Lift Section
- Tilt Section
- Tilt Backward
- Tilt Forward
- Relief Valve
- Main Control Valve Without OPS Solenoid
- Remove
- Disassemble
- Clean and Inspect
- Assemble
- Main Control Valve With OPS Solenoid
- Remove
- Disassemble
- Clean and Inspect
- Relief Valve Repair
- Assemble
- Install
Pressure Relief Valve Check and Adjustment2 topics
- Primary Relief Valve
- Secondary Relief Valve
Frame3 topics
- Main Frame
- Other Frame Weldments
- Overhead Guard
Battery and Operator Restraint System, Hood and Seat Brake, and6 topics
- Battery Restraint System
- Hood and Seat Brake
- Hood With E-Hydraulics
- Operator Restraint System and Seat Assembly
- Automatic Locking Retractor (ALR)
- Emergency Locking Retractor (ELR)
Traction Motor Replacement4 topics
- Steam Method
- Chemical Solution Method
- Additional Preparations for Repair
- Preparations for Usage After Repair
Drive Unit Assembly Repair5 topics
- Remove Complete Drive Unit Assembly as a Unit
- Traction Motor, Remove
- Drive Unit and Speed Reducer, Remove
- Drive Axle, Disassemble
- Differential and Speed Reducer, Disassemble
Assembly of Drive Unit5 topics
- Find Correct Shim Set for Hypoid Gear
- Pinion, Assemble and Install
- Differential and Ring Gear, Assemble and Install
- Input Gear for Speed Reducer, Assemble
- Drive Axle and Hub Assembly, Assemble
Installation of Drive Unit2 topics
- Drive Unit, Install
- Traction Motor, Install
Wheels and Hubs Repair2 topics
- Remove and Disassemble
- Assemble and Install
Spindles, Bearings, and Links Repair4 topics
- Remove and Disassemble; Lift Truck Models E1.50-1.75XM, E2.00XMS
- Assemble and Install; Lift Truck Models E1.50-1.75XM, E2.00XMS (
- Remove and Disassemble; Lift Truck Models E25-35XM, E25-35XM 2
- Assemble and Install; Lift Truck Models E25-35XM, E25-35XM 2, E4
Brake System3 topics
- Service Brakes
- Master Cylinder
- Parking Brake
Parking Brake Repair1 topic
- Remove and Dissemble
Seat Brake Assembly12 topics
- Seat Brake, Adjust - Lift Truck Models E1.50-1.75XM, E2.00XMS (E
- Brake Switch, Adjust - Lift Truck Models E1.50-1.75XM, E2.00XMS
- Electric Seat Brake Without Handle, Adjust for Lift Truck Model
- Electric Seat Brake With Handle for Lift Truck Model E1.50-2.00X
- Remove
- Clean
- Inspect
- Install
- Adjustments
- Solenoid Adjustment
- Traction cutoff Switch Adjustment
- Cable Adjustment
Tilt Cylinder Repair5 topics
- Tilt Cylinders With O-Ring or Single-Lip Seals
- Tilt Cylinders for XM and XMS Models
- Tilt Cylinders for XL, XLS, and XL 3 Models
- Tilt Cylinders for H700-800A and Early Model H700-920B
- Tilt Cylinders Using Chevron Packing
Tilt Cylinder Stroke and Mast Tilt Angle Adjustment2 topics
- Piston Rod Nut
- Retainer
Steering Wheel and Column Assembly Repair5 topics
- Assembly Components, Remove
- Steering Control Unit, Disassemble
- Steering Control Unit, Clean
- Steering Control Unit, Assemble
- Assembly Components, Install
Steering System for AC Electric Lift Trucks1 topic
- General
Power Steering Motor and Pump3 topics
- Description
- Power Steering Pump, Repair
- Seal, Replace
Electrical System (Trucks With AC Controllers)2 topics
- Features of the Display Panels
- Other Control Components
Display Panel and Key Switch Replacement2 topics
- Display Panel, Replace
- Key Switch, Replace
Controller Replacement2 topics
- Traction and Pump Motor Controller Replacement
- Master Controller, Replace
Control Components Replacement26 topics
- Start Switch, Replace
- Brake Light Switch, Replace
- Seat Switch, Replace
- Parking Brake Switch, Replace
- MONOTROL Pedal Direction Switches, Replace
- Steering Column Direction Control Switches, Replace
- Remove
- Install
- Brake Fluid Switch, Replace
- Brush Wear and Over Temperature Sensors (DC Pump Motor Only)
- Rocker Switches for Lights, Replace
- Accelerator Position Sensor, Replace
- On-Demand Steering Sensor, Replace
- Lights, Converter, Relay, and Reverse Alarm
- Brake, Tail, and Reverse Light Assembly, Replace
- Strobe Light Assembly, Replace
- Wire Harness Repair
- Front, Rear Driving Light or Spot Light Assemblies, Replace
- Converter, Replace
- Reverse Relay, Replace
- Backup Alarm, Replace
- Horn and Horn Button, Replace
- Horn Replacement for Lift Trucks E3.50-5.50XL, E4.50XLS (E70-120
- Horn Switch and Cover, Replace
- Hydraulic Pump Switches
- Fan Power Supply, Replace
Control and Power Fuse Check1 topic
- Fuse Locations
Direction Switches Check2 topics
- MONOTROL Pedal
- Steering Column
Accelerator Position Sensor Adjustment and Start Switch Adjustme2 topics
- Acceleration Position Sensor, Adjust
- Start Switch, Adjust
AC Motor Controllers/Display Panel5 topics
- AC Motors
- Motor Controllers
- Master Controller
- Dash Display
- Controller Area Network Bus (CANbus)
Function Settings1 topic
- Function Numbers
Function Descriptions20 topics
- Function Number 1 BATTERY VOLTAGE
- Function Number 2 EXTENDED SHIFT
- Function Number 3 ACCELERATION 1
- Function Number 4 ACCELERATION 2
- Function Number 5 TOP SPEED LIMIT
- Function Number 6 REGEN BRAKING
- Function Number 7 AUTO DECELERATION
- Function Number 8 BDI ADJUSTMENT
- Function Number 9 LIFT INTERRUPT
- Function Number 10 POWER STEERING TIME DELAY
- Function Number 11 SERVICE REMINDER
- Function Number 12 CUSTOM
- Function Number 13 PUMP SPEED 1
- Function Number 14 PUMP SPEED 2
- Function Number 15 PUMP SPEED 3
- Function Number 16 PUMP ACCELERATION
- Controller Status Light Emitting Diodes (LEDs)
- Master Controller
- AC Motor Controllers
- Status Codes
AC Motor Controllers Status Code Charts6 topics
- Troubleshooting When Dash and/or Lift Truck is not Operational
- Typical Symptoms
- Truck Runs but Dash Display is not Operational, or Only Displays
- Truck Does Not Run and Dash is Not Operational or Only Displays
- Hydraulics Operate Normally, Traction Does Not Operate Correctly
- Traction Operates Normally, Hydraulics do Not Operate Correctly
AC Transistor Motor Controller Replacement8 topics
- General Maintenance Instructions
- Special Precautions
- Fuses
- Fan Test
- Contactors
- Repair
- Thermal Sensors
- Motor Controller, Replace
Display Panel2 topics
- Premium Display Panel
- Standard Display Panel
Display Functions and Features9 topics
- Key-On Initialization
- Standard Display
- Premium Display
- Lift Truck Inspection Function
- Access to Service Functions
- Service Functions
- Performance Modes
- Battery Discharge Indicator (BDI)
- Hourmeter
Dash Display Service Menu Navigation2 topics
- Moving Through Menu Selections
- Editing and Adding Information
Troubleshooting and Adjustments Using the AC Controls Program (E6 topics
- Computer Requirements
- Software, Install
- Language Selection
- Demo Mode
- Connect PC to Lift Truck
- Starting AC Controls Program
Lift Truck Control Setup6 topics
- Change Lift Truck Serial Number or Hourmeter
- Setting Factory Default Values or Changing Lift Truck Parameters
- Create New Custom Lift Truck Configuration
- Lift Truck Configuration Properties
- Import New Lift Truck Configuration From Disk
- Delete Custom Lift Truck Configuration or Password File
Dash Display3 topics
- Custom Display Languages
- Download Display Language
- Clear Operator Log
Password Functions7 topics
- Enable/Disable Password and Lift Truck Inspection Functions
- Truck Inspection Checklist
- Password
- Password Properties
- Create New Password File
- Download Passwords
- Upload Passwords
Reports Menu8 topics
- Devices Report
- Custom Report
- Password Report
- Operator Report
- Current Settings Report
- Status Code Report
- Status Codes Log
- Diagnostics
Help Menu2 topics
- Technical Support
- About Electric Truck AC Controls Program
Periodic Maintenance7 topics
- Serial Number Data
- How to Move Disabled Lift Truck
- How to Tow Lift Truck
- How to Put Lift Truck on Blocks
- How to Raise Drive Tires
- How to Raise Steering Tires
- How to Clean a Lift Truck
Maintenance Procedures Every 8 Hours or Daily20 topics
- How to Make Checks With Key OFF
- Tires and Wheels
- Forks
- Mast, Carriage, Lift Chains, Header Hoses, and Traverse Chains
- Safety Labels
- Steering Column Latch
- Operator Restraint System
- Battery Restraint System J2.00-3.20XM (J40-65Z) (A416) Lift Truc
- Battery
- Attachment
- Hydraulic System
- How to Make Checks With Key ON
- Horn, Lights, and Alarm
- Steering System
- Service Brakes
- Parking Brake
- Control Levers and Pedals
- Direction and Speed Control Pedals
- Lift System Operation
- Oil Leaks
First Service After First 100 Hours of Operation1 topic
- Change Filter for Hydraulic Oil
Maintenance Procedures Every 250 Hours or 6 Weeks8 topics
- Steering King Pins E1.50-2.00XM (E114/F114) Trucks Only
- Steering Tie Rods and Spindles
- Attachment Load Rollers, Lubricate
- Attachment Main Load Bearings and Roller Bearings
- Attachment Track Assembly
- Traverse Chain Adjustment
- Pivot Boom Chain Tension Check
- Attachment Hydraulic Hoses
Maintenance Procedures Every 500 Hours or 3 Months11 topics
- Differential and Speed Reducer V30ZMD (D210/E210); E2.00-3.20XM
- Wheel Nut Torques
- Header Hose Checks
- Mast Lubrication
- Forks
- Remove
- Inspect
- Install
- Adjust
- Parking Brake Adjustment
- Seat Brake Operations Check
Maintenance Procedures Every 1000 Hours or 6 Months16 topics
- Lift Chains
- Wear Check
- Lift Chain Lubrication
- Check Upper and Lower Bearings, Integral Sideshift Carriage
- Steering Axle Spindles
- Hydraulic Tank Breather
- Differential and Speed Reducer J2.00-3.20XM (J40-65Z) (A416)
- Attachment Main Load Bearings
- Traverse Chain
- Attachment Pivot Boom Chain
- Pivot Boom Shaft Fitting, Lubricate
- Attachment Moving Parts and Structural Assemblies
- Other Lubrication
- Electrical Inspection
- Contactors
- Motor Brushes (DC Pump)
Maintenance Procedures Every 2000 Hours or Yearly12 topics
- Change Filter for Hydraulic Oil
- Change Hydraulic Oil
- Differential and Speed Reducer
- Brake Fluid Replacement
- Steering Tie Rods and Spindle Lift Truck Models E25-35Z, E40ZS (
- Wheel Bearings
- Steer Wheels, Lubrication
- Drive Wheels, Lubrication
- Replace Upper and Lower Bearings, Integral Sideshift Carriage
- Limited Switch Roller Shafts, Traverse Attachment
- Attachment Roller Bearings
- Pivot Boom Assembly
Battery Maintenance3 topics
- How to Charge Battery
- General
- WHEN WORKING NEAR THE MAST ALWAYS
Wheels and Tire Maintenance15 topics
- Remove Wheels From Lift Truck
- Remove and Install Tire on Wheel
- Remove Wheels From Lift Truck
- Remove Wheel From Pneumatic Tire
- Install Three- or Four-Piece Wheel in Pneumatic Tire
- Add Air to Tires
- Wheels, Install
- Solid Rubber Tires on Pneumatic Wheels
- Remove Wheels From Lift Truck
- Remove Solid Rubber Tire From Pneumatic Wheel
- Install Solid Rubber Tire on Pneumatic Wheel
- Wheels, Install
- Snap-On Tire, Change
- Remove Snap-On Solid Tire From Wheel
- Install Snap-On Solid Tire on Wheel
Capacities1 topic
- Battery Height Specifications (Hoods and Battery Types)
Mast Speeds8 topics
- E25-35Z, E40ZS Mast Speeds (36 and 48 Volt) Americas
- E1.50-2.00XM Mast Speeds (48 Volt) Europe
- Frame
- Mast
- Drive Axle, Speed Reducer, and Differential
- Steering Axle
- Brake
- E-Hydraulic Control Valve
Inside this manual
Real pages from this service manual (1,121 pages). Open the sample pages (PDF, 241 KB)
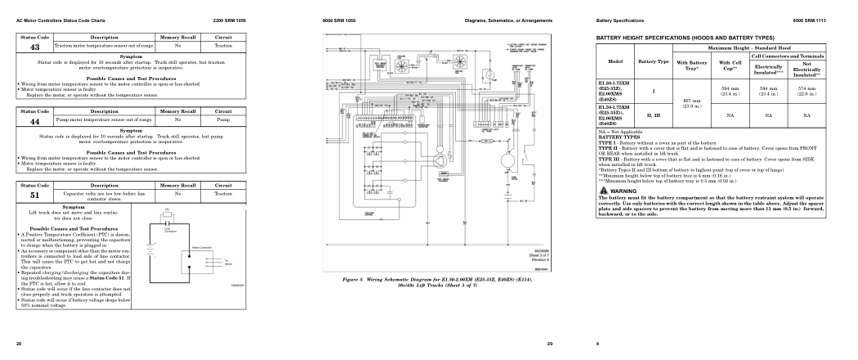
- Troubleshooting, page 625: AC Motor Controllers Status Code Charts
- Diagram, page 778: Diagrams, Schematics, or Arrangements
- Specifications, page 931: Battery Specifications
This is a service manual
Here's how it compares to the other manual types.
Service manual
Factory repair procedures and technical information such as specifications, troubleshooting, and wiring and hydraulic diagrams, for the models and systems the manual covers. See What's inside for its topics.
Operator's manual
Safe operation, controls, maintenance schedules, lubrication points, inspections, and basic checks. Repair procedures are in the service manual.
Parts manual
Illustrated diagrams with factory part numbers for identifying components and ordering parts. Repair procedures are in the service manual.
Engine service manuals are sometimes sold separately, since certain machine models were offered with more than one engine option.
What it's used for
Factory manual for in-house farm and construction shop use. Straightforward, complete, and easy to follow. It contains the OEM information dealership service departments and parts counters use to diagnose problems, identify components, and perform maintenance or repairs correctly.
Service shops and owner/operators who repair their own equipment
Identifying correct parts and seeing how assemblies come apart and go back together
Keeping equipment running with less downtime
Factory manual, 1,121 pages
Quantity one is the manual described above.
Fast free USA shipping
Ships in 1 business day.
60-day returns
Free if the mistake is ours. A manual ordered in error must come back unopened in its shrink-wrap; you pay return shipping and a 20% restocking fee applies. Return policy
Binder not included
Manuals over about 300 pages may need a standard 3-ring binder, which you can buy locally to keep the pages organized for shop use.
Questions about model, serial number, engine coverage or contents? Contact us before purchasing and we'll help confirm it's the right manual. Please verify the manual type, machine model, serial number range and engine coverage before purchasing: manuals ordered in error carry a 20% restocking fee (return policy).