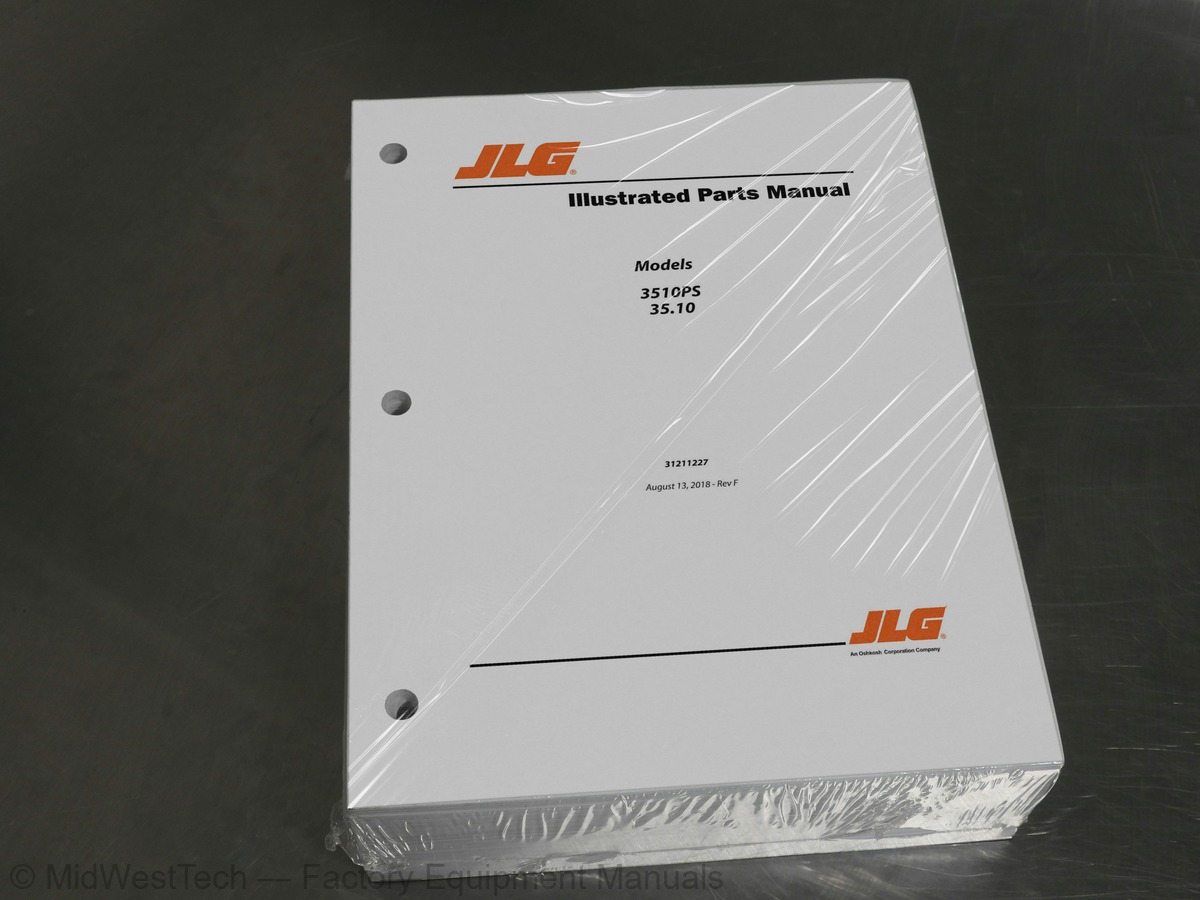
JLG 35.10, 3510PS Telehandler Parts Manual
1,316 pages · Publication 31211227
Added to your cart. View cart
What's inside
From the manual's own table of contents: 253 sections, 540 entries. See sample pages (PDF, 605 KB)
General61 topics
- SECTION 1 - FRAME AND ATTACHING PARTS
- FIGURE 1-1. FRAME INSTALLATION
- FIGURE 1-2. ENGINE ENCLOSURE INSTALLATION (NO RHOC - JLG)
- FIGURE 1-3. ENGINE ENCLOSURE INSTALLATION (RHOC - JLG)
- FIGURE 1-4. ENGINE ENCLOSURE COVER INSTALLATION (NO RHOC)
- FIGURE 1-5. ENGINE ENCLOSURE COVER INSTALLATION (RHOC)
- FIGURE 1-6. AIR INTAKE SEAL INSTALLATION
- FIGURE 1-7. HOOD INSTALLATION (JLG) (Prior to SN 1160008717)
- FIGURE 1-8. HOOD INSTALLATION (JLG) (SN 1160008717 to Present)
- FIGURE 1-9. HOOD INSTALLATION (DEUTZ-FAHR) (SN 1160008717 to Present)
- FIGURE 1-10. COVER PLATES INSTALLATION (NO OUTRIGGERS - ULS)
- FIGURE 1-11. COVER PLATES INSTALLATION (NO OUTRIGGERS - LS)
- FIGURE 1-12. COVER PLATE INSTALLATION (NO TRAILER BRAKES)
- FIGURE 1-13. COVER PLATE INSTALLATION (TRAILER BRAKES)
- FIGURE 1-14. COVER PLATE INSTALLATION (NO REAR AUX)
- FIGURE 1-15. COVER PLATE INSTALLATION (REAR AUX)
- FIGURE 1-16. COVER PLATE INSTALLATION (HYDRAULIC HITCH AND REAR AUX)
- FIGURE 1-17. REAR COVER PLATE INSTALLATION (NO HYDRAULIC HITCH)
- FIGURE 1-18. REAR COVER PLATE INSTALLATION (HYDRAULIC HITCH)
- FIGURE 1-19. COUNTERWEIGHT INSTALLATION (NO OUTRIGGERS)
- FIGURE 1-20. TANKS INSTALLATION
- FIGURE 1-21. FUEL TANK INSTALLATION
- FIGURE 1-22. HYDRAULIC TANK INSTALLATION
- FIGURE 1-23. FUEL TANK ASSEMBLY
- FIGURE 1-24. HYDRAULIC TANK ASSEMBLY
- FIGURE 1-25. FUEL AND HYDRAULIC CAP INSTALLATION
- FIGURE 1-26. HITCH RETRIEVAL INSTALLATION
- FIGURE 1-27. HITCH INSTALLATION (EEC AUTO)
- FIGURE 1-28. HITCH INSTALLATION (PITON)
- FIGURE 1-29. HITCH ASSEMBLY (EEC AUTO)
- FIGURE 1-30. SLIDING HITCH ASSEMBLY (PITON)
- FIGURE 1-31. HITCH INSTALLATION (EEC MANUAL)
- FIGURE 1-32. HITCH ASSEMBLY (EEC MANUAL)
- FIGURE 1-33. HITCH INSTALLATION (CUNA CATEGORY C)
- FIGURE 1-34. HITCH ASSEMBLY (CUNA CATEGORY C)
- FIGURE 1-35. HITCH INSTALLATION (CUNA CATEGORY D2)
- FIGURE 1-36. HITCH ASSEMBLY (CUNA CATEGORY D2)
- FIGURE 1-37. HITCH INSTALLATION (FIXED)
- FIGURE 1-38. HITCH ASSEMBLY (FIXED)
- FIGURE 1-39. HITCH INSTALLATION (HYDRAULIC) (Prior to SN 1160008716)
- FIGURE 1-40. HITCH INSTALLATION (HYDRAULIC) (SN 1160008716 to Present)
- FIGURE 1-41. TOOL BOX INSTALLATION
- SECTION 2 - BOOM
- FIGURE 2-1. BOOM INSTALLATION (JLG)
- FIGURE 2-2. BOOM ASSEMBLY (JLG)
- FIGURE 2-3. FIRST BOOM SECTION ASSEMBLY
- FIGURE 2-4. SECOND BOOM SECTION ASSEMBLY
- FIGURE 2-5. THIRD BOOM SECTION ASSEMBLY
- FIGURE 2-6. LINK ASSEMBLY
- FIGURE 2-7. LEVER ASSEMBLY
- FIGURE 2-8. MANUAL QUICK COUPLER INSTALLATION
- FIGURE 2-9. HYDRAULIC QUICK COUPLER INSTALLATION
- FIGURE 2-10. BOOM ANGLE INDICATOR INSTALLATION
- FIGURE 2-11. BOOM PROP INSTALLATION
- FIGURE 2-12. BOOM BRUSHES INSTALLATION
- SECTION 3 - ATTACHMENTS
- FIGURE 3-1. CARRIAGE ASSEMBLY (1524MM) (CE & AUS)
- FIGURE 3-2. CARRIAGE ASSEMBLY (1829MM) (CE & AUS)
- FIGURE 3-3. CARRIAGE ASSEMBLY (1225MM) (CE & AUS)
- FIGURE 3-4. CARRIAGE ASSEMBLY (1270MM) (ANSI - JLG)
- FIGURE 3-5. CARRIAGE ASSEMBLY (1524 MM) (ANSI - JLG)
Show all 254 sections
FIGURE 3-72. BALE HANDLER (SPIKE CLAMP) (CE & AUS)51 topics
- FIGURE 3-73. MUCK FORK AND GRAB (CE & AUS)
- FIGURE 3-74. PIPE HANDLER CARRIAGE (CE & AUS - JLG)
- FIGURE 3-75. PIPE HANDLER CARRIAGE (ANSI - JLG)
- FIGURE 3-76. FORK MOUNTED BASKET (DOMESTIC) (ANSI - JLG)
- FIGURE 3-77. FORK MOUNTED BASKET (ISO) (ANSI - JLG)
- FIGURE 3-78. FORK MOUNTED BASKET (FRENCH) (ANSI - JLG)
- FIGURE 3-79. FORK MOUNTED PLATFORM
- FIGURE 3-80. FORK MOUNTED TRASH HOPPER
- FIGURE 3-81. CONCRETE BUCKET (CE)
- FIGURE 3-82. SWEEPER (CE & AUS)
- FIGURE 3-83. SWEEPER (ANSI)
- FIGURE 3-84. AUGER (COUPLER MOUNTED) (CE & AUS)
- FIGURE 3-95. FORK TRANSPORT LATCH INSTALLATION (CE & AUS)
- SECTION 4 - ENGINE AND ATTACHING PARTS
- FIGURE 4-1. ENGINE INSTALLATION (74.4KW - ULS - PISTON PUMP)
- FIGURE 4-2. ENGINE INSTALLATION (90KW - ULS - PISTON PUMP)
- FIGURE 4-3. ENGINE INSTALLATION (100KW - ULS - PISTON PUMP)
- FIGURE 4-4. ENGINE INSTALLATION (74.4KW - LS - PISTON PUMP)
- FIGURE 4-5. ENGINE INSTALLATION (90KW - LS - PISTON PUMP)
- FIGURE 4-6. ENGINE MOUNTING INSTALLATION (74.4KW)
- FIGURE 4-7. ENGINE MOUNTING INSTALLATION (90KW/100KW)
- FIGURE 4-9. 3.6L ENGINE (90KW - ULS - PISTON PUMP)
- FIGURE 4-13. BRACKET GUARD INSTALLATION
- FIGURE 4-14. FUEL LINES INSTALLATION (ULS)
- FIGURE 4-15. FUEL LINES INSTALLATION (ULS - RHOC)
- FIGURE 4-16. FUEL LINES INSTALLATION (LS)
- FIGURE 4-17. FUEL LINES INSTALLATION (LS - RHOC)
- FIGURE 4-18. EXHAUST INSTALLATION (ULS)
- FIGURE 4-19. EXHAUST INSTALLATION (LS)
- FIGURE 4-20. COOLING PACKAGE INSTALLATION (74.4KW - ULS)
- FIGURE 4-21. COOLING PACKAGE INSTALLATION (74.4KW - LS)
- FIGURE 4-22. COOLING PACKAGE INSTALLATION (90KW - ULS)
- FIGURE 4-23. COOLING PACKAGE INSTALLATION (90KW - LS)
- FIGURE 4-24. COOLING FAN INSTALLATION
- FIGURE 4-25. FAN LINES INSTALLATION (74.4KW)
- FIGURE 4-26. FAN LINES INSTALLATION (90KW)
- FIGURE 4-27. FAN DRIVE MOTOR (NO RHOC)
- FIGURE 4-28. FAN DRIVE MOTOR (RHOC)
- FIGURE 4-29. PRIMARY FUEL FILTER INSTALLATION (74.4KW - ULS)
- FIGURE 4-30. FUEL FILTER INSTALLATION (90/100KW - ULS)
- FIGURE 4-31. PRIMARY FUEL FILTER INSTALLATION (90KW - LS)
- FIGURE 4-32. PRIMARY FUEL FILTER INSTALLATION (74.4KW - LS)
- FIGURE 4-33. AIR CLEANER INSTALLATION (74.4KW - ULS)
- FIGURE 4-34. AIR CLEANER INSTALLATION (90/100KW)
- FIGURE 4-35. AIR CLEANER INSTALLATION (74.4KW - LS)
- FIGURE 4-36. AIR CLEANER ASSEMBLY (74.4KW)
- FIGURE 4-37. AIR CLEANER ASSEMBLY (90/100KW)
- FIGURE 4-38. AIR INTAKE LINES INSTALLATION (74.4KW - ULS)
- FIGURE 4-39. AIR INTAKE LINES INSTALLATION (90/100KW - ULS)
- FIGURE 4-40. AIR INTAKE LINES INSTALLATION (74.4KW - LS)
- FIGURE 4-41. AIR INTAKE LINES INSTALLATION (90KW - LS)
FIGURE 5-32. TRUNION KIT50 topics
- FIGURE 5-33. DRIVE SHAFTS INSTALLATION
- FIGURE 5-34. REMOTE GREASE SYSTEM INSTALLATION (Prior to SN 1160008597)
- FIGURE 5-35. REMOTE GREASE SYSTEM INSTALLATION (SN 1160008597 to Present)
- FIGURE 5-36. AXLE SHIM INSTALLATION (24IN WHEEL)
- FIGURE 5-37. TRANSMISSION INSTALLATION (4 SPD)
- FIGURE 5-38. TRANSMISSION INSTALLATION (6 SPD - 90KW)
- FIGURE 5-39. TRANSMISSION INSTALLATION (6 SPD - 97KW)
- FIGURE 5-40. TRANSMISSION (4 SPD)
- FIGURE 5-41. TRANSMISSION (6 SPD - 90KW)
- FIGURE 5-42. TRANSMISSION (6 SPD - HHP - 97KW)
- FIGURE 5-43. PLANETARY CASE AND PARTS GROUP
- FIGURE 5-44. TORQUE CONVERTER GROUP
- FIGURE 5-45. TORQUE CONVERTER GROUP
- FIGURE 5-46. TRANSFER GEAR AND CASE GROUP
- FIGURE 5-47. TRANSFER GEAR AND CASE GROUP
- FIGURE 5-48. TRANSMISSION HYDRAULIC CONTROL GROUP
- FIGURE 5-49. INPUT SHAFT GROUP
- FIGURE 5-50. TRANSMISSION CLUTCH GROUP
- FIGURE 5-51. CLUTCH AND GEAR GROUP
- FIGURE 5-52. TRANSMISSION PUMP GROUP
- FIGURE 5-53. OUTPUT SHAFT GROUP
- FIGURE 5-54. SPEED SENSOR
- FIGURE 5-55. IDLER GEAR
- FIGURE 5-56. REAR TRANSMISSION CASE
- FIGURE 5-57. PLANETARY CASE
- FIGURE 5-58. FRONT TRANSFER CASE
- FIGURE 5-59. REAR TRANSFER CASE
- FIGURE 5-60. FRONT TRANSFER CASE
- FIGURE 5-61. REAR TRANSFER CASE
- FIGURE 5-62. RELIEF VALVE
- FIGURE 5-63. SOLENOID VALVE
- FIGURE 5-64. SOLENOID VALVE
- FIGURE 5-65. FRONT TRANSMISSION CASE ASSEMBLY
- FIGURE 5-66. REAR TRANSMISSION CASE ASSEMBLY
- FIGURE 5-71. RIGHT TIRE/WHEEL ASSEMBLY (AIR - 15.5 R25)
- FIGURE 5-72. LEFT TIRE/WHEEL ASSEMBLY (AIR - 15.5 R25)
- FIGURE 5-74. RIGHT TIRE/WHEEL ASSEMBLY (AIR - 460/70 R24)
- FIGURE 5-75. LEFT TIRE/WHEEL ASSEMBLY (AIR - 460/70 R24)
- FIGURE 5-77. RIGHT TIRE/WHEEL ASSEMBLY (AIR - 500/70 R24)
- FIGURE 5-78. LEFT TIRE/WHEEL ASSEMBLY (AIR - 500/70 R24)
- FIGURE 5-80. RIGHT TIRE/WHEEL ASSEMBLY (AIR - 440/80-24)
- FIGURE 5-83. RIGHT TIRE/WHEEL ASSEMBLY (AIR - 400/80-24)
- FIGURE 5-89. RIGHT TIRE/WHEEL ASSEMBLY (AIR - 460/70 R24 - BIBLOAD)
- FIGURE 5-90. LEFT TIRE/WHEEL ASSEMBLY (AIR - 460/70 R24 - BIBLOAD)
- FIGURE 5-91. WHEEL CHOCK INSTALLATION
- FIGURE 5-94. FENDER ASSEMBLY
- FIGURE 5-95. FENDER ASSEMBLY
- FIGURE 5-96. FENDER ASSEMBLY
- FIGURE 5-97. FENDER ASSEMBLY
- FIGURE 5-98. FENDER ASSEMBLY
FIGURE 6-61. CONDENSER61 topics
- FIGURE 6-62. A/C RECEIVER DRIER
- FIGURE 6-63. ROOF WIPER INSTALLATION
- FIGURE 6-64. FRONT NOSE CONE INSTALLATION (SIDELIGHT)
- FIGURE 6-65. RETRACTABLE SUNSCREEN INSTALLATION
- FIGURE 6-66. CAB STEP INSTALLATION
- FIGURE 6-67. FLOOR MAT INSTALLATION
- FIGURE 6-68. REAR WINDOW INSTALLATION (WO/WIPER) (CAN & ISO)
- FIGURE 6-69. REAR WINDOW INSTALLATION (WO/WIPER) (ANSI)
- FIGURE 6-70. CAB GUARD INSTALLATION (TOP)
- FIGURE 6-71. CAB GUARD INSTALLATION (FRONT)
- FIGURE 6-72. CAB GUARD INSTALLATION (TOP AND FRONT)
- FIGURE 6-73. NUMBER PLATE BRACKET INSTALLATION (NO CAB GUARD)
- FIGURE 6-74. NUMBER PLATE BRACKET INSTALLATION (CAB GUARD)
- FIGURE 6-75. HITCH MIRROR INSTALLATION (CONVEX)
- FIGURE 6-76. HITCH MIRROR INSTALLATION (FLAT)
- FIGURE 6-77. MIRROR ASSEMBLY (CONVEX)
- FIGURE 6-78. INTERIOR MIRROR INSTALLATION
- FIGURE 6-79. INTERIOR MIRROR
- FIGURE 6-80. BASIC MIRROR INSTALLATION (Prior to SN 1160008716)
- FIGURE 6-81. BASIC MIRROR INSTALLATION (SN 1160008716 to Present)
- FIGURE 6-82. FRONT WIPER INSTALLATION
- FIGURE 6-83. WASHER TANK INSTALLATION
- FIGURE 6-84. WASHER HOSES INSTALLATION
- FIGURE 6-85. HAMMER INSTALLATION
- FIGURE 6-86. HAMMER ATTACHMENT ASSEMBLY
- FIGURE 6-87. LEVEL INDICATOR INSTALLATION
- FIGURE 6-88. HVAC CAB ACTUATOR
- FIGURE 6-89. MIRROR INSTALLATION
- SECTION 7 - CONTROLS
- FIGURE 7-1. ACCELERATOR PEDAL INSTALLATION
- FIGURE 7-2. ACCELERATOR PEDAL
- FIGURE 7-3. BRAKE PEDAL INSTALLATION (Prior to SN 1160008716)
- FIGURE 7-4. BRAKE PEDAL INSTALLATION (SN 1160008716 to Present)
- FIGURE 7-5. BRAKE PEDAL
- FIGURE 7-6. BRAKE PEDAL PLATE
- FIGURE 7-7. BRAKE SENSOR INSTALLATION
- FIGURE 7-8. SWITCH PLATE ASSEMBLY
- FIGURE 7-9. PARKING BRAKE INSTALLATION (CABLE)
- FIGURE 7-10. PARKING BRAKE INSTALLATION (SAHR)
- FIGURE 7-11. PARKING BRAKE COVER (MECHANICAL)
- FIGURE 7-12. PARKING CABLE ASSEMBLY (MECHANICAL)
- FIGURE 7-13. STEERING WHEEL INSTALLATION
- FIGURE 7-14. STEERING WHEEL
- FIGURE 7-15. STEERING COLUMN INSTALLATION (Prior to SN 1160008716)
- FIGURE 7-16. STEERING COLUMN INSTALLATION (SN 1160008716 to Present)
- FIGURE 7-17. TILT STEERING COLUMN
- FIGURE 7-18. HORN INSTALLATION
- FIGURE 7-19. HORN BUTTON INSTALLATION (JLG)
- FIGURE 7-20. JOYSTICK INSTALLATION
- FIGURE 7-23. WIPER-TURN SWITCH (NO SPEED) (Prior to SN 1160008715)
- FIGURE 7-24. WIPER-TURN SWITCH (NO SPEED) (SN 1160008715 to Present)
- SECTION 8 - HYDRAULIC CIRCUITS
- FIGURE 8-1. COMMON HYDRAULICS INSTALLATION
- FIGURE 8-2. HYDRAULICS INSTALLATION
- FIGURE 8-3. MAIN CONTROL VALVE INSTALLATION
- FIGURE 8-4. PRIORITY VALVE INSTALLATION (Prior to SN 1160008715)
- FIGURE 8-5. PRIORITY VALVE INSTALLATION (SN 1160008715 to Present)
- FIGURE 8-6. STEER SELECT VALVE INSTALLATION
- FIGURE 8-7. VALVE ASSEMBLY
- FIGURE 8-8. MANUAL COUPLER LINES INSTALLATION (FRONT BOOM - SINGLE)
- FIGURE 8-9. HYDRAULIC COUPLER LINES INSTALLATION (FRONT BOOM - SINGLE)
SECTION 10 - ELECTRICAL64 topics
- FIGURE 10-1. MAIN ELECTRICAL INSTALLATION (Prior to SN 1160008717)
- FIGURE 10-2. MAIN ELECTRICAL INSTALLATION (SN 1160008717 to Present)
- FIGURE 10-3. FRONT FRAME HARNESS (Prior to SN 1160008717)
- FIGURE 10-4. FRONT FRAME HARNESS (SN 1160008717 to Present)
- FIGURE 10-5. REAR FRAME HARNESS (Prior to SN 1160008717)
- FIGURE 10-6. REAR FRAME HARNESS (SN 1160008717 to Present)
- FIGURE 10-7. ENGINE WIRING INSTALLATION (ULS)
- FIGURE 10-8. ENGINE HARNESS (ULS)
- FIGURE 10-9. ENGINE ECU INSTALLATION (ULS)
- FIGURE 10-10. ENGINE WIRING INSTALLATION (LS)
- FIGURE 10-11. ENGINE HARNESS (LS)
- FIGURE 10-12. ENGINE ECU INSTALLATION (LS)
- FIGURE 10-13. FUEL PUMP HARNESS
- FIGURE 10-14. GLOW PLUG RELAY HARNESS
- FIGURE 10-15. ELECTRICAL COMPONENTS INSTALLATION
- FIGURE 10-16. POWER DISTRIBUTION ELECTRICAL BOX
- FIGURE 10-17. 200 AMP RELAY INSTALLATION
- FIGURE 10-18. BATTERY INSTALLATION (STANDARD)
- FIGURE 10-19. BATTERY INSTALLATION (DUAL)
- FIGURE 10-20. CAB ELECTRICAL INSTALLATION
- FIGURE 10-21. CAB HARNESS
- FIGURE 10-22. STANDARD ELECTRICAL BOARD ASSEMBLY
- FIGURE 10-23. OPTION 1 ELECTRICAL BOARD ASSEMBLY
- FIGURE 10-24. OPTION 2 ELECTRICAL BOARD ASSEMBLY
- FIGURE 10-25. CAB OPTION HARNESS
- FIGURE 10-26. CAB HEATER HARNESS INSTALLATION
- FIGURE 10-28. CAB HEATER HARNESS (SN 1160008716 to Present)
- FIGURE 10-29. A/C OPTION HARNESS
- FIGURE 10-30. DASH ELECTRICS INSTALLATION (ULS)
- FIGURE 10-31. DASH ELECTRICS INSTALLATION (LS)
- FIGURE 10-32. REVERSE CAMERA INSTALLATION (TRAILER BRAKES)
- FIGURE 10-33. REVERSE CAMERA INSTALLATION (NO TRAILER BRAKES)
- FIGURE 10-34. REVERSE ALARM INSTALLATION
- FIGURE 10-35. REVERSE SENSOR INSTALLATION (NO HYDRAULIC HITCH)
- FIGURE 10-36. REVERSE SENSOR INSTALLATION (HYDRAULIC HITCH)
- FIGURE 10-37. REVERSE SENSOR HARNESS
- FIGURE 10-38. CLEARSKY INSTALLATION (A/C - LONG ROOF CAP) (Prior to SN 1160008715)
- FIGURE 10-39. CLEARSKY INSTALLATION (A/C - LONG ROOF CAP) (SN 1160008715 to Present)
- FIGURE 10-40. CLEARSKY INSTALLATION (NO A/C - SHORT ROOF CAP)
- FIGURE 10-41. CLEARSKY HARNESS (A/C)
- FIGURE 10-42. TELEMATICS CAP INSTALLATION
- FIGURE 10-43. DIP LIGHTS INSTALLATION (RHD - NO OUTRIGGERS)
- FIGURE 10-44. DIP LIGHTS INSTALLATION (LHD - NO OUTRIGGERS)
- FIGURE 10-45. LICENSE PLATE LAMP INSTALLATION
- FIGURE 10-46. LICENSE LIGHT HARNESS
- FIGURE 10-47. CAB WORKLIGHTS INSTALLATION (NO A/C)
- FIGURE 10-48. CAB WORKLIGHTS INSTALLATION (A/C)
- FIGURE 10-49. CAB WORKLIGHTS INSTALLATION (NO A/C - LED)
- FIGURE 10-50. CAB WORKLIGHTS INSTALLATION (A/C - LED)
- FIGURE 10-51. BOOM WORKLIGHTS INSTALLATION
- FIGURE 10-52. BOOM LED WORKLIGHTS INSTALLATION
- FIGURE 10-53. BOOM WORKLIGHTS HARNESS
- FIGURE 10-54. BEACON LIGHT INSTALLATION
- FIGURE 10-55. BEACON BRACKET INSTALLATION (Prior to SN 1160008716)
- FIGURE 10-56. BEACON BRACKET INSTALLATION (AG) (SN 1160008716 to Present)
- FIGURE 10-57. TRAILER ELECTRICS INSTALLATION
- FIGURE 10-58. LINK TRAILER HARNESS
- FIGURE 10-59. MULTIFUNCTION DISPLAY INSTALLATION
- FIGURE 10-60. ENGINE SPEED SET SWITCH INSTALLATION
- FIGURE 10-61. DECLUTCH SWITCH INSTALLATION
- FIGURE 10-62. FOG LAMP SWITCH INSTALLATION (Prior to SN 1160008597)
- FIGURE 10-63. LSI SENSOR INSTALLATION
- FIGURE 10-64. LSI DISPLAY INSTALLATION
- FIGURE 10-67. LMIS INSTALLATION (NO MULTIFUNCTION DISPLAY)
Inside this manual
Real pages from this parts manual (1,316 pages). Open the sample pages (PDF, 604 KB)

- Parts illustration, page 335: SECTION 4 - ENGINE AND ATTACHING PARTS
- Parts illustration, page 555: SECTION 5 - DRIVE TRAIN
- Parts illustration, page 1,175: SECTION 10 - ELECTRICAL
Other manuals for this machine
Save 10% on 2 manuals, 15% on 3 or more. Other manuals for the 35.10, 3510PS are listed below. Editions cover different serial number ranges: check the serial coverage and tick only the ones that match your machine.
Added to your cart. View cart
This is a parts manual
Here's how it compares to the other manual types.
Service manual
Factory repair procedures and technical information such as specifications, troubleshooting, and wiring and hydraulic diagrams, for the models and systems the manual covers. See What's inside for its topics.
Operator's manual
Safe operation, controls, maintenance schedules, lubrication points, inspections, and basic checks. Repair procedures are in the service manual.
Parts manual
Illustrated diagrams with factory part numbers for identifying components and ordering parts. Repair procedures are in the service manual.
What it's used for
Factory manual for in-house farm and construction shop use. Straightforward, complete, and easy to follow. It contains the OEM information dealership service departments and parts counters use to diagnose problems, identify components, and perform maintenance or repairs correctly.
Service shops and owner/operators who repair their own equipment
Identifying correct parts and seeing how assemblies come apart and go back together
Keeping equipment running with less downtime
Factory manual, 1,316 pages
Quantity one is the manual described above.
Fast free USA shipping
Ships in 1 business day.
60-day returns
Free if the mistake is ours. A manual ordered in error must come back unopened in its shrink-wrap; you pay return shipping and a 20% restocking fee applies. Return policy
Binder not included
Manuals over about 300 pages may need a standard 3-ring binder, which you can buy locally to keep the pages organized for shop use.
Questions about model, serial number, engine coverage or contents? Contact us before purchasing and we'll help confirm it's the right manual. Please verify the manual type, machine model, serial number range and engine coverage before purchasing: manuals ordered in error carry a 20% restocking fee (return policy).