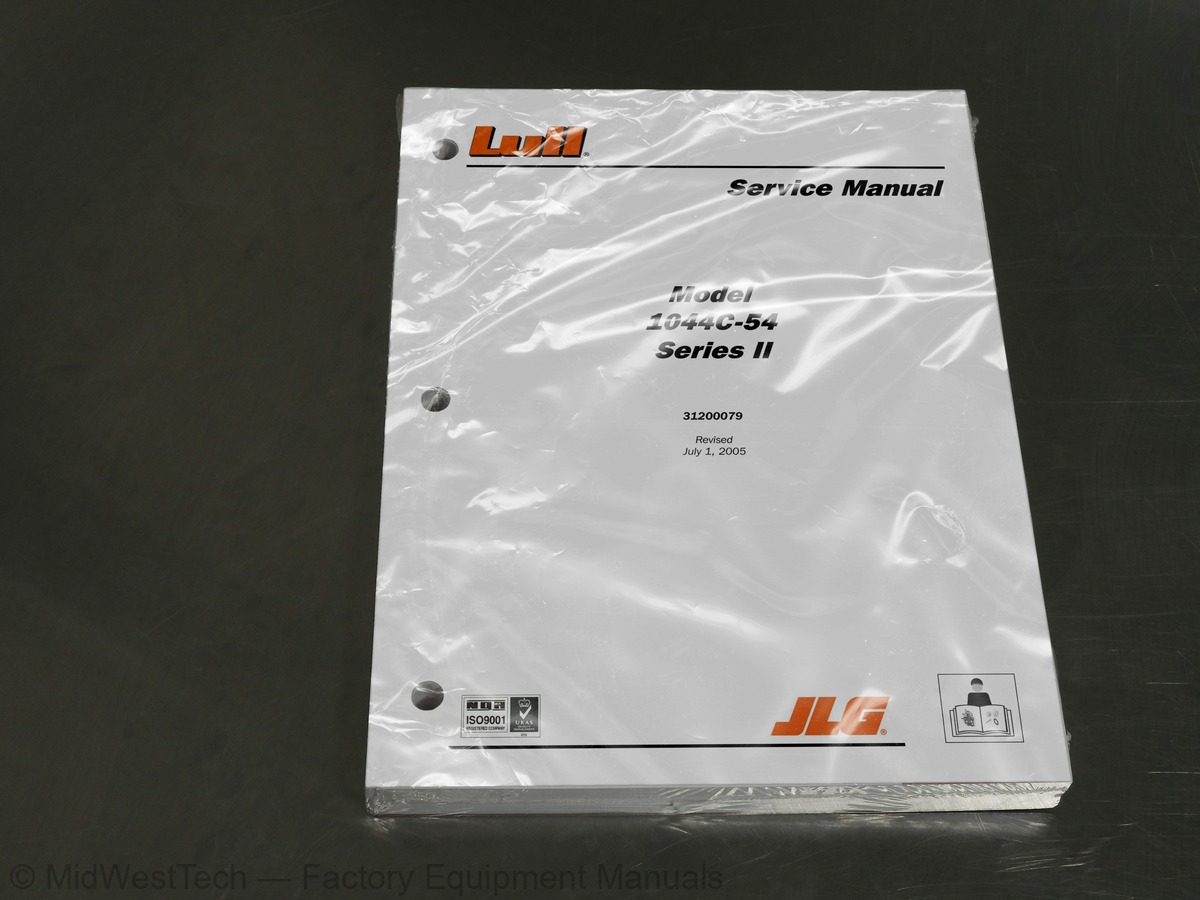
Lull 1044C-54, Series II Telehandler Service Manual
382 pages · Publication 31200079
Added to your cart. View cart
- Models
- 1044C-54, Series II
- Manual type
- Service Manual
- Pages
- 382
- Publication
- 31200079
- Condition
- Brand new
What's inside
From the manual's own table of contents: 167 sections, 424 entries. See sample pages (PDF, 341 KB)
Show all 167 sections
Lubrication1 topic
- Table of Contents Fluid and Lubricant Specifications
Installation1 topic
- Table of Contents Sight Gauge
Connecting an Attachment1 topic
- Table of Contents Boom Angle Inclinometer
Adjustment1 topic
- Table of Contents Rear Oscillation Lock System
Axle Inspection, Internal Service and Repair1 topic
- Table of Contents Axle Installation
Outrigger Control Valves252 topics
- Fig. 1-1: Decals and Placards
- Fig. 1-2: Instrument Panel Decals
- Fig. 1-3: Control Decals
- Fig. 1-4: Disconnect Battery Decal and Slow Moving Vehicle Sign
- Fig. 1-5: Steer Selector Plate
- Fig. 1-6: Hydraulic Reservoir/Fuel Tank Decals
- Fig. 1-7: Fork Carriage Decals
- Fig. 2-1: Machine Serial Number Plate
- Fig. 2-2: Engine Serial Number — John Deere
- Fig. 2-3: Axle Serial Number
- Fig. 2-4: Attachment Serial Number Plate
- Fig. 2-5: Top View
- Fig. 2-6: Left Side View
- Fig. 3-1: SAE Grade Identification
- Fig. 3-4: Metric Class Identification
- Fig. 5-1: Major Hydraulic Components
- Fig. 5-2: Mid-Inlet Hydraulic Components
- Fig. 5-3: Hydraulic Reservoir Location
- Fig. 5-4: Hydraulic Reservoir
- Fig. 5-5: Recommended Reservoir Filling Method
- Fig. 5-6: Alternate Reservoir Filling Method
- Fig. 5-7: Hydraulic Reservoir Drain and Refill
- Fig. 5-8: Hydraulic Reservoir/Fuel Tank Installation
- Fig. 5-9: Hydraulic Reservoir Sight Gauge
- Fig. 5-10: Reservoir Sight Gauge Installation
- Fig. 5-11: Suction Strainer Installation
- Fig. 5-12: Hydraulic Return Filter
- Fig. 5-13: Return Filter Pressure Gauge
- Fig. 5-14: Filter Housing Cover
- Fig. 5-15: Filter Element Assembly
- Fig. 5-16: Return Filter Assembly
- Fig. 5-17: Reservoir Breather
- Fig. 5-18: Hydraulic Pressure Filter – Control Manifold Hydraulics
- Fig. 5-19: Hydraulic Pressure Filter Element
- Fig. 5-20: Hydraulic Pressure Filter Assembly
- Fig. 5-21: Hydraulic Pump Location
- Fig. 5-22: Hydraulic Pump Hoses – Mid-Inlet Hydraulics
- Fig. 5-23: Hydraulic Pump Installation – Mid-Inlet Hydraulics
- Fig. 5-24: Checking Hydraulic Pump Flow Rate
- Fig. 5-25: Mid-Inlet Control Valve Location
- Fig. 5-26: Mid-Inlet Control Valve Components
- Fig. 5-27: Mid-Inlet Control Valve Configurations
- Fig. 5-28: Mid-Inlet Control Valve Installation
- Fig. 5-29: Rear Axle Stabilizer Control Valve Location
- Fig. 5-30: Rear Axle Stabilizer Control Valve Ports
- Fig. 5-31: Rear Axle Stabilizer Control Valve
- Fig. 5-32: Boom Extend Lockout Valve
- Fig. 5-33: Hydraulic Diagnostic Ports - Models with Mid-Inlet Hydraulics
- Fig. 5-34: Roll-Back Hose Frame Location - Control Manifold Hydraulics
- Fig. 5-35: Roll-Back Tray Installation - Mid-Inlet Hydraulics
- Fig. 6-1: Major Boom and Transfer Hydraulic Components
- Fig. 6-2: Joystick
- Fig. 6-3: Joystick Installation
- Fig. 6-4: Joystick Components
- Fig. 6-5: Pilot Pressure Diagnostic Port
- Fig. 6-6: Pilot Pressure Plug
- Fig. 6-7: Boom Hoist Cylinders
- Fig. 6-8: Boom Hoist Cylinder Installation
- Fig. 6-9: Boom Hoist Cylinder Assembly
- Fig. 6-10: Front Carriage Tilt Cylinder
- Fig. 6-11: Front Carriage Tilt Cylinder Installation
- Fig. 6-12: Front Carriage Tilt Cylinder Assembly
- Fig. 6-13: Rear Carriage Tilt Cylinder
- Fig. 6-14: Rear Carriage Tilt Cylinder Installation
- Fig. 6-15: Rear Carriage Tilt Cylinder Assembly
- Fig. 6-16: Selector Valve
- Fig. 6-17: Selector Valve Installation
- Fig. 6-18: Selector Valve Assembly
- Fig. 6-19: Load Bearing Pad
- Fig. 6-20: Pad Worn, But Still OK
- Fig. 6-21: Pad Must Be Replaced
- Fig. 6-22: Bolted Boom Slide Pad
- Fig. 6-23: Slide Pad Without Chamfers – 3 and 4-Section Boom
- Fig. 6-24: Damaged Slide Surface
- Fig. 6-25: Slide Surface Repair
- Fig. 6-26: Slide Pad Installation (2-Section Shown)
- Fig. 6-27: Positioning Retaining Block
- Fig. 6-28: Determining Capscrew Length
- Fig. 6-29: Correctly Installed Capscrew
- Fig. 6-30: Quick Attach Rear View
- Fig. 6-31: Release Handle
- Fig. 6-32: Lock Plate
- Fig. 6-33: Rotating Quick Attach Downwards
- Fig. 6-34: Lowering Boom
- Fig. 6-35: Retracting Boom
- Fig. 6-36: Extending Boom
- Fig. 6-37: Raising Boom
- Fig. 6-38: Rotating Quick Attach Forward
- Fig. 6-39: Lock Plate Engaged
- Fig. 6-40: Lower Pivot of Carriage Tilt Cylinder
- Fig. 6-41: Quick Attach Pivot
- Fig. 6-42: Boom Angle Inclinometer
- Fig. 6-43: Boom Angle Inclinometer Installation
- Fig. 6-44: 4-Section Boom
- Fig. 6-45: Boom Slide Pad Locations – 4-Section Boom
- Fig. 6-46: Boom Section Gaps – Front of 4-Section Boom
- Fig. 6-47: Lower Shim Installation – Front of 4-Section Boom
- Fig. 6-48: Upper Shim Installation – Front of 4-Section Boom
- Fig. 6-49: Boom Section Gaps – Rear of 4-Section Boom
- Fig. 6-50: Lower Shim Installation - Rear of 4-Section Boom
- Fig. 6-51: Upper Shim Installation – Rear of 4-Section Boom
- Fig. 6-52: Clearances Between Boom Sections – Rear of 4-Section Boom
- Fig. 6-53: Gaps Between Pads and Boom – Rear of 4-Section Boom
- Fig. 6-54: Clearances Between Boom Sections – Front of 4-Section Boom
- Fig. 6-55: Gaps Between Pads and Boom – Front of 4-Section Boom
- Fig. 6-56: Inner Boom Cross-Section at Window
- Fig. 6-57: Middle (Forward) Boom Cross-Section at Window
- Fig. 6-58: Middle (Forward) Boom Cross-Section at Window
- Fig. 6-59: 4-Section Boom Cover Installation
- Fig. 6-60: Hose Connections, 4-Section Boom
- Fig. 6-61: Cylinder Pivot Pins
- Fig. 6-62: Upper Rear Slide Pad Removal – Middle (Rear) Boom Section
- Fig. 6-63: Upper Rear Slide Pad Removal – Middle (Forward) Boom Section
- Fig. 6-64: Upper Rear Slide Pad Removal – Inner Boom Section
- Fig. 6-65: Locations for Chain Attachment – Inner Boom Section
- Fig. 6-66: 4-Section Boom Pivot Pins
- Fig. 6-67: Slide Pad Removal – Outer Boom Section
- Fig. 6-68: Lower Front Slide Pad Removal – Middle (Rear) Boom Section
- Fig. 6-69: Disconnecting Hoses Between Sections
- Fig. 6-70: Extension Cylinder Removal – 4-Section Boom
- Fig. 6-71: Upper Front Slide Pad Removal – Middle (Rear) Boom Section
- Fig. 6-72: Upper Front Slide Pad Removal – Middle (Forward) Boom Section
- Fig. 6-73: Upper Chain – Middle (Forward) to Middle (Rear) Boom Sections
- Fig. 6-74: Upper Chain Roller Assembly – Middle (Forward) Boom Section
- Fig. 6-75: Disconnecting Chains at Rear of Inner Boom
- Fig. 6-76: Disconnecting Chains at Rear of Middle (Forward) Boom
- Fig. 6-77: Slide Pad Removal – Inner Boom Section
- Fig. 6-78: Slide Pad Removal – Middle (Forward) Boom Section
- Fig. 6-79: Grease Hose Assembly
- Fig. 6-80: Rear Chain Roller Removal - Middle (Forward) Boom Section
- Fig. 6-81: Hose and Tube Removal – Inner Boom Section
- Fig. 6-82: Upper Chain Assembly
- Fig. 6-83: Upper Chain Roller Assembly – Middle (Rear) Boom Section
- Fig. 6-84: Removing Lower Chains
- Fig. 6-85: Slide Pads – Middle (Rear) Boom Section
- Fig. 6-86: Chain and Hose Guide Assembly
- Fig. 6-87: Tubes and Hoses – Middle (Rear) and Outer Boom Sections
- Fig. 6-88: Side Slide Pads – Outer Boom Section
- Fig. 6-89: Outer Boom Tubes and Hoses
- Fig. 6-90: Outer Boom Tube and Hose Assembly
- Fig. 6-91: Extension Cylinder Installation
- Fig. 6-92: Lower Chains on Outer Boom Section
- Fig. 6-93: Lower Rear Slide Pad Installation - Middle (Rear) Boom Section
- Fig. 6-94: Tubes and Hoses – Middle (Rear) Boom Sections
- Fig. 6-95: Chain and Hose Guide Assembly
- Fig. 6-96: Installation of Lower Chain – Middle (Rear) Boom Section
- Fig. 6-97: Upper Chain Roller Assembly – Middle (Rear) Boom Section
- Fig. 6-98: Chain Roller Assemblies - Middle (Forward) Boom Section
- Fig. 6-99: Slide Pad Installation – Middle (Forward) Boom Section
- Fig. 6-100: Hydraulic Hose and Tube Installation – Inner Boom Section
- Fig. 6-101: Slide Pad Installation – Inner Boom Section
- Fig. 6-102: Grease Hose Installation
- Fig. 6-103: Upper Chain Installation – Inner Boom Section
- Fig. 6-104: Upper Slide Pad Installation – Front of Middle (Forward) Boom Section
- Fig. 6-105: Upper Chain and Hose Reel Assembly – Middle (Forward) Boom
- Fig. 6-106: Rear Slide Pad Installation
- Fig. 6-107: Front Slide Pad Installation – Outer and Middle (Rear) Boom Sections
- Fig. 6-108: Lower Chain Installation – Inner Boom Section
- Fig. 6-109: Lower Chain Installation – Middle (Forward) Boom Section
- Fig. 6-110: Upper Chains – Middle (Rear) to Outer Boom Sections
- Fig. 6-111: Upper Chain – Middle (Forward) to Middle (Rear) Boom Sections
- Fig. 6-112: Securing Lower Chains – Middle (Rear) and Outer Boom Sections
- Fig. 6-113: Securing Boom Extension Cylinder
- Fig. 6-114: Connecting Hoses Between Sections
- Fig. 6-115: Boom Tension Check
- Fig. 6-116: 4-Section Boom Extension Cylinder
- Fig. 6-117: 4-Section Boom Extension Cylinder Installation
- Fig. 6-118: 4-Section Boom Extension Cylinder Assembly
- Fig. 6-119: Boom Extension Proximity Switch
- Fig. 6-120: Boom Extension Proximity Switch Operation
- Fig. 6-121: Boom Extension Proximity Switch Assembly
- Fig. 6-122: Boom Extension Proximity Switch Adjustment
- Fig. 6-123: Transfer Carriage
- Fig. 6-124: Disconnecting Transfer Cylinder from Transfer Carriage
- Fig. 6-125: Boom Elevation Proximity Switch Wiring
- Fig. 6-126: Boom Cover Installation
- Fig. 6-127: Boom Extension Proximity Switch Wiring
- Fig. 6-128: Disconnecting Hydraulic Hoses from Transfer Carriage
- Fig. 6-129: Transfer Carriage with Boom Installation
- Fig. 6-130: Transfer Carriage Installation
- Fig. 6-131: Transfer Carriage – Front Rollers, Bushings, and Shims
- Fig. 6-132: Shims for Front Transfer Rollers
- Fig. 6-133: Scraper Plate
- Fig. 6-134: Transfer Carriage – Rear Rollers, Bushings, and Shims
- Fig. 6-135: Spacer Washers for Rear Transfer Rollers
- Fig. 6-136: Rear Slide Block Installation
- Fig. 7-1: Frame Tilt System Components
- Fig. 7-2: Frame Tilt Control Valve
- Fig. 7-3: Frame Tilt Control Valve Installation
- Fig. 7-4: Frame Tilt Control Valve (Exploded View)
- Fig. 7-5: Frame Tilt Cylinder
- Fig. 7-6: Frame Tilt Cylinder Installation
- Fig. 7-7: Frame Tilt Cylinder (Exploded View)
- Fig. 7-8: Counterbalance Valve Cartridges, Frame Tilt Cylinder
- Fig. 7-9: Frame Level Indicator
- Fig. 7-10: Leveling the Frame
- Fig. 7-11: Circuit Operation Below 40°
- Fig. 7-12: Circuit Operation Above 40°
- Fig. 7-13: Circuit Operation Above 20° Below 40°
- Fig. 7-14: Circuit Operation Above 20° Below 40° with Service Brake Applied
- Fig. 7-15: Circuit Operation Below 20° With the Service Brake Applied
- Fig. 7-16: Rear Oscillation Lock Cylinder
- Fig. 7-17: Rear Oscillation Lock Cylinder Installation
- Fig. 7-18: Rear Oscillation Lock Cylinder (Exploded View)
- Fig. 7-19: Oscillation Control Block
- Fig. 7-20: Oscillation Control Block Installation
- Fig. 7-21: Oscillation Control Block (Exploded View)
- Fig. 7-22: Boom Elevation Proximity Switch
- Fig. 7-23: Boom Elevation Proximity Switch Operation
- Fig. 7-24: Boom Elevation Proximity Switch Assembly
- Fig. 7-25: Boom Elevation Proximity Switch Adjustment
- Fig. 8-1: ZF Transmission
- Fig. 8-2: Transmission Serial Number Plate Location
- Fig. 8-3: The Lubrication and Maintenance Flip Chart
- Fig. 8-4: Transmission Oil Cooler Hose Connections
- Fig. 8-5: Disconnect the Battery Negative (-) Cable
- Fig. 8-6: Drain Transmission Oil
- Fig. 8-7: Transmission Oil Cooler Hose Connections
- Fig. 8-8: Remove Transmission from Frame
- Fig. 8-9: Transmission External Components
- Fig. 8-10: Install the Transmission
- Fig. 8-11: Transmission Oil Cooler Hose Connections
- Fig. 8-12: Transmission Shift Logic Schematic
- Fig. 9-1: Axle and Drive Shaft
- Fig. 9-2: Service Brake Pedal Pressure Switch
- Fig. 9-3: Accumulator
- Fig. 9-4: Accumulator Charging
- Fig. 9-5: Park Brake Hoses
- Fig. 10-1: Outriggers
- Fig. 10-2: Outrigger Installation
- Fig. 10-3: Outrigger Cylinders
- Fig. 10-4: Outrigger Cylinder Installation
- Fig. 10-5: Outrigger Cylinder Assembly
- Fig. 10-6: Boom Extension Proximity Switch
- Fig. 10-7: Boom Extension Proximity Switch Operation
- Fig. 10-8: Boom Extension Proximity Switch Assembly
- Fig. 10-9: Boom Extension Proximity Switch Adjustment
- Fig. 10-10: Outrigger Controls
- Fig. 10-11: Outrigger Control Valve Installation
- Table 3-1: General Fluid and Lubricant Specifications
- Table 3-2: John Deere Engine Oil Specifications
- Table 3-3: ZF Transmission Oil Specifications
- Table 3-4: Torque for JIC and SAE Female Swivel Nuts
- Table 3-5: Torque for Non-adjustable O-ring Fittings
- Table 3-6: Torque for Adjustable O-ring Fittings
- Table 3-7: Torque for O-ring Plugs
- Table 3-8: Pipe Thread Fittings (Steel)
- Table 3-9: Inch Fraction, Decimal, and Metric Conversion Chart
- Table 3-10: Miscellaneous Conversions
- Table 5-1: Rear Axle Stabilizer Control Valve Markings
- Table 7-1: Rear Oscillation Lock Circuit Test Matrix
- Table of Contents General
Inside this manual
Real pages from this service manual (382 pages). Open the sample pages (PDF, 340 KB)
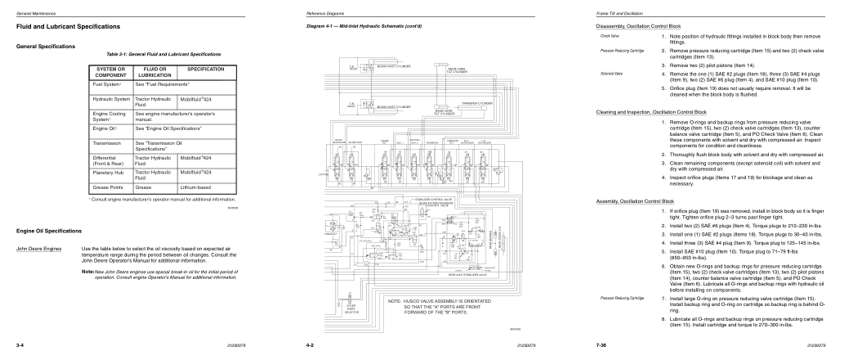
- Specifications, page 48: General Maintenance
- Diagram, page 68: Reference Diagrams
- Repair procedure, page 318: Frame Tilt and Oscillation
This is a service manual
Here's how it compares to the other manual types.
Service manual
Factory repair procedures and technical information such as specifications, troubleshooting, and wiring and hydraulic diagrams, for the models and systems the manual covers. See What's inside for its topics.
Operator's manual
Safe operation, controls, maintenance schedules, lubrication points, inspections, and basic checks. Repair procedures are in the service manual.
Parts manual
Illustrated diagrams with factory part numbers for identifying components and ordering parts. Repair procedures are in the service manual.
Engine service manuals are sometimes sold separately, since certain machine models were offered with more than one engine option.
What it's used for
Factory manual for in-house farm and construction shop use. Straightforward, complete, and easy to follow. It contains the OEM information dealership service departments and parts counters use to diagnose problems, identify components, and perform maintenance or repairs correctly.
Service shops and owner/operators who repair their own equipment
Identifying correct parts and seeing how assemblies come apart and go back together
Keeping equipment running with less downtime
Factory manual, 382 pages
Quantity one is the manual described above.
Fast free USA shipping
Ships in 1 business day.
60-day returns
Free if the mistake is ours. A manual ordered in error must come back unopened in its shrink-wrap; you pay return shipping and a 20% restocking fee applies. Return policy
Binder not included
Manuals over about 300 pages may need a standard 3-ring binder, which you can buy locally to keep the pages organized for shop use.
Other editions and similar models
Questions about model, serial number, engine coverage or contents? Contact us before purchasing and we'll help confirm it's the right manual. Please verify the manual type, machine model, serial number range and engine coverage before purchasing: manuals ordered in error carry a 20% restocking fee (return policy).