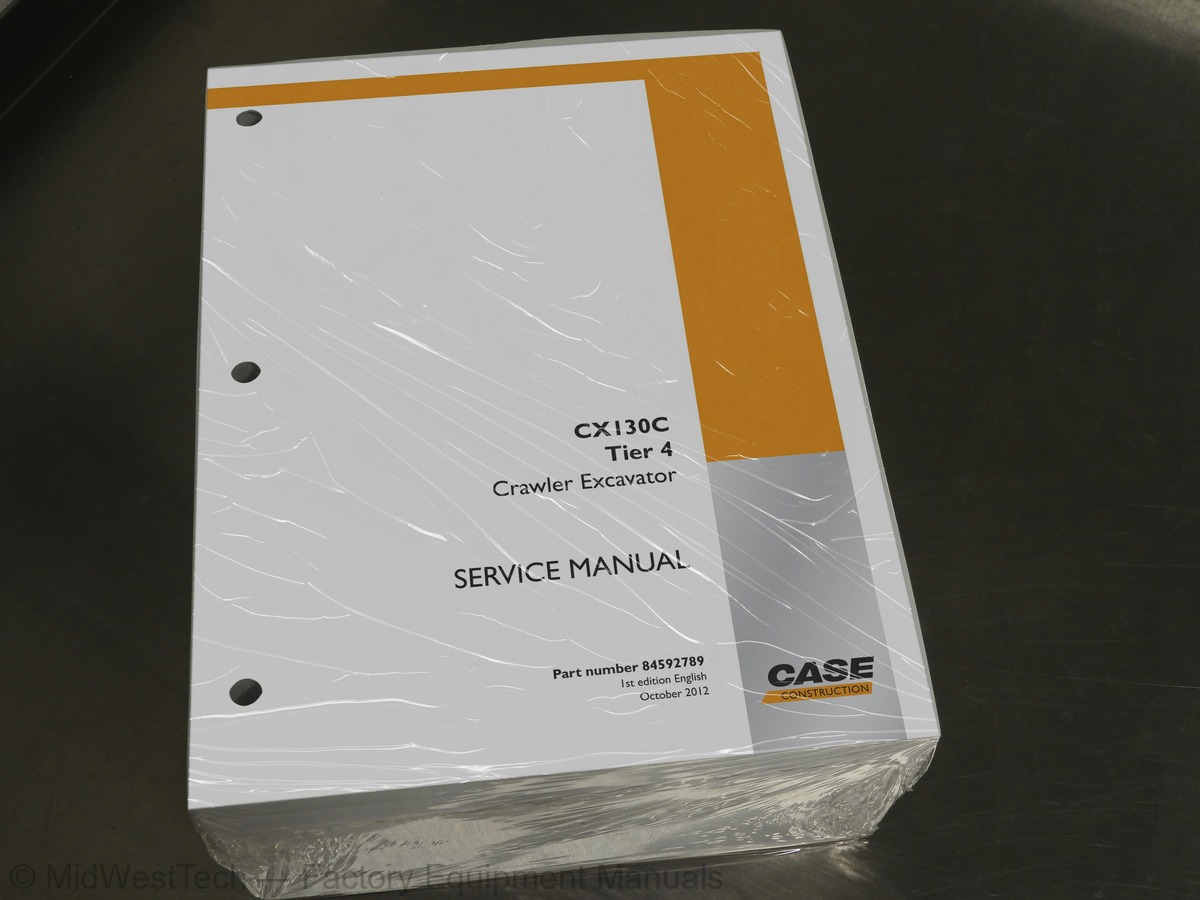
Case CX130C Tier 4 Crawler Excavator Service Manual
1,956 pages · Publication 84592789
Added to your cart. View cart
- Models
- CX130C Tier 4
- Manual type
- Service Manual
- Pages
- 1,956
- Publication
- 84592789
- Condition
- Brand new
What's inside
From the manual's own table of contents: 697 topics. See sample pages (PDF, 1391 KB)
- GENERAL INFORMATION
- Safety
- ROPS Judgment Method
- Bolt and Nut Tightening
- Main Data
- Performance
- Main Unit Dimensions
- Engine
- Cooling System
- Upper Side Work System
- Operating Device
- Swing Units
- Travel Lower Body
- Hydraulic Equipment
- Hydraulic Device
- Control Valve and Cylinder
- Capacities, Filters
- Coolant and Oil Capacities
- Hydraulic Oil Filters
- Fuel Filter
- CX130C NLC
- Main Equipment Table
- Lower Component
- Travel Unit
Show all 697 topics
- Take-up Roller
- Upper Roller
- Lower Roller
- Recoil Spring
- Shoe
- Upper Component
- Swing Unit
- Engine-related
- Air Cleaner (double element)
- Radiator
- Hydraulic Pump
- Control-related
- Control Valve
- Solenoid Valve (4 stack)
- Valve for Left/Right Operations
- Valve for Travel Operation
- Remote Control Valve Characteristic Diagram
- Operation Remote Control Valve Control Diagram
- Travel Remote Control Valve Control Diagram
- Cushion Valve (heat circuit, with shuttle valve)
- Selector Valve (option)
- Center Joint
- Backhoe Attachment
- Cylinder
- Main Unit Weight
- Divided Weight (standard specifications)
- Stand Alone Part Weight
- Shoe Weight (per side)
- Arm Weight
- Drive Sprocket
- Track Shoe (grouser shoe)
- Attachment (backhoe)
- Boom and Swing Frame Installation Section
- Boom Cylinder and Swing Frame Installation Section
- Boom and Boom Cylinder Installation Section
- Boom and Arm Cylinder Installation Section
- Boom and Arm Installation Section
- Arm and Arm Cylinder Installation Section
- Arm and Bucket Cylinder Installation Section
- Arm and Arm Link Installation Section
- Bucket and Bucket Link Installation Section
- Bucket Link and Bucket Cylinder Installation Section
- Bucket and Arm Installation Section
- Inspection Gauge
- For Drive Sprocket
- For Take-up Roller
- For Upper Roller
- For Lower Roller
- Standard Table
- Measurement Method
- Engine Speed
- Pressure in Each Section
- Cylinder Falling Amount
- Attachment Speed
- Swing Speed
- Swing (180°) Brake Angle
- Travel Speed
- Off Travel Amount
- Travel Sprocket Speed
- Shoe Tension Amount
- Swing Ball Race Bearing Movement Amount and Bucket Tip Movement Amount
- Tools to purchase or to make locally
- Travel Motor Special Tool
- Take-up Roller Special Tool
- Upper Roller Special Tool
- Lower Roller Special Tool
- Grease Cylinder Special Tool
- Center Joint Special Tool
- Swing Motor Special Tool
- Remote Control Valve Special Tool
- Gas Filling Special Tool
- Hydraulic Circuit
- CASE SPECIAL TOOLS
- Isuzu Engine Special Tools
- 4JJ1X Tier 4 Isuzu Engine
- Attachment Special Tool (for Cylinder Assembly)
- Special Jigs Part Number List
- CNH-EST DIAGNOSTIC TOOL (SCAN TOOL)
- HYDRAULIC FLUID
- ENGINE OIL
- OIL RANGE
- FUEL
- Conditions applicable to diesel fuel
- RECOMMENDED CONDITIONS THAT CAN BE APPLIED TO DIESEL FUEL
- Removal and Installation of Fuel Cooler
- Removal of Fuel Cooler
- Installation of Fuel Cooler
- Removal and Installation of Engine Intercooler
- Removal of Intercooler
- Installation of Intercooler
- Removal and Installation of Radiator
- Removal of Radiator
- Installation of Radiator
- Removal and Installation of Oil Cooler
- Removal of Oil Cooler
- Installation of oil cooler
- Removal and Installation of EGR Cooler
- EGR cooler Removal
- EGR cooler Installation
- Removal and Installation of EGR Valve
- EGR valve Removal
- EGR valve Installation
- Cylinder head cover Removal
- Installation of Cylinder Head Cover
- Removal and Installation of Cylinder Head
- Removal of Cylinder Head
- Disassembly of Cylinder Head
- Assembly of Cylinder Head
- Installation of Cylinder Head
- Inspection
- Removal and Installation of Oil Pan and Crank Case
- Removal of Oil Pan and Crank Case
- Disassembly of Oil Pan and Crank Case
- Assembly of Oil Pan and Crank Case
- Installation of Oil Pan and Crank Case
- Removal and Installation of Oil Pump Assembly
- Removal of Oil Pump Assembly
- Installation of Oil Pump Assembly
- Engine oil Inspection
- Removal and Installation of Water Pump Assembly
- Removal of Water Pump Assembly
- Installation of Water Pump Assembly
- Removal and Installation of Thermostat
- Removal of Thermostat
- Installation of Thermostat
- Inspection of Coolant
- Inspection of Cooling Fan Belt
- Monitor Control
- Fuel Gauge
- Coolant Temperature Gauge
- Oil Temperature Gauge
- Monitor Display Dimming
- Eco Gauge
- DPD Gauge
- Diagnostic Trouble Code Indicator
- Clock
- Fuel Economy Gauge
- Basic Operation
- Neutral Start
- Engine Start/Stop Control
- Preheating
- Throttle
- Idling Start
- Auto Idle
- One-touch Idle
- Auto Warm Up
- Quick Warm-up
- Idling Stop
- Idle up
- Travel Speed Selection
- Swing Brake
- Static Horsepower Control
- Accessories
- Working Light
- Radio Mute
- Engine Emergency Stop
- Travel Alarm
- Back/Side View Monitor
- Swing Lock
- Overload Warning
- Operability
- Swing Speed Limit
- Pressure Boost Control
- Free Swing
- Energy saving / Noise
- Pump Standby Pressure Control
- Swing Relief Cut
- Stroke Control
- Boom Down Energy Save
- Auto Energy Save
- Overload Reduction Control
- End Attachment
- Breaker Mode
- Crusher Mode
- Service Support
- Screen Operations
- Screen Display List
- CHECK Screen List
- MACHINE STATUS
- FAULT HISTORY
- WORK HISTORY
- ENGINE HISTORY
- HYDRAULIC HISTORY
- PART NUMBER
- SETUP Screen List
- MACHINE SELECT
- PARAMETERS
- Setting
- Model Select
- Throttle Volume Default Setting
- Password Setting
- Adjusting the Clock
- Parameter Settings
- Option Flow Pressure Setting
- Screen Brightness Setting
- Frequent DPD regeneration by manual regeneration
- Long DPD regeneration time
- Engine start failure
- Engine stalling
- Engine hunting, rough idling
- Excessive white smoke in the exhaust gas
- Excessive black smoke in the exhaust gas
- Abnormal noise
- Large fuel consumption
- Large oil consumption
- Engine Output Deficiency
- Inspection of the monitor warning light blinking circuit system
- Inspection of the starter circuit system
- Compression pressure inspection
- Inspection of the starting system
- Inspection of the fuel system
- Inspection of the air intake system
- Inspection of the exhaust system
- Inspection of the EGR control system
- Inspection of the glow control system
- Functional inspection of the DPD
- OBD system check
- Inspection of the monitor warning light illumination circuit system
- Removal and Installation of Glow Plug
- Removal of Glow Plug
- Installation of Glow Plug
- Main Unit Left Side Layout Diagram (radiator chamber)
- Engine Section Layout Diagram
- Main Unit Right Side Layout Diagram (pump chamber)
- Main Unit Center Section Layout Diagram
- Cab Layout Diagram 1
- Cab Layout Diagram 2
- Layout Around Operator Seat
- Stand Alone Parts Diagram
- Code table
- Overall
- Block diagram
- Computer A
- Computer B
- Monitor
- Air Conditioner
- Lever Lock
- Horn
- Working lights
- Option
- Other
- Electrical Symbol List
- Removal and Installation of Suction Control Valve
- Removal of Suction Control Valve
- Installation of Suction Control Valve
- Removal and Installation of Fuel filter pressure
- Fuel filter pressure sensor Removal
- Fuel filter pressure sensor Installation
- Removal and Installation of Engine coolant temperature sensor
- Engine coolant temperature sensor Removal
- Engine coolant temperature sensor Installation
- Removal and Installation of CKP sensor
- CKP sensor Removal
- CKP sensor Installation
- Removal and Installation of CMP sensor
- CMP sensor Removal
- CMP sensor Installation
- Removal and Installation of Oil pressure sensor
- Oil pressure sensor Removal
- Oil pressure sensor Installation
- Removal and Installation of Boost sensor
- Boost sensor Removal
- Boost sensor Installation
- Removal and Installation of IMT sensor
- IMT sensor Removal
- IMT sensor Installation
- Removal and Installation of Exhaust differential pressure sensor
- Exhaust differential pressure sensor Removal
- Exhaust differential pressure sensor Installation
- Removal and Installation of Exhaust gas temperature sensor
- DPD temperature sensor Removal
- DPD temperature sensor Installation
- Engine-side Trouble
- DTC U0001 (Flash Code 84) CAN-Bus Malfunction (ISO-CAN)
- DTC P0016 (Flash Code 16) Crankshaft Position - Camshaft Position Correlation
- DTC P0045 (Flash Code 33) Turbocharger Boost Control Solenoid Circuit
- DTC U0073 (Flash Code 84) CAN-Bus Malfunction (J1939)
- DTC P0087 (Flash Code 225) Fuel Rail/System Pressure - Too Low
- DTC P0088 (Flash Code 118) Fuel Rail/System Pressure - Too High
- DTC P0089 (Flash Code 151) Fuel Pressure Regulator Performance
- DTC P0091 (Flash Code 247) Fuel Pressure Regulator Control Circuit Low
- DTC P0092 (Flash Code 247) Fuel Pressure Regulator Control Circuit High
- DTC P0093 (Flash Code 227) Fuel System Leak Detected
- DTC U0101 (Flash Code 85) Lost Communication with TCM
- DTC P0102 (Flash Code 91) Mass Air Flow Circuit Low Input
- DTC P0103 (Flash Code 91) Mass Air Flow Circuit High Input
- DTC P0112 (Flash Code 22) Intake Air Temperature Sensor Circuit Low
- DTC P0113 (Flash Code 22) Intake Air Temperature Sensor Circuit High
- DTC P0117 (Flash Code 23) Engine Coolant Temperature Sensor Circuit Low
- DTC P0118 (Flash Code 23) Engine Coolant Temperature Sensor Circuit High
- DTC P0122 (Flash Code 43) Throttle Position Sensor Circuit Low
- DTC P0123 (Flash Code 43) Throttle Position Sensor Circuit High
- DTC P0182 (Flash Code 211) Fuel Temperature Sensor Circuit Low
- DTC P0183 (Flash Code 211) Fuel Temperature Sensor Circuit High
- DTC P0192 (Flash Code 245) Fuel Rail Pressure Sensor Circuit Low
- DTC P0193 (Flash Code 245) Fuel Rail Pressure Sensor Circuit High
- DTC P0201 (Flash Code 271) Injector Circuit - Cylinder 1
- DTC P0202 (Flash Code 272) Injector Circuit - Cylinder 2
- DTC P0203 (Flash Code 273) Injector Circuit - Cylinder 3
- DTC P0204 (Flash Code 274) Injector Circuit - Cylinder 4
- DTC P0237 (Flash Code 32) Turbo Charger Boost Sensor Circuit Low
- DTC P0238 (Flash Code 32) Turbo Charger Boost Sensor Circuit High
- DTC P0336 (Flash Code 15) Crankshaft Position Sensor Circuit Range/Performance
- DTC P0340 (Flash Code 14) Camshaft Position Sensor Circuit
- DTC P0404 (Flash Code 45) Exhaust Gas Recirculation 1 Control Circuit Range/Performance
- DTC P0409 (Flash Code 44) Exhaust Gas Recirculation 1 Sensor Circuit
- DTC P0426 (Flash Code 143) Catalyst Temperature Sensor Circuit Range/Performance Sensor 1
- DTC P0427 (Flash Code 48) Catalyst Temperature Sensor Circuit Low Sensor 1
- DTC P0428 (Flash Code 48) Catalyst Temperature Sensor Circuit High Sensor 1
- DTC P0522 (Flash Code 295) Oil Pressure Sensor Circuit Low
- DTC P0523 (Flash Code 295) Oil Pressure Sensor Circuit High
- DTC P0560 (Flash Code 155) System Voltage
- DTC P0563 (Flash Code 35) System Voltage High
- DTC P0601 (Flash Code 53) Internal Control Module Memory Check Sum Error
- DTC P0602 (Flash Code 154) Control Module Programming Error
- DTC P0604 (Flash Code 153) Internal Control Module Random Access Memory (RAM) Error
- DTC P0606 (Flash Code 51) ECM/PCM Processor
- DTC P0638 (Flash Code 61) Throttle Actuator Control Range/Performance
- Main Unit-side Trouble
- Diagnostic Trouble Code: 7000 P1 Pressure Sensor Signal Abnormality
- Diagnostic Trouble Code: 7001 P2 Pressure Sensor Signal Abnormality
- Diagnostic Trouble Code: 7002 N1 Pressure Sensor Signal Abnormality
- Diagnostic Trouble Code: 7003 N2 Pressure Sensor Signal Abnormality
- Diagnostic Trouble Code: 7004 Overload Pressure Sensor Signal Abnormality
- Diagnostic Trouble Code: 7005 Bottom Pressure Sensor Signal Abnormality
- Diagnostic Trouble Code: 7006 Rod Pressure Sensor Signal Abnormality
- Diagnostic Trouble Code: 7020 Upper Pressure Sensor Signal Abnormality
- Diagnostic Trouble Code: 7021 Swing Pressure Sensor Signal Abnormality
- Diagnostic Trouble Code: 7022 Travel Pressure Sensor Signal Abnormality
- Diagnostic Trouble Code: 7023 Arm-in Pressure Sensor Signal Abnormality
- Diagnostic Trouble Code: 7040 Fuel Level Sensor Signal Abnormality
- Diagnostic Trouble Code: 7041 Oil Temperature Sensor Signal Abnormality
- Diagnostic Trouble Code: 7045 Monitor Thermistor Signal Abnormality
- Diagnostic Trouble Code: 7060 Boom Angle Sensor Signal Abnormality
- Diagnostic Trouble Code: 7061 Arm Angle Sensor Signal Abnormality
- Diagnostic Trouble Code: 7063 Return Filter Clogging Pressure Switch Signal Abnormality
- (Breaker specifications)
- (Other than breaker specifications)
- Diagnostic Trouble Code: 7065 Boom-up Pilot Pressure Sensor Signal Abnormality
- Diagnostic Trouble Code: 7067 Bucket-close Pilot Pressure Sensor Signal Abnormality
- Diagnostic Trouble Code: 7200 Swing Brake Solenoid Signal Abnormality
- Diagnostic Trouble Code: 7201 Travel High-speed Solenoid Signal Abnormality
- Diagnostic Trouble Code: 7202 Pressure Boost Solenoid Signal Abnormality
- Diagnostic Trouble Code: 7203 Travel Alarm Buzzer Signal Abnormality
- Diagnostic Trouble Code: 7204 Power Save Solenoid Signal Abnormality
- Diagnostic Trouble Code: 7205 Feed Pump Relay Signal Abnormality
- Diagnostic Trouble Code: 7206 Option Line Switchover Solenoid Signal Abnormality
- Diagnostic Trouble Code: 7207 Free Swing Solenoid Signal Abnormality
- Diagnostic Trouble Code: 7210 Liftcrane Buzzer Signal Abnormality
- Diagnostic Trouble Code: 7211 Rotating Light Relay and Bucket Lock Signal Abnormality
- Diagnostic Trouble Code: 7240 Pump Horsepower Proportional Valve Signal Abnormality
- Diagnostic Trouble Code: 7241 P1 Flow Control Proportional Valve Signal Abnormality
- Diagnostic Trouble Code: 7242 Fan Proportional Valve Signal Abnormality
- Diagnostic Trouble Code: 7246 2 Pumps Flow Solenoid Signal Abnormality
- Diagnostic Trouble Code: 7247 Boom-down Proportional Valve Signal Abnormality
- Diagnostic Trouble Code: 7248 Arm-in Proportional Valve Signal Abnormality
- Diagnostic Trouble Code: 7250 Option Relief Pressure Proportional Valve Signal Abnormality
- Diagnostic Trouble Code: 7251 Battery Control Relay Signal Abnormality
- Diagnostic Trouble Code: 7252 Idle Stop Relay Signal Abnormality
- Diagnostic Trouble Code: 7253 DPD Regeneration Request Output Signal Abnormality
- Diagnostic Trouble Code: 7400 Abnormally High Coolant Temperature [ 105 °C ( 221.0 °F )or higher ]
- Diagnostic Trouble Code: 7401 Abnormally High Coolant Temperature [ 110 °C ( 230.0 °F )or higher ]
- Diagnostic Trouble Code: 7402 Abnormally High Coolant Temperature [ 120 °C ( 248.0 °F )or higher ]
- Diagnostic Trouble Code: 7404 Abnormally High Oil Temperature [ 95 °C ( 203.0 °F )or higher ]
- Main Frame
- Cab Main Harness
- Engine Harness
- Frame
- Engine and Pump
- Attachments
- Battery
- Configuration Diagram
- Dimension Diagram
- Jig Dimension Diagram
- Disassembly Procedures
- Assembly Procedures
- Tools for Assembly and Disassembly
- Standard Tools
- Secondary Materials
- Special Tool (jig)
- Motor Disassembly Procedures
- Precautions before Motor Disassembly
- Tightening Torque
- Disassembly Procedure
- Maintenance Standards
- Motor Parts Maintenance Standards
- Motor Assembly Procedures
- Precautions before Motor Assembly
- Assembly Procedure
- Initial Pre-conditioning Operation
- Structural Diagram
- Part Table
- Overall view
- PUMP CHAMBER HYDRAULIC EQUIPMENT LAYOUT
- SWING BODY CENTER SECTION HYDRAULIC EQUIPMENT
- HOUSING LEFT SIDE HYDRAULIC EQUIPMENT LAYOUT
- LAYOUT OF HYDRAULIC EQUIPMENT IN CAB
- Hydraulic Pump (standard model)
- Relief Valve
- Stack Solenoid Valve
- Remote Control Valves (upper, travel)
- Remote Control Valves (left-right)
- Remote Control Valve (travel)
- Cushion Valve
- 2-way Selector Valve
- Direction Valve
- Shut-off Valve
- HBCV
- Manifold Under Cab
- Manifold (accumulator section)
- Manifold (hydraulic oil tank section)
- Swing Motor
- Travel Motor
- Procedures for Pressure Measurement from the Monitor Display
- Monitor and switch panel
- Pressure Measurement Method
- Operating Method
- PROCEDURES FOR MEASURING HYDRAULIC OIL TEMPERATURE FROM THE MONITOR DISPLAY
- Hydraulic Oil Temperature Measurement Method
- Procedures for Pressure Measurement by Installing Pressure Gauge
- Preparations
- Items to Prepare
- Pressure Measuring Ports
- Structure and Operation Explanation of Control Valve
- Location of Relief Valves
- Pressure Measurement Preparations
- Pressure Measurement
- Main Pressure Measurement
- Attachment pressure measurement
- Boom-down pressure measurement
- Travel pressure measurement
- Swing pressure measurement
- Option line pressure measurement
- Pilot Pressure Measurement
- Pressure gauge installation
- Negative Control Pressure Measurement
- Pressure Adjustment
- Main Pressure Adjustment
- Pressure measurement and adjustment preparation work
- Main relief pressure adjustment
- Overload relief pressure adjustment
- Swing relief pressure adjustment
- Pilot Pressure Adjustment
- Hydraulic Pump Flow Measurement Procedures
- Work Preparations
- Flow Measurement
- Check
- Boom Cylinder HBCV
- Arm Cylinder HBCV
- Removal of Operation Remote Control Valve (left side)
- Installation of Operation Remote Control Valve (left side)
- Removal of Operation Remote Control Valve (right side)
- Installation of Operation Remote Control Valve (right side)
- Replacement standards for worn parts
- Standards for repairing cylinders, valve plates, and swash plates (shoe plates)
- Attached diagram 1. pump assembly cross-section diagram
- Drive Shaft Front Side
- Drive Shaft Rear Side
- Operation explanation
- Regulator adjustment
- Tables and diagrams
- Procedures for Assembly and Disassembly of Regulator
- Tools
- Disassembly preparations
- Diagram 1. Front-side regulator assembly cross-section diagram
- Main plunger section
- Foot relief valve
- Main relief valve
- Disassembly
- Assembly and pressure setting
- Pressure setting
- Overload relief valve
- Center bypass valve
- Arm regeneration check
- Boom back pressure check
- Load hold valve
- Boom regeneration check
- Check valve
- Swing priority valve
- Check valve (swing priority path)
- Arm regeneration valve
- Travel signal switchover spool
- Specifications and Structure Diagram (including the assembly diagram and parts table)
- Basic functions
- Function of Each Location
- Cylinder Head Assembly
- Piston Assembly
- Pipe Assembly
- Handling Precautions
- Precautions for Installing the Cylinder on the Machine Body
- Usage Cautions
- Maintenance and Inspection Cautions
- Maintenance Inspection and Service
- Trouble Diagnostics
- Storage Standards
- Storing Parts Individually (In principle, store indoors.)
- When Mounted on Vehicle Body
- Recommended Anti-rust Oil
- Assembly and Disassembly Procedures
- General Work Precautions
- Inspection after Assembly
- Required Tool
- General Tool
- Special Jig
- Drain the Oil
- Secure the Cylinder
- Pull out the Piston Rod
- Fasten the Piston Rod
- Remove the Piston Nut
- Removal of Piston etc
- Disassembly of the Retraction Side Cushion Ring
- Remove the Piston Seal
- Disassembly of the Buffer Ring
- Disassembly of U-ring and Wiper Ring
- Removal of O-ring and Backup Ring
- Disassembly of Bushing
- Removal of Pin Bushing
- Cleaning and Storage
- Test Operation
- Usage Limits
- Boom Cylinder
- Arm Cylinder
- Bucket Cylinder
- Procedures for Assembly and Disassembly of Operation Remote Control Valve
- Maintenance Procedures
- Required Tools and Tightening Torque
- Causes of Trouble and Countermeasures
- Procedures for Assembly and Disassembly of Travel Remote Control Valve
- Causes of Trouble and Countermeasures and Cross-section Diagram
- Reverse Operation Spool Section
- Check Plunger Section with Throttle
- Shuttle Valve Section
- Written Materials
- Causes of Trouble and Solutions
- Assembly
- Swing Motor Internal Structure Diagram
- Travel Circuit
- Travel Low-speed Circuit
- Travel High-speed Circuit
- Straight Travel Circuit
- Straight Travel Circuit (with HBCV)
- Swing Circuit
- Swing Relief Cut-off Control Circuit
- Swing Priority Circuit
- Swing Priority Circuit (with HBCV)
- Swing Brake Circuit
- Swing Parking Circuit (lever in neutral)
- Swing Parking Circuit (brake release)
- Swing Parking Circuit (machine stop)
- Boom Circuit
- Boom-up Circuit (independent operation)
- Boom-up Circuit (independent operation) (with HBCV)
- Boom-up Circuit (compound boom up + arm in)
- Boom-up Circuit (compound boom up + arm in) (with HBCV)
- Boom-down Regenerative Circuit
- Boom-down Regenerative Circuit (with HBCV)
- Boom-down Tilting Prevention Circuit
- Boom-down Tilting Prevention Circuit (with HBCV)
- Boom-down Load Holding Valve Circuit
- Boom-down Load Holding Valve Circuit (with HBCV)
- Arm Circuit
- Arm-out Circuit
- Arm-out Circuit (with HBCV)
- Arm-in Forced Regenerative Circuit
- Arm-in Forced Regenerative Circuit (with HBCV)
- Arm-in Load Holding Valve Circuit
- Arm-in Load Holding Valve Circuit (with HBCV)
- Bucket Circuit
- Bucket-open Circuit
- Bucket-close Regenerative Circuit
- Negative Control Circuit
- Negative control circuit (bucket close, power save solenoid OFF)
- Horsepower Boost Circuits
- Arm-in Horsepower Boost Circuit
- Arm-in Horsepower Boost Circuit (with HBCV)
- Travel Horsepower Boost Circuit
- Other Circuits
- Cushion Circuit (arm-out operation)
- Cushion Circuit (arm-out operation stopped)
- Cushion Circuit (arm-out →arm-in operation)
- Heat Circuit (lever in neutral)
- Auto Pressure Boost Circuit (bucket close)
- Option Circuits
- Breaker Circuit (independent operation)
- Double-acting Circuit (hydraulic fork)
- Multi-purpose Circuit (2 pumps flow crusher)
- 2nd Option Circuit (hydraulic rotation fork)
- Structure and Operation Explanation
- Hydraulic Pump Internal Structure Diagram
- Regulator
- Regulator Operation Explanation
- Regulator Operation Explanation Diagram
- Front Side Regulator Internal Structure Diagrams
- Rear Side Regulator Internal Structure Diagram
- Gear Pump
- Gear Pump Internal Structure Diagram
- Travel motor operation explanation
- Explanation of Component Device Operation
- Hydraulic motor
- Brake valve
- Parking brake
- Relief mechanism
- High and low speed 2-stage switchover mechanism
- Reduction Gear
- Swing Motor Operation Explanation
- Hydraulic Motor Section
- Valve Casing Section
- Brake Section
- Relief Valve Operation Explanation (relief valve model: KRD22EK10)
- Structure
- Function
- Operation
- Pressure Reduction Valve Section
- Operating Section Damping Mechanism Section
- Air Conditioner Overall Diagram
- Equipment Layout Diagram
- Circuit Diagram
- Air Conditioner Circuit Diagram
- Explanation of Functions
- Explanation of Control
- Air Mix Motor Actuator Control
- Blow Mode Motor Actuator Control
- Refresh/Recirculate Switch Motor Actuator Control
- Blower Amp Control
- Compressor Clutch Control
- COOLMAX Control and HOTMAX Control
- Abnormality Detection and Control after Abnormality Detected
- Monitor Mode
- Door Switch Control
- Inside Air Filter Clogging Detection Control
- Actuator Inspection
- Air Mix Motor Actuator Inspection
- Refresh/Recirculate Switch Motor Actuator Inspection
- Mode Motor Actuator Inspection
- Self-diagnosis Function with Panel Display
- Abnormality Display and Self-check Procedures
- Abnormality Display Position
- Explanation of Abnormality Display
- Motor Actuator Abnormality
- Sensor Abnormality
- Explanation of Monitor Mode
- Monitor Mode Display Position
- Monitor Mode Display Operating Method
- Display Contents in Monitor Mode
- Part Function and Good/Poor Judgment
- Control Panel
- Blower Amp
- Relay
- Air Mix Actuator
- Refresh/Recirculate Actuator
- Blow Mode Actuator
- Evaporator Sensor
- Dual Pressure Switch
- Solar Radiation Sensor
- Inside Air Sensor
- Removal of Blower Unit
- Replacement of Blower Motor
- Replacement of Blower Amp
- Removal of Heater Core
- Removal of Heat Case Right/Left
- Replacement of Evaporator and Expansion Valve
- Installation of Evaporator Sensor
- Replacement of Motor Actuator
- Work Precautions
- Work Procedures
- Air Conditioner Refrigerant "Vacuum Operation" and "Gas Filling Operation
- Operation Chart
- Filling Procedures
- Charging Hose Connection Positions
- Gauge Manifold Connection
- Vacuuming
- Gas Filling Operation, High-pressure Side
- Gas Filling Operation, Low-pressure Side
Inside this manual
Real pages from this service manual (1,956 pages). Open the sample pages (PDF, 1390 KB)

- Troubleshooting, page 621: Symptom
- Diagram, page 951: Electrical Wiring Diagram
- Specifications, page 1,101: Assembly and Disassembly of Travel Motor
- Color page, page 524: Service Support
- Color page, page 1,184: Pressure Measurement and Adjustment Procedures
- Foldout diagram (color): STARTER MOTOR
Other manuals for this machine
Save 10% on 2 manuals, 15% on 3 or more. Other manuals for the CX130C Tier 4 are listed below. Editions cover different serial number ranges: check the serial coverage and tick only the ones that match your machine.
Added to your cart. View cart
This is a service manual
Here's how it compares to the other manual types.
Service manual
Factory repair procedures and technical information such as specifications, troubleshooting, and wiring and hydraulic diagrams, for the models and systems the manual covers. See What's inside for its topics.
Operator's manual
Safe operation, controls, maintenance schedules, lubrication points, inspections, and basic checks. Repair procedures are in the service manual.
Parts manual
Illustrated diagrams with factory part numbers for identifying components and ordering parts. Repair procedures are in the service manual.
Engine service manuals are sometimes sold separately, since certain machine models were offered with more than one engine option.
What it's used for
Factory manual for in-house farm and construction shop use. Straightforward, complete, and easy to follow. It contains the OEM information dealership service departments and parts counters use to diagnose problems, identify components, and perform maintenance or repairs correctly.
Service shops and owner/operators who repair their own equipment
Identifying correct parts and seeing how assemblies come apart and go back together
Keeping equipment running with less downtime
Factory manual, 1,956 pages
Quantity one is the manual described above.
Fast free USA shipping
Ships in 1 business day.
60-day returns
Free if the mistake is ours. A manual ordered in error must come back unopened in its shrink-wrap; you pay return shipping and a 20% restocking fee applies. Return policy
Binder not included
Manuals over about 300 pages may need a standard 3-ring binder, which you can buy locally to keep the pages organized for shop use.
Other editions and similar models
Questions about model, serial number, engine coverage or contents? Contact us before purchasing and we'll help confirm it's the right manual. Please verify the manual type, machine model, serial number range and engine coverage before purchasing: manuals ordered in error carry a 20% restocking fee (return policy).