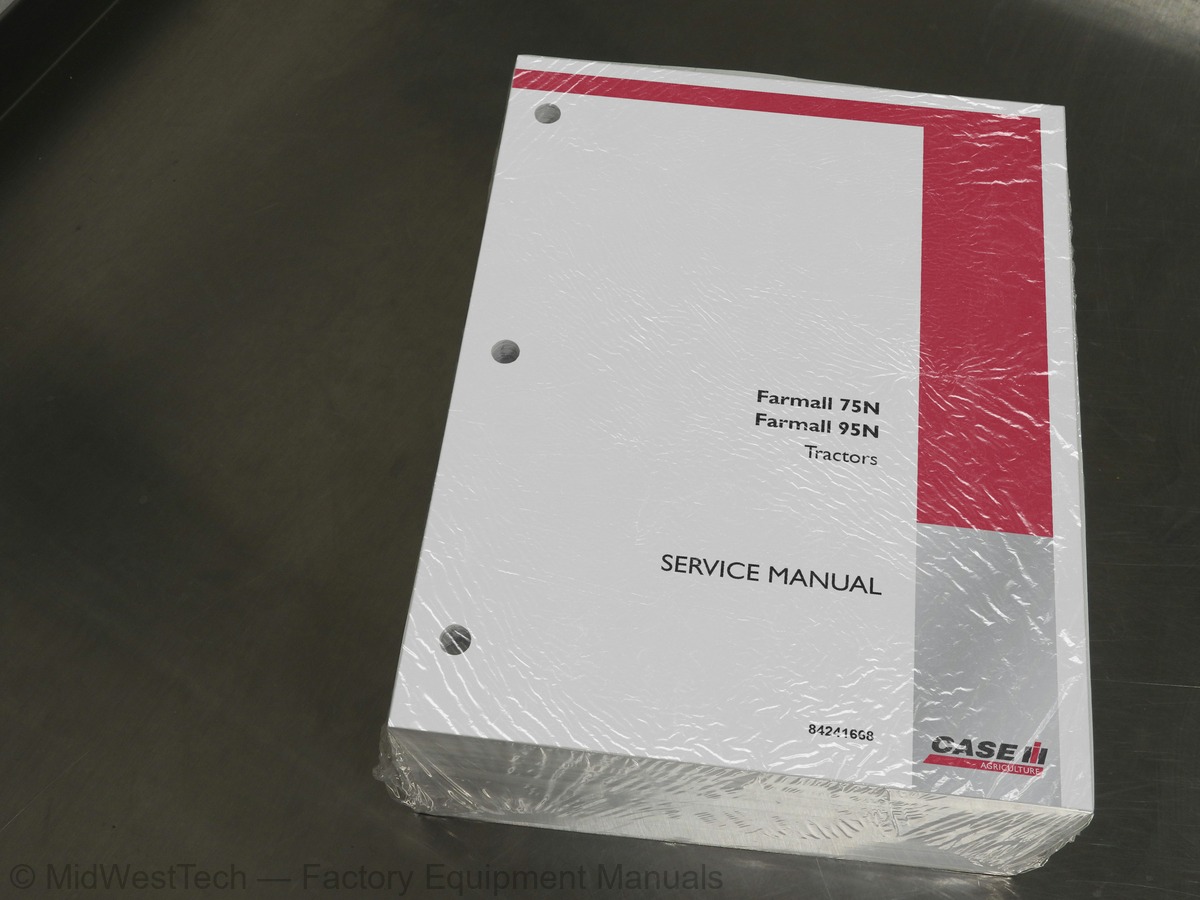
Case Farmall 75N, 95N Tractor Service Manual
1,669 pages · Publication 84241668
Added to your cart. View cart
- Models
- Farmall 75N, 95N
- Manual type
- Service Manual
- Pages
- 1,669
- Publication
- 84241668
- Condition
- Brand new
What's inside
From the manual's own table of contents: 116 sections, 700 entries. See sample pages (PDF, 654 KB)
General Instructions12 topics
- Important Notice
- Battery
- Shimming
- Rotating Shaft Seals
- O--Ring Seals
- Sealing Compounds
- Bearings
- Spring Pins
- Spare Parts
- Notes for Equipment
- Important Notes
- Moving the Tractor with the Battery Removed
Safety Regulations9 topics
- Safety Symbols
- To Prevent Accidents
- General Guidelines
- Start Up
- Engine
- Electrical Systems
- Hydraulic Systems
- Wheels and Tires
- Removal and Installation
Description and Operation1 topic
- Exhaust Gas Recirculation System (EGR)
Show all 116 sections
Overhaul33 topics
- Removal
- Installation
- Disassembly
- Removing the Crankshaft Front Seal
- Removing the Crankshaft Rear Seal
- Assembly
- Fitting the Connecting Rod--Piston Assembly
- Fitting the Piston Connecting Rod Assemblies In the Cylinder Liners
- Big End Cap Assembly
- Fitting the Thermostat Valve
- Fitting the Cylinder Head
- Fitting the Injectors
- Fitting the Rocker Arm Assembly
- Fitting the Timing Gear
- Fitting the Injection Pump
- Fitting the Additional Counterweights
- Fitting the Hydraulic Pump Drive Gear
- Fitting the Timing Gear Casing
- Fitting the Crankshaft Rear Seal
- Fitting the Flywheel
- Fitting the Oil Pump
- Fitting the Oil Sump
- Fitting the Crankshaft Front Seal
- Fitting the Crankshaft Front Pulley
- Fitting the Cooling System Union
- Fitting the Coolant Pump
- Fitting the Fan--alternator Pulley
- Fitting the Auxiliary Member Drive Belt
- Fitting the Exhaust Manifold -- Turbine
- Fitting the Injector Feed Pipes
- Fitting the Fuel Pump -- Feed Pipes
- Pre-heating System and Tappet Cover
- Fitting the Starter Motor
Checks, Measurements and Repairs47 topics
- Crankcase, Cylinder Liners
- Crankshaft
- Connecting Rods
- Bushings
- Checking Connecting Rods
- Checking Twisting
- Checking Bending
- Pistons
- Normal Dimensions (mm) Piston Data
- Measuring the Piston Diameter
- Piston Pins
- Conditions for Correct Pin--Piston Coupling
- Piston Rings
- Valves and Camshaft
- Dimensions (mm) of Valves and Valve Guides
- Decarbonizing, Checking and Grinding Valves
- Valve Springs
- Tappets
- Camshaft
- Cylinder Head
- Checking the Cylinder Head Mating Surface
- Cylinder Head Thickness
- Cylinder Head Hydraulic Seal Check
- Low Oil Pressure Indicator
- Functional Checks
- Oil Filter
- Replacement
- Cooling System
- Radiator
- Flushing and Checks
- Coolant Thermometer
- Check
- Thermostat Valve
- Crankshaft -- Front Seal
- Crankshaft -- Rear Seal
- Adjusting Valve/Rocker Arm Clearance
- Injectors
- Bosch Injection Pump
- Timing
- Fuel Circuit Air Bleeding
- Coolant Pump
- 4-Cylinder Coolant Pump and Generator Drive Belt
- Tension Adjustment
- Engaging the PTO Control Clutch
- Disengaging the PTO Control Clutch
- Adjusting the PTO Clutch Servo Control
- Adjusting the PTO Switch
18 110 30 Single Disk Clutch 11 ″ (Fitted with Power--Shuttle)3 topics
- Checks, Measurements and Repairs -- Dual Disk Clutch
- Coplanarity Adjustment of 11 ″ /11 ″ Dual Clutch Release
- Coplanarity of 11 ″ Single Plate Clutch Release Levers
18 100 40 Main Clutch Adjustments6 topics
- PTO Clutch Control Adjustments
- Reverser Data
- Creeper Unit Data
- Transmission and Range Gear Data
- Gearbox and Shuttle
- Creeper Unit
21 130 52 Shuttle Control Lever2 topics
- Splitter Main Data
- Splitter
21 160 31 Splitter Device and Creeper Unit Gearbox, Shafts and Bearings3 topics
- Power Shuttle Main Data
- Power Shuttle Unit
- Disassembly--Assembly
21 134 70 Gearbox Control Valve Solenoid Valve -- From Gearbox1 topic
- Clutch Control Pressure Test
Propeller Shaft Data1 topic
- 4WD Drive Gear with Electro-Hydraulic Coupling
42 23 101 Drive Gear Housing Removed2 topics
- Differential Lock
- Differential Lock Release
25 102 24 Hydraulically Controlled Differential Lock with Bevel Drive4 topics
- Bevel Drive Adjustments
- Determining the Thickness of the Drive Pinion Position Adjustment Ring
- Adjustment of the Drive Pinion Bearings
- Checking the Backlash Between the Pinion and Crown Wheel
21 108 85 Front Axle Steering Sensor4 topics
- Assembly and Adjustment
- Final Drive Data
- Hydraulically Controlled Rear Differential Lock
- Rear Transmission
27 106 16 Rear Transmission Gearbox3 topics
- Adjusting the Position of Differential Lock Engagement Sleeve
- Clearance Between the Sides of the Bevel Drive Teeth
- Adjustment of the Clearance Between the Sun and Planet Pinion Teeth
27 120 32 Epicyclic Final Drive9 topics
- Removal--installation
- Description
- Operation
- PTO Controlled Directly from the Engine Clutch
- PTO Synchronized With Gearbox (Mechanically Controlled Models)
- Dual Command (2 Speed Power Shift)) models
- Power Take-Off Speed Selection Lever
- Service Brakes
- Parking Brake
33 202 46 Brake Hydraulic Pump1 topic
- Service Brakes Control Pedals Stroke Adjustment (Tractors With Cabs)
33 202 04 Brake Hydraulic System1 topic
- Air Bleeding
33 110 08 Handbrake Control3 topics
- Stroke Adjustment
- Rear Hydraulic Lift Data
- Implement Hitching Device Data
35 110 40 Lift Internal Controls4 topics
- Lift Adjustments
- Adjusting Position Control
- Upper Stroke Limit Adjustment
- Adjusting Draft Control
35 110 08 Rod Mechanism Adjustments5 topics
- Position Control Rod Adjustments
- Adjusting Fast Raise/Lower Device
- Lift Arm Descent Speed Adjustments
- Upper Stroke Limit Adjustment Check
- of the Fast Raise/Lower Device
35 114 32 Lift Pressure Relief Valve (Setting)7 topics
- Operating Stages of Auxiliary Control Valve
- Double Acting Cylinders
- Single Acting Cylinders
- Single/Double-Acting Cylinder with Automatic Detent Release and Float Position
- Lifting
- Lower
- Float Operation
35 204 46 Auxiliary Control Valves2 topics
- Disassembly -- Assembly
- Adjustment of the Automatic Detent Release Pressure
Functional Testing and Troubleshooting of Trailer Brake Valve -- Italia Version11 topics
- Trailer Brake Release Pressure Test
- Test Conditions
- Fault Diagnosis
- Valve Incorporated In The Trailer Brake Control Valve
- Testing the Hydraulic System For Leakage
- When the Parking Brake Is Applied
- Controlling the Switches
- Electronically Controlled Hydraulic Lift Operation
- Neutral Phase
- Lifting Phase
- Lowering Phase
35 134 42 Electronically Controlled Hydraulic Lift1 topic
- Cylinder Safety Valve Calibration
35 138 24 Disassembly -- Assembly4 topics
- Inspection and Re-fitting
- Hydraulic Pump C 42
- BOSCH 25 Hydraulic Pump
- Filter
Tightening Torques2 topics
- Neutral
- Right--Hand Steering Control B, R--ht, E, F
41 204 30 Hydrostatic Steering Control Valve3 topics
- With Control Valve Installed On Tractor
- Pump Type A 25
- Pump Type A 31 XRP2
41 206 20 Hydrostatic Steering Oil Pump -- A 31 XRP 2 Pump2 topics
- Wheel Track
- 2WD Front Wheel Track Diagram
Safety Precautions12 topics
- Adjustment
- Stopping
- Operating Principles
- Main Components of Cab Air Conditioning System
- Compressor
- SANDEN SD 5H11 Model
- Compressor Oil -- Type and Quantity
- Condenser
- Filter/Dryer
- Thermostatic Expansion Valve
- Evaporator
- Thermostatic Switch (Antifrost)
Cab Heating and Ventilation Controls10 topics
- Ventilation
- Electric Fan
- Air Filter
- Heating
- Temperature Control Knob
- Ignition Switch
- Cab Air Conditioning and Temperature Controls
- Air Conditioning and Temperature Control Button
- Heater Control Knob
- 3-speed Electric Fan Control Knob
50 200 03 Function and Cooling Testing2 topics
- Pressure Variations At Different Altitudes
- Checking the Temperature of the Air Coming Out of the Vents Inside the Cab
Maintenance of the Air Conditioning System3 topics
- Warnings for Air Conditioning System Repair Operations
- Air Conditioning System Fault Diagnosis Summary
- Visual Inspection of Components
Checks and Services6 topics
- Refrigerant Recovery--Recycling and Evacuation--charging Stations (380000315)
- Connecting the piping to the stations
- Recovery and Recycling Station (380000315)
- Technical Characteristics
- Maintenance
- Evacuation/Charging Station (380000315)
50 200 04 Filter/Drying, Recharging and Refrigeration Check11 topics
- System Using the Recovery/ Recycling Station 380000315
- Recycling of Recovered Refrigerant
- Discharge of Recovered Oil
- From Cylinder (19) To An External Cylinder
- Using the Evacuation/Charging Station 380000315
- Evacuation of the Graduated Cylinder (31) of the Evacuation/Charging Station
- Charging the Graduated Cylinder (31) of the Evacuation/Charging Station
- (Previously Discharged Using the Recovery/Recycling Station)
- Charging the Cab Air Conditioning System (After Evacuation) With New Oil
- Charging the Cab Air Conditioning System With Refrigerant (After Evacuation)
- Summary of the Air Conditioning System Charging Operations
50 200 06 Checking for and Eliminating Any Gas Leaks3 topics
- Testing for Leaks With Leak Detector 380000314
- Checking for Refrigerant Leaks Using An Electronic Leak Detector
- Refrigerant Gas Leak Test
50 200 10 Compressor Drive Belt Tension Adjustment3 topics
- Fitting the Compressor Drive Belt
- Checking Compressor Drive Belt Tension
- Periodic Checking of Drive Belt
Instrument Panel3 topics
- Analog Instrument Panel
- Indicator Light Panel
- Digital Instrument Cluster
Transmitters, Sensors & Switches2 topics
- Locations
- Descriptions
Control Panel With Analog Instrument3 topics
- Speedometer/Tachometer
- Engine Coolant Temperature Gauge
- Fuel Gauge
Digital Instrument Cluster5 topics
- Rev Counter/Hourmeter (1)
- Digital Displays
- Digital Display (2)
- Digital Display (3)
- Multifunction Display
Miscellaneous Functions1 topic
- Controls On Right--Hand Cab Upright
Maintenance7 topics
- Electronic Lift Control Lights
- Front Headlight Bulbs
- Rear Sidelights, Brake and Direction Indicator Light Bulbs
- Cab Front and Rear Work Lights
- Courtesy and Adjustable Reading Light Bulbs
- Courtesy Light
- Adjustable Reading Light
System Tests15 topics
- Starting System Test On Tractor
- Power Absorption In Starter Motor Circuit
- Starting System Circuit Resistance (Voltage Drop)
- Battery Positive Cable
- Starter Motor Ground Connection
- Battery Ground Cable
- Checking Armature End Float
- Starter Motor Test (Without Load)
- Bench Tests
- Armature
- Field Coils
- Bearing Bushes
- Pinion
- Description of the Alternator
- Alternator Operation
System Testing and Troubleshooting11 topics
- Precautions
- Preliminary Checks
- Battery Check
- Driving Belt Check
- Warning Light Check
- Preliminary Tests
- Alternator Wire Connection Tests
- Charging Current and Regulated Voltage Tests
- Charging Circuit Voltage Drop Tests
- Ground Side Voltage Drop Test
- Maximum Alternator Output Test
Preventive Maintenance Checks and Services8 topics
- Relative Density
- Battery Maintenance
- Dry Charged Batteries
- Charging The Battery
- Normal Charging (Top Up)
- Charging Extremely Flat Batteries
- Tests
- Test Charge
Electrical Circuit Components24 topics
- Component List -- Numeric Order
- Mechanical Rear Lift
- List of Relay Functions
- Main Fusebox
- Maxi Fuses
- Differential Lock and Mechanical Rear Lift
- Electrohydraulic Differential Lock and Electronic Rear Lift
- Maxi--Fuses
- Electrohydraulic Differential Lock and Mechanical Rear Lift
- Lift and Electrohydraulic Differential Lock
- Fuse and Relay Layout On Cab Right--Hand Upright
- Air Conditioned Cab Relays
- Heated Cab Relays
- Fuse Layout
- Fuse Box (1) (Cab Circuit)
- Power Sockets
- Seven--pole Power Socket
- A Two--Pole Power Socket (ISO Version)
- A Power Socket (North America Version)
- Grid Heater
- Grid Heater Relay
- Grid Heater Control Module
- Electronic Flasher Module
- Ground Location Points
Electrical Circuits6 topics
- How To Use the Wiring Diagrams
- Connector Code Reading
- Wire Color Coding
- Symbols Used In Electrical Circuits
- Electrical Circuit Components (Functional Order)
- Version Index
Version 1 -- Two--Wheel Drive, Mechanical Differential Lock, Rear Mechanical Lift28 topics
- Circuit Index
- Component Locations -- Diagrams 1 Through 3
- Battery Cut--out, Power Socket, Wiper/Washer Pumps Circuit -- Diagram 1
- Brakes, Brake Lights, Differential Lock Circuit -- Diagram 2
- Grid Heater Circuit -- Diagram 3
- Component Locations -- Diagrams 4 Through 6
- Instrument and Sensor Circuit -- Diagram 4
- and Safety Devices -- Diagram 5
- (Control Switches and Flasher) -- Diagram 6
- Component Locations -- Diagrams 7 Through 10
- External Lights and Horn Circuit -- Diagram 7
- Power Supplies 1 Circuit -- Diagram 8
- Power Supplies 2 Circuit -- Diagram 9
- Seven--pin Socket Circuit -- Diagram 10
- Component Locations -- Diagrams 11 Through 14
- Diagnostics Connection Circuit -- Diagram 11
- Trailer Brake Circuit -- Diagram 12
- Intermediate Connections Circuit 1 -- Diagram 13
- Engine, Sensors and Transmitters Circuit -- Diagram 14
- Component Locations -- Diagrams 15 Through 22
- Intermediate Connections Circuit 2 -- Diagram 15
- Rotating Beacon, Cigar Lighter Circuit -- Diagram 16
- Radio Circuit -- Diagram 17
- Cab Power Supply Circuit -- Diagram 18
- Windscreen and Rear Window Washer/Wiper Circuit -- Diagram 19
- Work Lights Circuit -- Diagram 20
- Circuit for Stabilizer Lock and Right--hand Tie Rod -- Diagram 21
- Front PTO Circuit -- Diagram 22
Version 2 -- 2wd Models, Electrohydraulic Differential Lock, Rear Mechanical Lift10 topics
- Power Supplies Circuit 1 -- Diagram 8
- Power Supplies Circuit 2 -- Diagram 9
- Component Locations -- Diagrams 15 Through 20
- Component Locations -- Diagrams 21 Through 26
- Power Shuttle 16+16 Circuit (Dashboard Side) -- Diagram 21
- Power Shuttle 16+16 Circuit (Transmission Side) -- Diagram 22
- Power Shuttle 44+16 Circuit (Dashboard Side) -- Diagram 23
- Power Shuttle 44+16 Circuit (Transmission Side) -- Diagram 24
- Circuit for Stabilizer Lock and Right--hand Tie Rod -- Diagram 25
- Front PTO Circuit -- Diagram 26
Differential Lock, Rear Mechanical Lift33 topics
- Component Locations -- Diagrams 1 Through 4
- Four--Wheel Drive Circuit -- Diagram 1
- Battery Cut--out, Power Socket, Wiper/Washer Pumps Circuit -- Diagram 2
- Brakes, Brake Lights, Differential Lock Circuit -- Diagram 3
- Grid Heater Circuit -- Diagram 4
- Component Locations -- Diagrams 5 Through 8
- Instrument and Sensor Circuit -- Diagram 5
- and Safety Devices -- Diagram 6
- (Control Switches and Flasher) -- Diagram 7
- External Lights and Horn Circuit -- Diagram 8
- Component Locations -- Diagrams 9 Through 11
- Power Supplies Circuit 1 -- Diagram 9
- Power Supplies Circuit 2 -- Diagram 10
- Seven--pin Socket Circuit -- Diagram 11
- Component Locations -- Diagrams 12 Through 15
- Diagnostics Connection Circuit -- Diagram 12
- Trailer Brake Circuit -- Diagram 13
- Intermediate Connections Circuit 1 -- Diagram 14
- Engine, Sensors and Transmitters Circuit -- Diagram 15
- Component Locations -- Diagrams 16 Through 21
- Intermediate Connections Circuit 2 -- Diagram 16
- Rotating Beacon, Cigar Lighter Circuit -- Diagram 17
- Radio Circuit -- Diagram 18
- Cab Power Supplies Circuit -- Diagram 19
- Windscreen and Rear Window Washer/Wiper Circuit -- Diagram 20
- Work Lights Circuit -- Diagram 21
- Component Locations -- Diagrams 22 Through 27
- Power Shuttle 16+16 Circuit (Dashboard Side) -- Diagram 22
- Power Shuttle 16+16 Circuit (Transmission Side) -- Diagram 23
- Power Shuttle 44+16 Circuit (Dashboard Side) -- Diagram 24
- Power Shuttle 44+16 Circuit (Transmission Side) -- Diagram 25
- Circuit for Stabilizer Lock and Right--hand Tie Rod -- Diagram 26
- Front PTO Circuit -- Diagram 27
Differential Lock, Rear Electronic Lift29 topics
- Rear Electronic Lift Circuit -- Diagram 4
- Grid Heater Circuit -- Diagram 5
- Instrument and Sensor Circuit -- Diagram 6
- and Safety Devices -- Diagram 7
- (Control Switches and Flasher) -- Diagram 8
- Component Locations -- Diagrams 9 Through 12
- External Lights and Horn Circuit -- Diagram 9
- Power Supplies Circuit 1 -- Diagram 10
- Power Supplies Circuit 2 -- Diagram 11
- Seven--pin Socket Circuit -- Diagram 12
- Component Locations -- Diagrams 13 Through 16
- Diagnostics Connection Circuit -- Diagram 13
- Trailer Brake Circuit -- Diagram 14
- Intermediate Connections Circuit 1 -- Diagram 15
- Engine, Sensors and Transmitters Circuit -- Diagram 16
- Component Locations -- Diagrams 17 Through 23
- Intermediate Connections Circuit 2 -- Diagram 17
- Rotating Beacon, Cigar Lighter Circuit -- Diagram 18
- Radio Circuit -- Diagram 19
- Cab Power Supply Circuit -- Diagram 20
- Windscreen and Rear Window Washer/Wiper Circuit -- Diagram 21
- Work Lights Circuit -- Diagram 22
- Power Shuttle 16+16 Circuit (Dashboard Side) -- Diagram 23
- Component Locations -- Diagrams 24 Through 28
- Power Shuttle 16+16 Circuit (Transmission Side) -- Diagram 24
- Power Shuttle 44+16 Circuit (Dashboard Side) -- Diagram 25
- Power Shuttle 44+16 Circuit (Transmission Side) -- Diagram 26
- Circuit for Stabilizer Lock and Right--hand Tie Rod -- Diagram 27
- Front PTO Circuit -- Diagram 28
Rear Mechanical Lift4 topics
- Component Locations -- Diagrams 4 Through 7
- Component Locations -- Diagrams 8 Through 11
- Component Locations -- Diagrams 16 Through 22
- Component Locations -- Diagrams 23 Through 27
Rear Electronic Lift8 topics
- Component Locations -- Diagrams 8 Through 12
- Component Locations -- Diagrams 17 Through 22
- Component Locations -- Diagrams 23 Through 28
- Power Shuttle / Dual Command (2 Speed Power Shift) 32+16 / 44+16 (SB)
- Four--Wheel Drive, Front Power Take--off (SD)
- Electronic Lift EDC (SA)
- ADIC Instrument Panel (ZA)
- Ground Points Layout
Version Index47 topics
- Brakes, Brake Lights, Differential Lock Circuit -- Diagram 1
- Grid Heater, Power Socket, Brake Fluid Level Sensor Circuit -- Diagram 2
- Instrument and Sensor Circuit -- Diagram 3
- Safety Devices -- Diagram 4
- (Control Switches and Flasher) -- Diagram 5
- External Lights, Horn and Rear Work Light Circuit -- Diagram 6
- Power Supplies Circuit 1 -- Diagram 7
- Power Supplies Circuit 2 -- Diagram 8
- Seven--Pin Socket Circuit -- Diagram 9
- Trailer Brake Circuit -- Diagram 10
- Component Locations -- Diagrams 11 and 12
- Engine, Sensors and Transmitters Circuit -- Diagram 11
- CAN Line Circuit -- Diagram 12
- Component Locations -- Diagrams 1 through 5
- Grid Heater, Brake Fluid Level Sensor, Power Socket Circuit -- Diagram 2
- and Safety Devices -- Diagram 4
- Component Locations -- Diagrams 6 through 11
- Intermediate Connections Circuit -- Diagram 11
- Component Locations -- Diagrams 12 and 13
- Engine, Sensors and Transmitters Circuit -- Diagram 12
- CAN Line Circuit -- Diagram 13
- Component Locations -- Diagrams 14 through 19
- Power Shuttle 16+16 Circuit (Dashboard Side) -- Diagram 14
- Power Shuttle 16+16 Circuit (Transmission Side) -- Diagram 15
- Power Shuttle 44+16 Circuit (Dashboard Side) -- Diagram 16
- Power Shuttle 44+16 Circuit (Transmission Side) -- Diagram 17
- Circuit for Stabilizer Lock and Right--hand Tie Rod -- Diagram 18
- Front PTO Circuit -- Diagram 19
- Grid Heater, Brake Fluid Level Sensor, Power Socket Circuit -- Diagram 3
- External Lights, Horn and Rear Work Light Circuit -- Diagram 7
- Component Locations -- Diagrams 11 through 13
- Trailer Brake Circuit -- Diagram 11
- Intermediate Connections Circuit -- Diagram 12
- Engine, Sensors and Transmitters Circuit -- Diagram 13
- Component Locations -- Diagrams 14 through 20
- CAN Line Circuit -- Diagram 14
- Power Shuttle 16+16 Circuit (Dashboard Side) -- Diagram 15
- Power Shuttle 16+16 Circuit (Transmission Side) -- Diagram 16
- Power Shuttle 44+16 Circuit (Dashboard Side) -- Diagram 17
- Power Shuttle 44+16 Circuit (Transmission Side) -- Diagram 18
- Circuit for Stabilizer Lock and Right--hand Tie Rod -- Diagram 19
- Front PTO Circuit -- Diagram 20
- Component Locations -- Diagrams 1 and 2
- Component Locations -- Diagrams 3 through 6
- Component Locations -- Diagrams 7 through 12
- Component Locations -- Diagrams 13 and 14
- Intermediate Connections Circuit -- Diagram 13
List Of Fault Codes6 topics
- Electronically Controlled Rear Hydraulic Lift (EDC)
- Transmission Fault Codes
- 4WD Fault Codes
- Front PTO Fault Codes
- Electric Codes
- Control Panel (ADIC) Fault Codes
Fault Code Descriptions98 topics
- Electronically Controlled Rear Hydraulic Lift (EDC) Fault Codes
- 1008 -- Fast Up/Down Switch Failure
- 1009 -- Both External Switches Operated At Same Time
- 1010 -- Voltage Too Low On The Maximum Arms Raise Potentiometer
- 1011 -- Voltage Too High On The Maximum Arms Raise Potentiometer
- 1012 -- Voltage Too Low On The Lowering Speed Potentiometer
- 1013 -- Voltage Too High On The Lowering Speed Potentiometer
- 1021 -- Voltage Too Low On The Position/Draft Control Potentiometer
- 1022 -- Voltage Too High On The Position/Draft Control Potentiometer
- 1023 -- Rear Lift Control Panel Disconnected
- 1024 -- Calibrate The Arms
- 1025 -- Voltage Too Low On The Working Depth Control Potentiometer
- 1026 -- Voltage Too High On The Working Depth Control Potentiometer
- 1027 -- Voltage Too Low On The Lift Arms Position Potentiometer
- 1028 -- Voltage Too High On The Lift Arms Position Potentiometer
- 1029 -- Lift Solenoid Valves Disconnected
- 1031 -- Chassis Harness Disconnected
- 1032 -- Short Circuit To +12 V On The Draft Sensor
- 1033 -- Open Circuit On The Draft Sensor
- 1040 -- Lift Not Calibrated
- 1042 -- Lowering Limit Potentiometer Not Set On Maximum Value
- 1043 -- Lowering Speed Potentiometer Not Set On Maximum Value
- 1044 -- Set Position/Draft Control Potentiometer Not In Position
- 1063 -- Open Circuit On The Lowering Control Solenoid Valve
- 1064 -- Open Circuit On The Lifting Control Solenoid Valve
- 1065 -- Lowering Control Solenoid Valve Shorted
- 1066 -- Lifting Control Solenoid Valve Shorted
- 1068 -- Max. Raise Limit Potentiometer Not Set On Maximum Value
- 1080 -- Voltage Too Low On The Lowering Limit Potentiometer
- 1081 -- Voltage Too High On The Lowering Limit Potentiometer
- 2011 -- Clutch Pedal Potentiometer Signal Too Low
- 2012 -- Clutch Pedal Potentiometer Signal Too High
- 2013 -- Hi And Lo Buttons Pressed At The Same Time
- 2021 -- Transmission Harness Disconnected
- 2024 -- All Clutches Not Calibrated
- 2026 -- Engine Speed Too High
- 2035 -- The Solenoid Of The Dump Valve Shorted To + 12 V
- Is Shorted To Ground
- 2037 -- Clutch Pedal Switch Circuit Open
- 2047 -- Clutch Pedal Switch Too High
- 2048 -- Clutch Pedal Switch Set Too Low
- 2051 -- Open Circuit On The Transmission Oil Temperature Sensor
- 2052 -- Short Circuit To Ground On The Transmission Oil Temperature Sensor
- 2059 -- Shuttle Lever Switches Disagree
- 2061 -- Shuttle/HI--LO Synchro Potentiometer Signal Too High
- 2062 -- Shuttle/HI--LO Synchro Potentiometer Signal Too Low
- 2063 -- Synchro Not Moving To Shuttle Position
- 2064 -- Synchro Not Moving To HI--LO Position
- 2070 -- Voltage From Forward Speed Switch Of The Shuttle Lever Too High
- 2071 -- Voltage From Forward Speed Switch Of The Shuttle Lever Too Low
- 2072 -- Voltage From Reverse Speed Switch Of The Shuttle Lever Too High
- 2073 -- Voltage From Reverse Speed Switch Of The Shuttle Lever Too Low
- 2085 -- Open Circuit At The Shuttle Position Synchronizer Solenoid Valve
- 2086 -- Open Circuit At The HI--LO Position Synchronizer Solenoid Valve
- Synchronizer Solenoid Valve
- 2199 -- Creeper Unit Option Not Enabled
- 2311 -- HI Speed Switch Input Voltage Too High
- 2312 -- LO Speed Switch Input Voltage Too High
- 2342 -- Clutch A Solenoid Shorted To Ground Or Circuit Open
- 2343 -- Clutch B Solenoid Shorted To Ground Or Circuit Open
- 2352 -- Clutch A Solenoid Shorted To + 12 V
- 2353 -- Clutch B Solenoid Shorted To + 12 V
- 2362 -- Clutch A Not Calibrated
- 2363 -- Clutch B Not Calibrated
- 2400 -- HI--LO/Shuttle Synchronizer Not Calibrated Or Calibration Incorrect
- 2411 -- Synchronizer Does Not Move During Start--up Procedure
- 2413 -- Synchronizer Disengaged Without Control Module Control
- 2421 -- Voltage From Range Lever Switch Too Low
- 2422 -- Voltage From Range Lever Switch Too High
- 2425 -- Voltage From Gear Lever Switch Too Low
- 2426 -- Voltage From Gear Lever Switch Too High
- 2427 -- Error On Gear Lever Button Common
- 2428 -- Dump Switch Voltage Too High
- 2429 -- Dump Switch Jammed On
- 2430 -- Low Creeper Switch Input
- 2431 -- High Creeper Switch Voltage
- 2432 -- Oil Pressure Switch Jammed Off
- 2433 -- Oil Pressure Switch Jammed On
- 6011 -- Permanent Four--wheel Drive Switches And Sensors Supply Fuse Error
- Four--Wheel Drive Solenoid Valve
- 6020 -- Automatic/Manual Four--Wheel Drive Selector Switch Faulty
- 6021 -- Four--Wheel Drive Solenoid Stuck Off
- 6023 -- Four--Wheel Drive Solenoid Circuit Open
- 6031 -- Voltage From The Front Shaft Speed Sensor (VAA) Too Low
- 6032 -- Voltage From The Front Shaft Speed Sensor (VAA) Too High
- 6033 -- Voltage From The Rear Shaft Speed Sensor (VAP) Too Low
- 6034 -- Voltage From The Rear Shaft Speed Sensor (VAP) Too High
- 6035 -- Frequency From The Front Shaft Speed Sensor (VAA) Too High
- 6036 -- Frequency From The Rear Shaft Speed Sensor (VAP) Too High
- 6037 -- Inconsistent Sensors (VAA) and (VAP)
- 6038 -- Voltage From Tilt Sensor Too Low
- 6039 -- Voltage From Tilt Sensor Too High
- 6041 -- Voltage From Steering Angle Sensor Too High
- 6042 -- Voltage From Steering Angle Sensor Too Low
- Front PTO Codes
- 8007 -- Short Circuit To +12 V On Electromagnetic Clutch
- 8008 -- Short Circuit To Ground Or Open Circuit On Electromagnetic Clutch
- Clutch Slip Detector
Inside this manual
Real pages from this service manual (1,669 pages). Open the sample pages (PDF, 652 KB)

- Repair procedure, page 94: SECTION 10 -- ENGINE -- CHAPTER 1
- Specifications, page 194: SECTION 18 -- CLUTCH -- CHAPTER 1
- Diagram, page 1,169: SECTION 55 -- ELECTRICAL SYSTEM -- CHAPTER 7
- Color page, page 208: SECTION 21 -- TRANSMISSIONS -- CHAPTER 1
- Color page, page 460: SECTION 35 -- HYDRAULIC SYSTEMS -- CHAPTER 2
- Foldout diagram, page 942: SECTION 55 -- ELECTRICAL SYSTEM -- CHAPTER 6
This is a service manual
Here's how it compares to the other manual types.
Service manual
Factory repair procedures and technical information such as specifications, troubleshooting, and wiring and hydraulic diagrams, for the models and systems the manual covers. See What's inside for its topics.
Operator's manual
Safe operation, controls, maintenance schedules, lubrication points, inspections, and basic checks. Repair procedures are in the service manual.
Parts manual
Illustrated diagrams with factory part numbers for identifying components and ordering parts. Repair procedures are in the service manual.
Engine service manuals are sometimes sold separately, since certain machine models were offered with more than one engine option.
What it's used for
Factory manual for in-house farm and construction shop use. Straightforward, complete, and easy to follow. It contains the OEM information dealership service departments and parts counters use to diagnose problems, identify components, and perform maintenance or repairs correctly.
Service shops and owner/operators who repair their own equipment
Identifying correct parts and seeing how assemblies come apart and go back together
Keeping equipment running with less downtime
Factory manual, 1,669 pages
Quantity one is the manual described above.
Fast free USA shipping
Ships in 1 business day.
60-day returns
Free if the mistake is ours. A manual ordered in error must come back unopened in its shrink-wrap; you pay return shipping and a 20% restocking fee applies. Return policy
Binder not included
Manuals over about 300 pages may need a standard 3-ring binder, which you can buy locally to keep the pages organized for shop use.
Other editions and similar models
Questions about model, serial number, engine coverage or contents? Contact us before purchasing and we'll help confirm it's the right manual. Please verify the manual type, machine model, serial number range and engine coverage before purchasing: manuals ordered in error carry a 20% restocking fee (return policy).