Hyster G008 (H550HD, H650HD, H700HD, H550HDS, H650HDS, H700HDS) Heavy Duty Forklift Service Manual
1,697 pages · Publication G008
Added to your cart. View cart
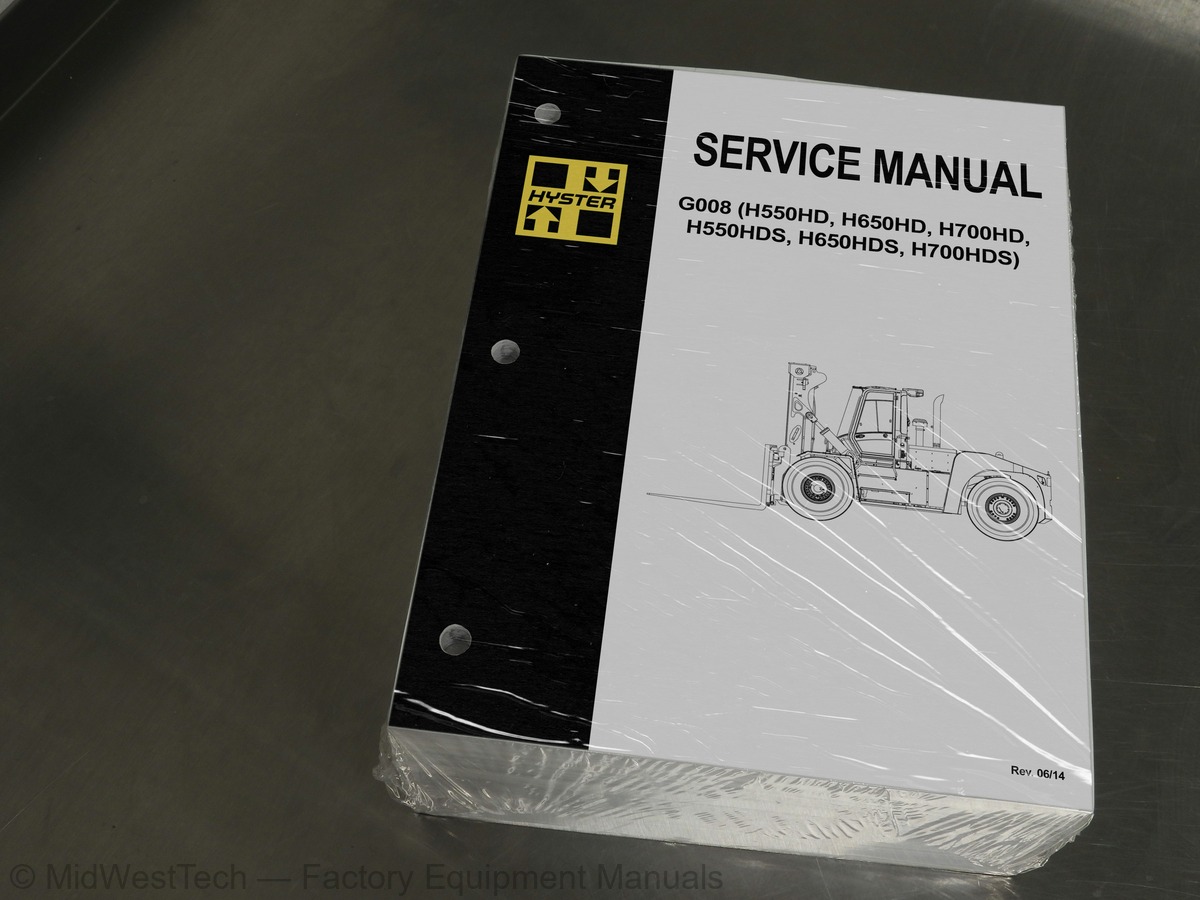
What's inside
From the manual's own table of contents: 595 topics. See sample pages (PDF, 466 KB)
- General
- Threaded Fasteners
- Nomenclature, Threads
- Strength Identification
- Cotter (Split) Pins
- Fastener Torque Tables
- Conversion Table
- Series Code / Model Designation Reference Table
- Finding Fault Code Information
- Fault Codes
- Normal Mode
- Fault Log Mode
- Access
- Exit
- Clear
- Electronic Throttle Calibration
- Electronic Throttle Calibration Procedure
- Description
- Air Filter Assembly
- Remove
- Install
- Exhaust System
- Hood Assembly
- Hydraulic Tank
Show all 595 topics
- Inspect
- Clean
- Repair
- Small Leaks
- Additional Preparations for Repair
- Large Leaks
- Preparations for Use After Repair
- Fuel Tank
- Engine Replacement
- Engine and Transmission Assembly
- Engine Only
- Counterweight
- Label Replacement
- Description of Operation
- Cab Structure
- Cab Tilt System
- Cab Tilt System, Raise
- Cab Tilt System, Lower
- Oil Filling for Cab Tilt System
- Raising and Lowering Cab
- Raise Cab
- Lower Cab
- Cab Door Assembly
- Cab Door
- Door Hinge
- Door Striker Pin
- Door Striker Pin Adjustment
- Door Latch
- Door Handle
- Door Release
- Door Push Button
- Electric Tilt Pump
- Hand Pump
- Cab Tilt Cylinder
- Disassemble
- Assemble
- Latch
- Brake and Inching Pedals
- Cooling System Description
- Cooling Cores
- Fan Clutch
- Fan Clutch Engagement
- Shroud
- Engine Cooling System
- Water Pump
- Thermostat
- Expansion Tank And Radiator Cap
- Exhaust Gas Recirculation (EGR)
- Cab Heater
- Coolant
- Charge Air Cooling System
- Transmission Oil Cooling System
- Hydraulic Cooling System
- Oil Filtration and Oil Cooling
- Brake Cooling
- Hydraulic Control System
- Service and Repair
- Cooling System Checks
- Basic Checks
- Coolant Quality Checks
- Coolant Flow Checks
- Checking Transmission Thermostat Opening Temperature
- Checking Engine Thermostat Completely Opened Temperature
- Checking the Transmission Thermal Bypass Valve
- Cooling Core Efficiency
- Cooling Core Flow Restrictions
- Engine Leak Tests
- External Leak Test
- Check for Coolant Leak Into The Engine Oil Sump
- Combustion Leak Test
- Engine Cooling System Maintenance
- Draining the Engine Cooling System
- Filling the Engine Cooling System
- Flushing the Engine Cooling System
- Cleaning the Engine Cooling System
- Remove and Replace Procedures
- Drive Belt
- Belt Tensioner
- Operation
- Hydraulic Operation
- Variable Force Solenoids
- Speed Engagement
- Cooling and Lubrication
- Control System
- APC200 Controller
- Self Test
- Protection Modes
- Limp Home Mode
- Shut Down Mode
- Transmission Exceed Codes
- Fault Identification
- Transmission Control Valve
- Transmission Control Valve Repair
- Pressure Check
- Pressure Specifications
- Pressure, Speed, and Temperature Sensors
- Pressure Switch
- Test
- Speed Sensor
- Temperature Sensors
- Dana Dashboard Software
- Connection
- Transmission Test and Calibration
- Precautions
- Stall Test
- Stall Test Procedure
- Inching Calibration
- Brake and Inching Pedal Adjustment
- Inching Pedal Sensor Adjustment
- Inching Pedal Sensor Calibration
- Electrical Specifications
- APC200 Display Information
- Transmission Repair
- Transmission Case
- 1st Clutch Drum and Turbine Shaft
- Reverse Clutch Drum
- 2nd Clutch Drum
- 3rd Clutch Drum
- Forward Clutch Drum
- Output Shaft
- Clean and Inspect
- Housings
- Oil Seals and Gaskets
- Bearings
- Gears and Shafts
- Control Valve Removal and Installation
- Control Valve Disassemble and Assemble
- Control Valve
- Right Control Valve Cover
- Left Control Valve Cover
- Modulator Valve Components
- Regulator Valve Components
- Torque Specifications
- Torque Specifications for Lubricated or Plated Screw Threads
- Troubleshooting
- Description And Operation
- Drive Shaft
- Differential
- Planetary Gear Assembly
- Drive Shaft Repair
- H25XM (H550HD) Models Only
- Oil Drain and Refill Procedures
- Planetary Gears and Axle Housing
- Drain
- Fill
- Brake Housing
- Drive Axle Removal
- Planetary Gear Repair
- Planetary Gear Carrier
- Ring Gear, Ring Gear Hub, and Wheel Hub
- Wheel Hub
- Clean, Inspect, and Repair
- Repairing and Replacing Parts
- Welding
- Ground or Polished Parts
- Parts With Rough Finishes
- Axle Assemblies
- Drying Cleaned Parts
- Preventing Corrosion
- Wheel Bearing Preload, Adjust
- Wet Disc Brake Repair
- Basic Principles of Flow Control Systems
- Orifice (Fixed/Variable)
- Basic Principle
- Pressure Compensated Flow Control Valve
- Pressure Compensated Flow Control Valve Functional Description
- Priority Valve
- Priority Valve Functional Description
- Load Sense (LS)
- Load Sense Functional Description
- Example 1
- Example 2
- Basic Principles of Pressure Control Systems
- Direct Acting Relief Valves
- Direct Acting Relief Valve Functional Description
- Two-Stage Relief Valve (Pilot-Operated Relief Valve)
- Two-Stage Relief Valve (Pilot Operated Relief Valve) Functional Description
- Unloading Valve (Accumulator Charging Valve)
- Unloading Valve (Accumulator Charging Valve) Functional Description
- Counterbalance Valve
- Counterbalance Valve Functional Description
- Pressure Reducer Valve
- Pressure Reducer Valve Functional Description
- Steering System Main Component Identification
- Steering System
- Introduction
- Hydraulic Oil Flow Path
- Fundamentals
- Component Validation for Correct Operation
- Flow Amplifier Valve
- Pressure-Compensated Flow Control Valve
- Fundamental
- Brake System Main Component Identification
- Brake Pressure System
- Main System
- Service Brakes
- Park Brake
- Brake Accumulator Charging System
- Service Brake System
- Park Brake System
- Two-Stage Relief Valve (Pilot-Operated Relief Valve) Functional Description
- Pilot-Operated Selector Valves
- Function Description
- Pump Pressure Free Flow Side
- Function Pressure Blocked Flow Side
- Pressure-Reducer Valve Functional Description
- Component Location and Identification
- Main Control Valve
- Flow Path
- Main Manifold
- Priority Valve (A)
- Component Functionality Test
- Check Valve (L)
- Electrical Schematic and System Description
- Electrical Schematic
- Schematic Location Number
- Electrical Components
- Electrical Wires
- Wire Identification Number
- Electrical Wire Colors
- Wire Harnesses
- Harness Interconnection
- Electrical Connectors
- Connector Types
- Connector Identification
- Connector Pin Numbers
- Connector Description
- Fuses
- Relays
- Flyback Diodes
- CAN (Controller Area Network)
- Diagnostic
- Instrument Panel
- General Fault Finding
- Preparation
- Define the Problem Area
- Identify Possible Causes of Malfunction
- Determine the Most Probable Cause
- Fuse Check
- Wiring Check
- Component Check
- Repair and Test
- Wire Harness Identification and Connector Location
- Mast System
- Tilting
- Lifting
- Pilot Operated Check Valves
- Emergency Lowering Valve
- Lift Chains
- Elongation Through Wear
- Speed of Wear
- Plate Height Wear
- Lubrication
- Restoring the Oil Film
- Maintenance
- Maintaining the Presence of Oil
- Corrosion Protection
- Requirements for Chain Lubricant
- Load Rollers
- Bearing Blocks
- Carriage
- Standard Carriage With Manual Fork Positioning
- Standard Carriage With Hydraulic Fork Positioning
- Side Shift Apron Carriage With Manual Fork Positioning
- Side Shift Apron Carriage With Hydraulic Fork Positioning
- Dual Function Side Shift and Fork Positioning (DFSSFP) Carriage
- Dedicated Carriage for Container Attachment
- Directional Control Valve
- Forks
- Coil Ram
- Safety Procedures When Working Near Mast
- Before Starting Repairs to the Hydraulic System, Always
- Remove and Replace
- Hook-Type Fork
- Pin-Type Fork
- Hook-Type Coil Ram
- Pin-Type Coil Ram
- Fork Hanger, Dual Function Carriage
- Attachment Mounting
- Attachment Functions
- Extend and Retract
- Stop Cylinder
- Sideshift, Slew and Rotation
- Twist Locks
- Seated Pin
- Indicator Lights
- Twist Module
- ELME 812 Hydraulic System
- ELME Main Direction Control Valve
- Sideshift Circuit
- Slew Circuit
- Extension Cylinder Control Valve
- Extend and Retract Circuit
- Twist Lock Circuit
- Stop Cylinder Circuit
- Electrical System
- Printed Circuit Board
- PCB Sockets
- Cable Number
- Wire Number
- Wire Color Code
- Cable Connectors
- Sensors and Solenoids
- Automatic Locking
- Lift Interrupt
- Container Attachment
- Wear Pads
- Wear Pads Mounted on Main Frame
- Replace
- Wear Pads Mounted on Extension Beam
- Slew Cylinder
- Extension Cylinder
- Lift Truck Weights
- Mast Lift Height and Weight
- Carriage Weight
- Fork Weights
- Mast Speeds
- Tier 1
- Engine Specifications
- Hydraulic Specifications
- Capacities
- Transmission Oil Pressures
- Tire Sizes
- Engine
- Frame
- Transmission
- Drive Line and Axle
- Steering Cylinder
- Steering Axle
- Wheels and Hubs
- Spindles
- Wheel Nuts
- Brake System
- Hydraulic System
- Hydraulic Hose Torque Specifications
- Shuttle Valve
- Mast and Carriages
- Outer Mast
- Inner Mast
- Weights and Dimensions
- Loading Procedures
- Loading Complete Truck or Basic Truck on a Transport
- Loading Disassembled Components
- Unloading Procedures
- Unloading Complete Truck or Basic Truck From Transport
- Lifting a Truck
- Driving On/Off a Trailer
- Unloading Disassembled Components
- Truck Assembly
- Safety Procedures When Working Near the Mast
- Before Starting Repairs to the Hydraulic System Always
- Mast Assembly
- Installing Hose Sheaves
- Preparations
- Installing the Mast
- Installing the Tilt Cylinders
- Adjusting the Tilt Cylinder
- Connecting the Lift Cylinders
- Connecting the Mast Supply Hoses
- Carriage, Forks, and Attachment
- Install Carriage
- Install Pin-Type Forks
- Install Hook-Type Forks
- Install Attachment
- Lift Chain Adjustment
- Carriage Alignment
- Fork Height Adjustment
- Install Exhaust Extension
- Install Cab Lights
- Attach Mast Labels
- Lubricate
- AUTOMATED GREASING SYSTEM (OPTIONAL)
- Pre-Delivery
- Adjust Timing for Automatic Engine Shut Down
- Perform Pre-Delivery Inspection
- How to Move a Disabled Lift Truck
- How to Tow the Lift Truck
- Tires and Wheels
- Remove Wheels From Lift Truck
- Remove Tire From Wheel
- Remove Tire From Five-Piece Wheel
- Install Tire on Wheel
- Install Tire on Five-Piece Wheel
- Add Air Pressure to Tires
- Solid Rubber Tire, Change
- Install Wheels on Lift Truck
- Tires and Tire Pressure
- Clutch Calibration Condition Messages
- Fault Codes During Clutch Calibration
- APC200 Fault Codes
- Pressure Feedback Sensor
- MCC Heater and Air Conditioner
- Heater System
- Air Conditioning
- Dryer
- Compressor Lubrication
- Control Systems, Sensors, and Switches
- Climate Control
- Service Menu
- Set Up
- View 1 and View 2
- Error List
- Statistics
- Water Valve
- Standard Heater Assembly
- Standard Heater Parts Replacement
- Heater Core
- Blower
- Push/Pull Cable Replacement
- Water Valve Cable
- Heater/Air Conditioner Assembly
- Heater/Air Conditioner Parts Replacement
- Vent Door
- Evaporator Core
- Serial Number Data
- How to Tow a Lift Truck
- How to Put Lift Truck on Blocks
- How to Raise Drive Tires
- How to Raise Steering Tires
- How to Clean a Lift Truck
- Truck Maintenance Schedule
- Truck Maintenance Procedures Every 8 Hours or Daily
- How to Make Checks With the Engine Stopped
- Warning and Safety Labels
- Forks, Mast, Carriage, Lift Chains, and Attachments
- Header Hose Assembly
- Hydraulic Tank Breather
- Fuel, Oil, or Coolant Leaks
- Air Intake Piping and Charge Air Piping
- Drive Belts
- Engine Compartment
- Radiator Sections for Engine Coolant, Charge Air Cooler, and Transmission and Hydraulic Oil
- Windshield Washer Fluid
- Hydraulic System Oil
- Engine Oil
- Coolant Level
- How to Make Checks With Engine Running
- Operator Restraint System
- Safety Belt and Seat Rails
- Steering Column Latch
- Gauges, Lights, and Horn
- Fuses and Relays
- Operator Presence System Disable Switch
- Transmission Calibration Switch
- Windows and Mirrors
- High Exhaust System Temperature Light
- Engine Air Filter
- Fuel Filter/Water Separator
- How to Add Fuel to the Lift Truck
- Control Levers and Pedals
- Parking Brake
- Lift System Operation
- Attachments
- Signals From the Spreader Control System
- Operator Presence System
- Transmission Oil
- Diagrams, Schematics or Arrangements
- Figure 1. Electrical Schematic, Tier 3
- Figure 2. Electrical Schematic, Tier 4
- Figure 3. Electrical Schematic - 25-32T Tier 3
- Figure 4. Electrical Schematic - 25-32T Tier 4i
- Figure 5. Hydraulic Schematic
- Figure 6. Main Control Valve Schematic, Item 1
- Figure 7. Counter Balance Valves, Item 2
- Figure 8. Lowering Control Valves, Item 3
- Figure 9. Steering Feedback Valve, Item 4
- Figure 10. Flow Amplifier Valve, Item 5
- Figure 11. Steering Control Unit, Item 6
- Figure 12. Primary Variable Displacement Pump, Item 7
- Figure 13. Secondary Variable Displacement Pump, Item 8
- Figure 14. Brake Cooling Valve, Item 9
- Figure 15. Brake Treadle Valve, Item 10
- Figure 16. Brake Flow Distribution Manifold, Item 11
- Figure 17. Hydraulic Schematic, Standard Carriage - W/Individual Fork Positioning
- Figure 18. Hydraulic Schematic, Container Attachment
- Figure 19. Hydraulic Schematic, Dual SS/FP Carriage +6th Functions
- Figure 20. Hydraulic Schematic, SS Apron Carriage W/Fork Positioning
- Figure 21. Hydraulic Schematic, Standard Carriage w/o Fork Positioning
- Figure 22. Transmission Hydraulic Schematic
- Calibration
- Calibrating the Lever With the Hydraulic User Interface Program
- Calibrating the Joystick With the Hydraulic User Interface Program
- Calibrating the Lever Without the Hydraulic User Interface Program
- Calibrating the Joystick Without the Hydraulic User Interface Program
- Controller Pinning
- General Functions of the Interface
- Main Functional Requirements
- What is Needed for the Hydraulic User Interface Program
- Installation of the Program
- Start Screen
- Reminder Screen
- Basic Screen Layout of the Hydraulic User Interface Program
- Truck Configuration Screen
- Mode Definition Screen
- Default Flow Settings Screen
- Load Moment Interrupt Screen
- Features Screen
- Dynamic Control Screen
- Loaded Speed Reduction Screen
- Temperature Protection Screen
- Anti-Stall Screen
- Drive Over Lift (DOL)
- ECO elo
- Throttle Up On Hoist Lift
- Calibration Screen
- Calibrating the Connected Levers/Joystick Without the Interface Software
- Calibrating the Connected Levers/Joystick With the Interface Software
- Profile Configuration Screen
- Flow Settings Screen
- Valve Settings Screen
- Diagnostic Screen
- Active Errors Screen
- Error History Screen
- All Parameters Screen
- Installing the Hydraulic Controller Software and Read-Only Parameter File
- Grease Pump Assembly
- Reservoir
- Controller
- Pump
- 5/2 Solenoid Valve
- Divider Block
- Greasing Cycle
- Stage 1 Pumping
- Stage 2 Pressure Retaining
- Stage 3 Pressure Decreasing
- Stage 4 Pause
- Display
- Control LED's
- 3-Digit Display
- Start Up
- Selected Duty Cycle
- Decimal Dot
- Low Grease Level
- Test Being Performed
- Fault Code
- Switch Button
- Changing the duty cycle
- Test Cycle Selection
- Activating a Single Test Cycle
- Activating Multiple Test Cycles
- Resetting Fault Codes
- Electrical
- Grease Line Identification
- Periodic Maintenance
- Grease Recommendations
- Filter Replacement
- Refilling the Grease Reservoir
- Test Cycles Using the Button on the Pump
- Bleeding the Pump
- Bleeding the System
- Pump Assembly
- Grease Reservoir
- Minimum-Level Switch
- Checking the Level-Switch
- Replacing the Level-Switch
- Clutch Release
- Neutral Selection
- APC216 Controller
- Fault Rectification
- Oil Pressure Check
- Check by Air Pressure
- Pressure Sensor
- APC216 Display Information
- Exterior Components
- Removal for B236 and C214 series trucks
- Removal for G008 series trucks
- Torque Converter and Housing
- Rear Cover
- Install – Preparation
- Install for G008 series trucks
- Install for B236 and C214 series trucks
Inside this manual
Real pages from this service manual (1,697 pages). Open the sample pages (PDF, 466 KB)

- Troubleshooting, page 538: Troubleshooting
- Specifications, page 1,032: Lift Truck Weights
- Diagram, page 1,344: Figure 4. Electrical Schematic - 25-32T Tier 4i (Sheet 24 of 24)
- Color page: Figure 15. Hydraulic Components Location
- Color page: The different speed ratios between input shaft and drive
- Foldout diagram (color): Figure 6. Main Control Valve Schematic, Item 1
This is a service manual
Here's how it compares to the other manual types.
Service manual
Factory repair procedures and technical information such as specifications, troubleshooting, and wiring and hydraulic diagrams, for the models and systems the manual covers. See What's inside for its topics.
Operator's manual
Safe operation, controls, maintenance schedules, lubrication points, inspections, and basic checks. Repair procedures are in the service manual.
Parts manual
Illustrated diagrams with factory part numbers for identifying components and ordering parts. Repair procedures are in the service manual.
Engine service manuals are sometimes sold separately, since certain machine models were offered with more than one engine option.
What it's used for
Factory manual for in-house farm and construction shop use. Straightforward, complete, and easy to follow. It contains the OEM information dealership service departments and parts counters use to diagnose problems, identify components, and perform maintenance or repairs correctly.
Service shops and owner/operators who repair their own equipment
Identifying correct parts and seeing how assemblies come apart and go back together
Keeping equipment running with less downtime
Factory manual, 1,697 pages
Quantity one is the manual described above.
Fast free USA shipping
Ships in 1 business day.
60-day returns
Free if the mistake is ours. A manual ordered in error must come back unopened in its shrink-wrap; you pay return shipping and a 20% restocking fee applies. Return policy
Binder not included
Manuals over about 300 pages may need a standard 3-ring binder, which you can buy locally to keep the pages organized for shop use.
Other editions and similar models
Questions about model, serial number, engine coverage or contents? Contact us before purchasing and we'll help confirm it's the right manual. Please verify the manual type, machine model, serial number range and engine coverage before purchasing: manuals ordered in error carry a 20% restocking fee (return policy).