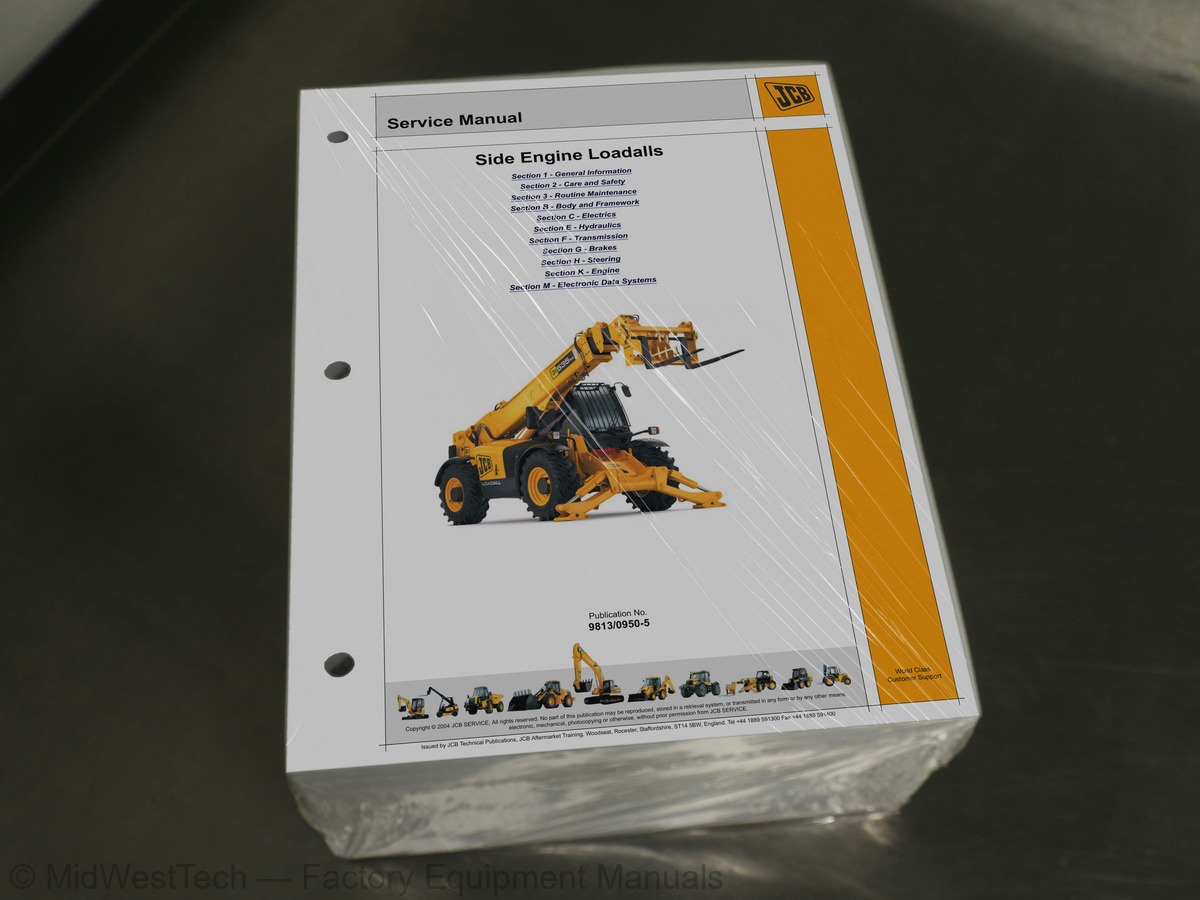
JCB Side Engine Loadall 540-170, 540-140, 535-125 Hi Viz, 535-140 Hi Viz, 540-200 Telehandler Service Manual
2,187 pages · Publication 9813-0950-5
Added to your cart. View cart
- Models
- Side Engine Loadall 540-170, 540-140, 535-125 Hi Viz, 535-140 Hi Viz, 540-200
- Serial coverage
- from SN 1522578 to TBA, from 1522579 to TBA, from 1522591 to TBA
- Manual type
- Service Manual
- Pages
- 2,187
- Publication
- 9813-0950-5
- Condition
- Brand new
What's inside
From the manual's own table of contents: 256 topics. See sample pages (PDF, 445 KB)
- Introduction
- Scope
- Format
- Left and Right Sides
- Hydraulic Schematic Codes
- Related Topics
- Machine Identification Plate
- Component Identification Plates
- Zinc Plated Fasteners and Dacromet Fasteners
- Hydraulic Connections
- `Positional Type' Hydraulic Adaptors
- Numerical List
- Tool Detail Reference
- Rivet Nuts
- Slide Hammer Kit
- Sealing and Retaining Compounds
- Acceptable and Unacceptable Fuels
- Specifications
- Important Information
- Safety Check List
- Safety Decals
- Parking the Machine and Making it Safe
- Boom Safety Strut (P1)
- Boom Safety Strut (P2)
Show all 256 topics
- Venting the Hydraulic Pressure
- Venting the Brake System Pressure
- Connecting/Disconnecting Hydraulic Hoses
- Quick Release Couplings
- Hydraulic Contamination
- Battery Disconnection/Connection
- Battery Charging System Precautions
- Removing and Replacing Components
- Hydraulic Rams
- Gas Hydraulic Bladder Accumulators
- Table
- Applicability
- Service Requirements
- Health and Safety
- Service Schedules
- Fluids, Lubricants and Capacities
- Prepare the Machine for Maintenance
- Cleaning the Machine
- Checking for Damage
- Greasing
- Access Panels
- Cab Heater and Air Conditioning
- Boom
- Brakes
- Electrical System
- Engine
- Fuel System
- Hydraulic System
- Transmission
- Tyres and Wheels
- Wheel Alignment
- Wear Pads
- Windscreen Washer
- Fire Extinguisher (if fitted)
- Removal and Replacement
- Component Location
- Operation Overview
- Electrical Operation and Schematics
- Fault Finding
- Refrigerant
- Component Locations
- Fault Finding and Diagnostics
- Test Procedures
- Compressor Drive Belt - Adjustment
- Hydraulic Operation and Schematics
- LLMI - Calibration
- LLMI Tests
- LLMC Tests
- Logic Sequence
- Freeze Thermostat (HVAC Unit)
- Removal and Replacement (P1)
- Removal and Replacement (P2)
- Removal and Replacement (P3)
- Heater Air Intake (Snorkel)
- Testing
- Wear Pads and Shims
- Angle Indicator Removal and Replacement
- Pivot Shims
- Boom Rear Cover
- Boom Removal and Replacement
- Dismantling and Assembly
- Boom Clearances and Wear Pad Shims
- Chain Maintenance
- Extension Chains Removal and Replacement
- Retraction Chains Removal and Replacement
- Initial Chain Set Up
- Pivot Clearance
- Dismantle and Assemble
- Hose Removal and Replacement
- Leg Removal and Replacement (P1)
- Leg Removal and Replacement (P2)
- Leg Removal and Replacement (P3)
- Frame Removal and Replacement
- Checking Pressure Switch Operation
- Spool Sensors (Parallel Machines)
- Boom Mounted Inclinometer P1
- Boom Mounted Inclinometer P2
- Boom Mounted Inclinometer P3
- Boom Mounted Inclinometer P4
- Chassis Mounted Inclinometer P1
- Chassis Mounted Inclinometer P2
- Chassis Mounted Inclinometer P3
- Chassis Mounted Inclinometer P4
- Chassis Mounted Inclinometer P5
- Boom Retract Sensor
- Boom Extended Sensor
- Access and Location
- Fuses - SD, SE, SF Engines 3 Stage Boom (S1)
- Fuses - SD, SE, SF Engines 3 Stage Boom (S2)
- Fuses - SD, SE, SF Engines 4 Stage Boom (S3)
- Fuses - SF Engines 5 Stage Boom (S4)
- Link Box Fuses - SD, SF Engines
- Link Box Fuses - SE Engines
- Relays - SD, SE, SF Engines 3 Stage Boom (S1)
- Relays - SD, SE, SF Engines 3 Stage Boom (S2)
- Relays - SD, SE, SF Engines 4 Stage Boom (S3)
- Relays - SF Engine 5 Stage Boom (S4)
- Fusebox Pin Number Identification
- Relay Base Pin Number Identification
- Overview
- Applications
- Electrical Schematic
- Earth Points
- Wire Numbers and Functions
- Harness Interconnections and Drawings
- Wiring Harness Repair
- Removal, Inspection and Replacement
- Maintenance
- Disconnection and Connection
- Removal and Replacement (S1)
- Removal and Replacement (S2)
- Removal and Replacement (S3)
- Systems
- Schematics - Machines with Dual Lever Controls
- Schematics - LLMC Machines with Servo Controls
- Schematics - Machines with Electro Servo Controls
- Interlock Characteristics
- Parallel Lift (S1)
- Parallel Lift (S2)
- Descriptions
- Lift Pressure Balance System (S1)
- Lift Pressure Balance System (S2)
- Tilt/Lift/Extension Ram Counterbalance Valves (S1)
- Extension Ram Counterbalance Valves (S2)
- Checking Pump Flow
- Dismantle, Inspection and Assemble
- Steering Priority Valve
- Removal and Replacement - Single Ram (P1)
- Removal and Replacement - Single Ram (P2)
- Removal and Replacement - Single Ram (P3)
- Removal and Replacement - Twin Rams, 2 Stage Boom
- Removal and Replacement - Twin Rams, 3 Stage Boom
- Removal and Replacement - Twin Rams, 5 Stage Boom
- Removal and Replacement - 2 Stage Boom (P1)
- Removal and Replacement - 2 Stage Boom (P2)
- Removal and Replacement - 2 Stage Boom (P3)
- Removal and Replacement - 3, 4 and 5 Stage Boom
- Removal and Replacement - 3 Stage Boom Outer Ram
- Removal and Replacement - 4 Stage Boom Outer Ram
- Removal and Replacement - 4 Stage Boom Inner Ram
- Removal and Replacement - 5 Stage Boom Ram
- Single Piston Rams
- Piston Head Retention
- Twin Piston, 4 Stage Boom Outer Ram
- Extension Ram Make-Up Valve (if fitted)
- Component Location and Identification
- Electrical Connectors
- Bleed Procedure
- Component Identification
- Renewing the Pinion Oil Seal
- Removal and Replacement - SD80 Fixed Axle
- Removal and Replacement - SD80 Pivot Sway Axle
- Removal and Replacement - SD80 Trunnion Sway Axle
- Dismantle, Inspection and Assembly
- Component Identification - 1 Piece Axle
- Component Identification - 3 Piece Axle
- Removal and Replacement - SD80 Pivot Axle
- Removal and Replacement - SD80 Trunnion Axle
- Drive Paths
- Clutch Operation Overview
- Forward and Reverser Clutch Operation
- Mainshaft and Layshaft Clutch Operation
- and 4 Wheel Drive Clutch (4WD Spring ON) Operation (if fitted)
- Electronic Fault Codes
- Gearbox `Limp Modes' (Powershift Electronic Control)
- Transmission Technical Data Check List
- Pressure and Flow Tests
- Procedure
- Oil Pressure Switch - Removal and Replacement
- Solenoid Control Valves - Removal and Replacement
- Wheel Drive Yoke and Oil Seal - Removal and Replacement
- Gearbox Removal and Replacement
- Gearbox Dismantle, Inspection and Assembly
- Solenoid Control Valve Cartridge - Solenoid Coil
- Solenoid Control Valve Cartridge - Twin Fixing Type
- Oil Pressure Switch
- Oil Temperature Switch (P1)
- Oil Temperature Switch (P2)
- Removal, Testing and Replacement
- Specifications (S1)
- Specifications (S2)
- Axle Breather (Braked Axles) - Inspection
- Bleeding
- Brake Light Switch (Proximity Type)
- Brake Light Switch (Reed Type)
- Lever Adjustment
- Switch Adjustment
- Renewing the Brake Pads
- Renewing the Parkbrake Cable
- Adjustment
- Re-phasing the Road Wheels
- Bleeding the System
- Proximity Switch - Setting
- Electrical Operation and Schematics - Indicated System (if fitted)
- Removal and Replacement (S4)
- Link Arms
- Removal and Replacement (P4)
- Renewing the Brush Gear
- Renewing the Starter Solenoid
- Separating the Engine and Bevel Box
- Service Hours Reset
- General ‘D’ Codes
- Transmission ‘T’ Codes
- Powertrain ‘P’ Codes
- Constant Auxiliary ECU ‘A’ Codes
- HVCS ‘H’ Codes
- Machine Control ECU ‘L’ Codes
- Cab Area ‘B’ Codes
- Chassis ‘C’ Codes
- CANbus ‘U’ Codes
- RAS “S” Codes
- Electronic Engine SE Engine ECU Codes
- Electronic Engine SH/SL/DH Engine ECU Codes
- Why Use ServiceMaster?
- What is Servicemaster?
- How to Set-up Servicemaster
- Tool Suite
- Diagnostics Connector
- Servicemaster Machine Selection
- JCB DieselMax (4.4L Tier 3 SE) Diagnostics Tool - User Guide
- JCB DieselMax (4.4L Tier 3 SE) Engine Setup - User Guide
- Loadall Cluster (LMS) Setup - User Guide
- Loadall Datalogger - User Guide
- User Guide
- Boom Angle Sensor Calibration - User Guide
- Location (S1)
- Location (S2)
- Wires and Connectors
- Removal and Replacement Guide (P1)
- Removal and Replacement Guide (P2)
- Location
- Removal and Replacement Guide
Inside this manual
Real pages from this service manual (2,187 pages). Open the sample pages (PDF, 445 KB)
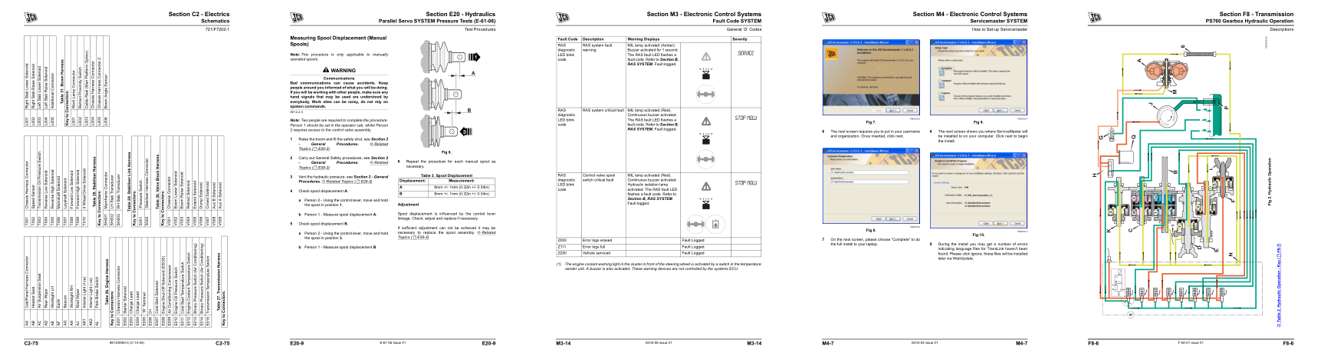
- Diagram, page 750: Section C2 - Electrics
- Specifications, page 1,146: Section E20 - Hydraulics
- Troubleshooting, page 1,971: Section M3 - Electronic Control Systems
- Color page, page 2,052: Section M4 - Electronic Control Systems
- Color page, page 1,459: Section F8 - Transmission
This is a service manual
Here's how it compares to the other manual types.
Service manual
Factory repair procedures and technical information such as specifications, troubleshooting, and wiring and hydraulic diagrams, for the models and systems the manual covers. See What's inside for its topics.
Operator's manual
Safe operation, controls, maintenance schedules, lubrication points, inspections, and basic checks. Repair procedures are in the service manual.
Parts manual
Illustrated diagrams with factory part numbers for identifying components and ordering parts. Repair procedures are in the service manual.
Engine service manuals are sometimes sold separately, since certain machine models were offered with more than one engine option.
What it's used for
Factory manual for in-house farm and construction shop use. Straightforward, complete, and easy to follow. It contains the OEM information dealership service departments and parts counters use to diagnose problems, identify components, and perform maintenance or repairs correctly.
Service shops and owner/operators who repair their own equipment
Identifying correct parts and seeing how assemblies come apart and go back together
Keeping equipment running with less downtime
Factory manual, 2,187 pages
Quantity one is the manual described above.
Fast free USA shipping
Ships in 1 business day.
60-day returns
Free if the mistake is ours. A manual ordered in error must come back unopened in its shrink-wrap; you pay return shipping and a 20% restocking fee applies. Return policy
Binder not included
Manuals over about 300 pages may need a standard 3-ring binder, which you can buy locally to keep the pages organized for shop use.
Other editions and similar models
Questions about model, serial number, engine coverage or contents? Contact us before purchasing and we'll help confirm it's the right manual. Please verify the manual type, machine model, serial number range and engine coverage before purchasing: manuals ordered in error carry a 20% restocking fee (return policy).