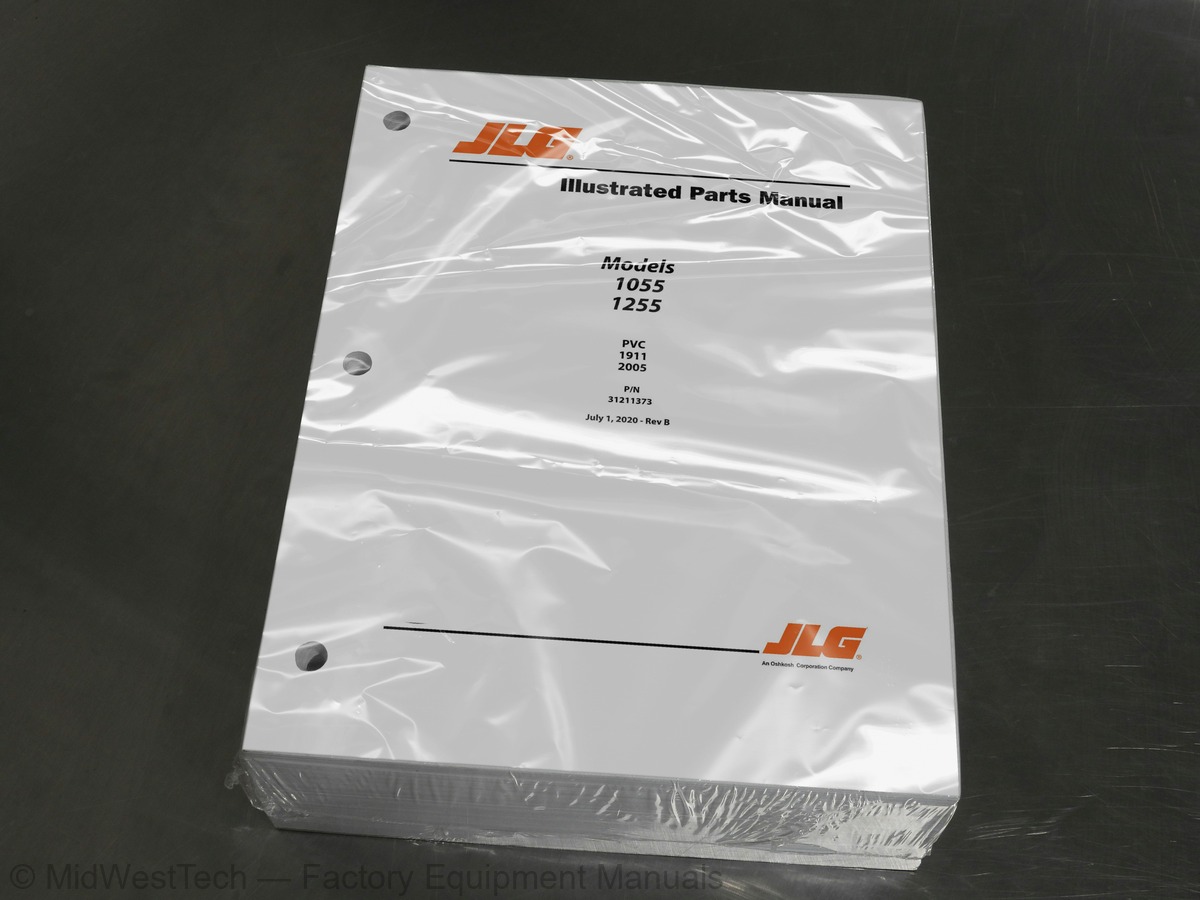
JLG 1055, 1255 Telehandler Parts Manual
1,278 pages · Publication 31211373
Added to your cart. View cart
What's inside
From the manual's own table of contents: 235 sections, 530 entries. See sample pages (PDF, 563 KB)
General59 topics
- SECTION 1 - FRAME AND ATTACHING PARTS
- FIGURE 1-1. FRAME COVER INSTALLATION (ULS)
- FIGURE 1-2. FRAME COVER INSTALLATION (LS)
- FIGURE 1-3. ENGINE MOUNTING INSTALLATION
- FIGURE 1-4. ENGINE ENCLOSURE INSTALLATION
- FIGURE 1-5. ENGINE ENCLOSURE COVER INSTALLATION
- FIGURE 1-6. HOOD ASSEMBLY
- FIGURE 1-7. TANK INSTALLATION
- FIGURE 1-8. FUEL TANK INSTALLATION
- FIGURE 1-9. HYDRAULIC TANK INSTALLATION
- FIGURE 1-10. OUTRIGGERS INSTALLATION
- FIGURE 1-11. COUNTERWEIGHT INSTALLATION - 1055
- FIGURE 1-12. COUNTERWEIGHT INSTALLATION - 1255
- FIGURE 1-13. MIRROR INSTALLATION
- SECTION 2 - BOOM
- FIGURE 2-1. BOOM ASSEMBLY - 1055
- FIGURE 2-2. BOOM ASSEMBLY - 1255
- FIGURE 2-3. FIRST BOOM ASSEMBLY - 1055
- FIGURE 2-4. FIRST BOOM ASSEMBLY - 1255
- FIGURE 2-5. SECOND BOOM ASSEMBLY - 1055
- FIGURE 2-6. SECOND BOOM ASSEMBLY - 1255
- FIGURE 2-7. THIRD BOOM ASSEMBLY - 1055
- FIGURE 2-8. THIRD BOOM ASSEMBLY - 1255
- FIGURE 2-9. FOURTH BOOM ASSEMBLY - 1055
- FIGURE 2-10. FOURTH BOOM ASSEMBLY - 1255
- FIGURE 2-11. EXTEND CYLINDER PINS INSTALLATION
- FIGURE 2-12. SECOND BOOM SECTION EXTEND CHAIN INSTALLATION - 1055
- FIGURE 2-13. SECOND BOOM SECTION EXTEND CHAIN INSTALLATION - 1255
- FIGURE 2-14. THIRD BOOM SECTION EXTEND CHAIN INSTALLATION
- FIGURE 2-15. SECOND BOOM SECTION RETRACT CHAIN INSTALLATION - 1055
- FIGURE 2-16. SECOND BOOM SECTION RETRACT CHAIN INSTALLATION - 1255
- FIGURE 2-17. THIRD BOOM SECTION RETRACT CHAIN INSTALLATION - 1055
- FIGURE 2-18. THIRD BOOM SECTION RETRACT CHAIN INSTALLATION - 1255
- FIGURE 2-19. CHAIN SHEAVE ASSEMBLY
- FIGURE 2-20. CHAIN SHEAVE ASSEMBLY
- FIGURE 2-21. CHAIN SHEAVE ASSEMBLY
- FIGURE 2-22. CHAIN SHEAVE ASSEMBLY
- FIGURE 2-23. BOOM PINNING INSTALLATION
- FIGURE 2-24. BOOM PIVOT INSTALLATION
- FIGURE 2-25. LIFT CYLINDER INSTALLATION
- FIGURE 2-26. COMPENSATION CYLINDER INSTALLATION
- FIGURE 2-27. BOOM BRUSHES INSTALLATION
- FIGURE 2-28. BOOM ANGLE INDICATOR INSTALLATION
- FIGURE 2-29. MANUAL QUICK COUPLER INSTALLATION
- FIGURE 2-30. HYDRAULIC QUICK COUPLER INSTALLATION
- FIGURE 2-31. BOOM PIN INSTALLATION
- FIGURE 2-32. TILT CYLINDER PIN INSTALLATION
- FIGURE 2-33. QUICK COUPLER ASSEMBLY
- FIGURE 2-34. BOOM PROP INSTALLATION (ANSI)
- FIGURE 2-35. BOOM PROP INSTALLATION (CANADA)
- FIGURE 2-36. BOOM PROP BRACKET
- SECTION 3 - ATTACHMENTS
- FIGURE 3-1. CARRIAGE ASSEMBLY (50 INCH) (PVC 1911)
- FIGURE 3-2. CARRIAGE ASSEMBLY (50 INCH) (PVC 2005)
- FIGURE 3-5. CARRIAGE ASSEMBLY (72 INCH) (PVC 1911)
- FIGURE 3-6. CARRIAGE ASSEMBLY (72 INCH) (PVC 2005)
- FIGURE 3-7. SIDE TILT CARRIAGE ASSEMBLY (50 INCH) (PVC 1911)
- FIGURE 3-8. SIDE TILT CARRIAGE ASSEMBLY (50 INCH) (PVC 2005)
- FIGURE 3-9. SIDE TILT CARRIAGE ASSEMBLY (60 INCH) (PVC 1911)
Show all 236 sections
FIGURE 3-76. ROTATING DRYWALL CARRIAGE60 topics
- FIGURE 3-77. DRYWALL BOARD HANDLER
- FIGURE 3-78. PIVOT FRAME GROUP
- FIGURE 3-79. DRYWALL CYLINDER
- FIGURE 3-80. DRYWALL HYDRAULIC GROUP
- FIGURE 3-81. DRYWALL VALVE ASSEMBLY
- FIGURE 3-82. DRYWALL CYLINDER
- FIGURE 3-83. DRYWALL FORK GROUP
- FIGURE 3-84. MULTI-PURPOSE GRAPPLE BUCKET (2450 MM)
- FIGURE 3-85. SIDE TILT CARRIAGE ASSEMBLY (60 INCH) (PVC 2005)
- SECTION 4 - ENGINE AND ATTACHING PARTS
- FIGURE 4-1. ENGINE INSTALLATION (ULS)
- FIGURE 4-2. ENGINE INSTALLATION (LS)
- FIGURE 4-6. FUEL LINES INSTALLATION (ULS)
- FIGURE 4-7. FUEL LINES INSTALLATION (LS)
- FIGURE 4-8. PRIMARY FUEL FILTER INSTALLATION (ULS)
- FIGURE 4-9. PRIMARY FUEL FILTER INSTALLATION (LS)
- FIGURE 4-10. FUEL TANK ASSEMBLY
- FIGURE 4-11. COOLING PACKAGE INSTALLATION (ULS)
- FIGURE 4-12. COOLING PACKAGE INSTALLATION (LS)
- FIGURE 4-13. RADIATOR COOLING PACKAGE
- FIGURE 4-14. HOC LINES INSTALLATION
- FIGURE 4-15. COOLANT LINES INSTALLATION (ULS)
- FIGURE 4-16. COOLANT LINES INSTALLATION (LS)
- FIGURE 4-17. CAC LINES INSTALLATION (ULS)
- FIGURE 4-18. CAC LINES INSTALLATION (LS)
- FIGURE 4-19. TOC LINES INSTALLATION
- FIGURE 4-20. SURGE TANK INSTALLATION
- FIGURE 4-21. FAN INSTALLATION
- FIGURE 4-22. FAN GUARD INSTALLATION
- FIGURE 4-23. AIR INTAKE LINES INSTALLATION (ULS)
- FIGURE 4-24. AIR CLEANER LINES INSTALLATION (LS)
- FIGURE 4-25. AIR CLEANER INSTALLATION (ULS)
- FIGURE 4-26. AIR CLEANER INSTALLATION (LS)
- FIGURE 4-27. AIR CLEANER ASSEMBLY (90/100KW)
- FIGURE 4-28. AIR INTAKE DUCT INSTALLATION
- FIGURE 4-29. EXHAUST INSTALLATION (ULS)
- FIGURE 4-30. EXHAUST INSTALLATION (LS)
- FIGURE 4-31. MUFFLER INSTALLATION (LS)
- FIGURE 4-32. DEF LINES INSTALLATION
- FIGURE 4-33. DEF PUMP LINES INSTALLATION
- FIGURE 4-34. DEF TANK INSTALLATION
- FIGURE 4-35. DEF PUMP AND CONTROL INSTALLATION
- FIGURE 4-36. UREA PUMP
- FIGURE 4-37. DEF TANK ASSEMBLY
- FIGURE 4-38. DEF BREATHER VALVE
- FIGURE 4-39. ENGINE PARTS INSTALLATION (NO HEATER)
- FIGURE 4-40. ENGINE PARTS INSTALLATION (HEATER)
- FIGURE 4-41. A/C PUMP INSTALLATION (ULS)
- FIGURE 4-42. A/C PUMP INSTALLATION (LS)
- FIGURE 4-43. A/C LINES INSTALLATION
- FIGURE 4-44. FUEL CAP ASSEMBLY
- FIGURE 4-45. HEATER BREATHER
- FIGURE 4-46. AIR INTAKE SHUT OFF VALVE INSTALLATION
- SECTION 5 - DRIVE TRAIN
- FIGURE 5-1. DRIVE TRAIN INSTALLATION
- FIGURE 5-2. FRONT AXLE INSTALLATION
- FIGURE 5-3. FRONT AXLE MOUNTING INSTALLATION
- FIGURE 5-4. FRONT AXLE
- FIGURE 5-5. FRONT AXLE, CENTRAL HOUSING
- FIGURE 5-6. FRONT AXLE, DIFFERENTIAL
FIGURE 5-73. TRANSMISSION, FILTER49 topics
- FIGURE 5-74. TRANSMISSION, OIL DIPSTICK
- FIGURE 5-75. TRANSMISSION, ACCESSORIES
- FIGURE 5-76. TRANSMISSION, TRANSFER BOX HOUSING 1
- FIGURE 5-77. TRANSMISSION, TRANSFER BOX HOUSING 2
- FIGURE 5-78. TRANSMISSION, TRANSFER BOX HOUSING INPUT
- FIGURE 5-79. TRANSMISSION, TRANSFER BOX HOUSING OUTPUT 1
- FIGURE 5-80. TRANSMISSION, TRANSFER BOX HOUSING OUTPUT 2
- FIGURE 5-81. LSI AXLE SENSOR INSTALLATION
- FIGURE 5-85. TIRE/WHEEL RIGHT ASSEMBLY 14-24 16PR - AIR
- FIGURE 5-86. TIRE/WHEEL LEFT ASSEMBLY 14-24 16PR - AIR
- FIGURE 5-91. TIRE AND WHEEL ASSEMBLY - 400/75-28 - FOAM FILLED
- FIGURE 5-99. FENDER INSTALLATION
- FIGURE 5-100. WHEEL CHOCK INSTALLATION
- FIGURE 5-101. TOOLBOX INSTALLATION
- FIGURE 5-102. TIRE/WHEEL SET 400/75-28 - PNEU NON MARKING
- FIGURE 5-103. TIRE/WHEEL ASSEMBLY 400/75-28 - PNEU NON MARKING
- FIGURE 5-105. TIRE/WHEEL ASSEMBLY 400/75-28 - FF NON MARKING
- SECTION 6 - CAB
- FIGURE 6-1. CAB MOUNTING
- FIGURE 6-2. CAB MOUNTS INSTALLATION
- FIGURE 6-3. FRONT CAB OUTRIGGER INSTALLATION
- FIGURE 6-4. CAB FENDER INSTALLATION
- FIGURE 6-5. CAB FENDER INSTALLATION REAR (LH)
- FIGURE 6-6. CAB GUARD INSTALLATION (TOP)
- FIGURE 6-7. CAB GUARD INSTALLATION (FRONT)
- FIGURE 6-8. CAB GUARD INSTALLATION (TOP AND FRONT)
- FIGURE 6-9. OROPS CAB INSTALLATION
- FIGURE 6-10. EROPS CAB INSTALLATION
- FIGURE 6-11. LSI ENCLOSED CAB INSTALLATION
- FIGURE 6-12. LSI OPEN CAB INSTALLATION
- FIGURE 6-13. CAB, TRIM KIT
- FIGURE 6-14. CAB, TRIM KIT
- FIGURE 6-15. CAB, EPD CAULK
- FIGURE 6-16. OPEN CAB ASSEMBLY
- FIGURE 6-17. OPEN CAB PLUG GROUP
- FIGURE 6-18. OPEN CAB, LSI DISPLAY INSTALLATION (PVC 2005)
- FIGURE 6-19. ENCLOSED CAB ASSEMBLY
- FIGURE 6-20. REAR WINDOW INSTALLATION
- FIGURE 6-21. DOOR INSTALLATION
- FIGURE 6-22. ENCLOSED CAB PLUG GROUP
- FIGURE 6-23. LSI DISPLAY INSTALLATION
- FIGURE 6-24. BASIC MIRROR INSTALLATION
- FIGURE 6-25. FRONT COVER INSTALLATION
- FIGURE 6-26. LEVEL INDICATOR INSTALLATION
- FIGURE 6-27. FRONT WIPER INSTALLATION
- FIGURE 6-28. WASHER TANK INSTALLATION
- FIGURE 6-29. REAR WINDOW INSTALLATION (WO/WIPER) (ANSI)
- FIGURE 6-30. REAR WINDOW INSTALLATION (WO/WIPER) (ISO)
- FIGURE 6-31. REAR WINDOW INSTALLATION (WO/WIPER) (ENG/SPAN)
FIGURE 8-1. MAIN HYDRAULICS INSTALLATION65 topics
- FIGURE 8-2. STEER SELECT VALVE INSTALLATION
- FIGURE 8-3. STEERING SELECT VALVE ASSEMBLY
- FIGURE 8-4. PRIORITY FUNCTION MANIFOLD INSTALLATION
- FIGURE 8-5. PRIORITY FUNCTION MANIFOLD VALVE ASSEMBLY
- FIGURE 8-6. PRIORITY FUNCTION MANIFOLD VALVE ASSEMBLY
- FIGURE 8-7. MAIN CONTROL VALVE INSTALLATION
- FIGURE 8-8. MAIN CONTROL VALVE ASSEMBLY
- FIGURE 8-9. FRAME LEVEL AND OUTRIGGER VALVE INSTALLATION
- FIGURE 8-10. FRAME LEVEL AND OUTRIGGER VALVE ASSEMBLY
- FIGURE 8-11. FRAME HYDRAULIC INSTALLATION
- FIGURE 8-12. CAB HYDRAULIC INSTALLATION
- FIGURE 8-13. BOOM HYDRAULIC INSTALLATION
- FIGURE 8-14. ENGINE BAY HYDRAULIC INSTALLATION
- FIGURE 8-15. PISTON PUMP INSTALLATION
- FIGURE 8-16. PISTON PUMP ASSEMBLY (PVC 1911)
- FIGURE 8-17. PISTON PUMP ASSEMBLY (PVC 2005)
- FIGURE 8-18. BOOM HYDRAULIC TUBES INSTALLATION
- FIGURE 8-19. BOOM AUXILIARY HYDRAULIC INSTALLATION
- FIGURE 8-20. BOOM AUXILIARY HYDRAULIC WITH HYDRAULIC COUPLER
- FIGURE 8-21. FRAME LEVEL INSTALLATION
- FIGURE 8-22. REAR AXLE STABILIZER INSTALLATION
- FIGURE 8-23. REAR AXLE STABILIZER CYLINDER INSTALLATION
- FIGURE 8-24. LIFT CYLINDER VALVE INSTALLATION, NO RIDE CONTROL
- FIGURE 8-25. RIDE CONTROL INSTALLATION - 1055
- FIGURE 8-26. RIDE CONTROL INSTALLATION
- FIGURE 8-27. RIDE CONTROL HYDRAULIC LINES
- FIGURE 8-28. COUNTERBALANCE VALVE HYDRAULIC LINES (LIFT - RIDE CONTROL) (
- FIGURE 8-29. FRAME LEVEL CYLINDER INSTALLATION
- FIGURE 8-30. EXTEND/RETRACT CYLINDER INSTALLATION
- FIGURE 8-31. LIFT CYLINDER INSTALLATION - 1055
- FIGURE 8-32. LIFT CYLINDER INSTALLATION - 1255
- FIGURE 8-33. QUICK COUPLER VALVE ASSEMBLY
- FIGURE 8-34. FRONT AXLE LINES INSTALLATION
- FIGURE 8-35. REAR AXLE LINES INSTALLATION
- FIGURE 8-36. VALVE ASSEMBLY
- FIGURE 8-37. CHECK VALVE ASSEMBLY
- FIGURE 8-38. VALVE INSTALLATION - SAHR BRAKE
- FIGURE 8-39. VALVE ASSEMBLY - SAHR BRAKE
- FIGURE 8-40. SAHR BRAKE VALVE
- FIGURE 8-41. TWIN/TRI LINE HOSES INSTALLATION
- SECTION 9 - HYDRAULIC COMPONENTS
- FIGURE 9-1. CYLINDER GROUP INSTALLATION - 1055
- FIGURE 9-2. CYLINDER GROUP INSTALLATION - 1255
- FIGURE 9-3. LIFT CYLINDER - 1055
- FIGURE 9-4. LIFT CYLINDER - 1255
- FIGURE 9-5. TILT CYLINDER INSTALLATION - 1055
- FIGURE 9-6. TILT CYLINDER - 1055
- FIGURE 9-7. TILT CYLINDER INSTALLATION - 1255
- FIGURE 9-8. TILT CYLINDER
- FIGURE 9-9. COMPENSATION CYLINDER - 1055
- FIGURE 9-10. COMPENSATION CYLINDER - 1255
- FIGURE 9-11. FRAME LEVEL CYLINDER
- FIGURE 9-12. OUTRIGGER CYLINDER
- FIGURE 9-13. REAR AXLE STABILITY CYLINDER
- FIGURE 9-14. EXTEND/RETRACT CYLINDER
- FIGURE 9-15. QUICK COUPLER CYLINDER
- FIGURE 9-16. MAIN CONTROL VALVE
- FIGURE 9-17. TANK HYDRAULIC
- FIGURE 9-18. HYDRAULIC FILTER
- FIGURE 9-19. DIVERTOR VALVE
- FIGURE 9-20. STEERING SELECT VALVE
- FIGURE 9-21. PRIORITY MANIFOLD VALVE (PVC 1911)
- FIGURE 9-22. PRIORITY MANIFOLD VALVE (PVC 2005)
- FIGURE 9-23. FRAME LEVEL AND OUTRIGGER VALVE
- FIGURE 9-24. PISTON PUMP
FIGURE 10-52. BEACON INSTALLATION (LED)62 topics
- FIGURE 10-53. BOOM WORKLIGHTS HARNESS
- FIGURE 10-54. A/C OPTION HARNESS
- FIGURE 10-55. REAR FRAME HARNESS
- FIGURE 10-56. REAR FRAME HARNESS
- FIGURE 10-57. FRONT FRAME HARNESS (PVC 1911)
- FIGURE 10-58. FRONT FRAME HARNESS (PVC 2005)
- FIGURE 10-59. ENGINE CHASSIS HARNESS
- FIGURE 10-60. ENGINE HARNESS
- FIGURE 10-61. ENGINE HARNESS
- FIGURE 10-62. FRONT FRAME HEADLIGHT HARNESS
- FIGURE 10-63. TAIL LIGHTS HARNESS
- FIGURE 10-64. REVERSE SENSOR HARNESS
- FIGURE 10-67. OPTION 1 CAB HARNESS
- FIGURE 10-68. OPTION 2 CAB HARNESS
- FIGURE 10-69. CAB OPTION HARNESS
- FIGURE 10-70. TELEMATICS READY HARNESS
- FIGURE 10-71. FUEL FILTER HEATER INSTALLATION
- FIGURE 10-72. ROOF PIGTAIL HARNESS
- FIGURE 10-73. BOOM AUXILIARY ELECTRIC HARNESS INSTALLATION
- FIGURE 10-74. PLATFORM HARNESS
- FIGURE 10-75. USB CHARGER INSTALLATION
- FIGURE 10-76. TELEMATICS HARNESS
- FIGURE 10-77. CUSTOMER SUPPLIED TELEMATICS CANBUS
- FIGURE 10-78. TELEMATICS HARNESS
- FIGURE 10-79. GATEWAY CONTROLLER
- FIGURE 10-80. TELEMATICS CANBUS INSTALLATION (CLEARSKY 2)
- FIGURE 10-81. TELEMATICS CANBUS INSTALLATION (CLEARSKY 2) (CE)
- FIGURE 10-82. 4WARD TELEMATIC, HARNESS (CLEARSKY 2)
- FIGURE 10-83. CLEARSKY INSTALLATION 3-WIRE (ANSI)
- FIGURE 10-84. CLEARSKY INSTALLATION 3-WIRE (CE)
- FIGURE 10-85. CONTROL ACCESSORY
- FIGURE 10-86. AIR SHUTOFF VALVE HARNESS
- FIGURE 10-87. AIR SHUT OFF VALVE HARNESS (ENGINE)
- FIGURE 10-88. RIDE CONTROL INSTALLATION
- FIGURE 10-89. TBAP HARNESS
- FIGURE 10-90. DEF PURGE LIGHT HARNESS
- FIGURE 10-91. STANDARD ELECTRICAL BOARD ASSEMBLY
- FIGURE 10-92. CUMMUNICATION ANALYSER CABLE
- FIGURE 10-93. OPTION 2 ELECTRICAL BOARD ASSEMBLY
- FIGURE 10-94. OPTION 1 ELECTRICAL BOARD ASSEMBLY
- FIGURE 10-95. BOOM RIDE FLOAT HARNESS
- FIGURE 10-96. TELEMATICS ADAPTER HARNESS
- FIGURE 10-97. LSI HARNESS - BOOM RETRACT
- SECTION 11 - DECALS
- FIGURE 11-1. CAPACITY CHART HOLDER INSTALLATION
- FIGURE 11-2. DECAL INSTALLATION - 1055
- FIGURE 11-3. DECAL INSTALLATION - 1255
- FIGURE 11-4. DECAL INSTALLATION (ANSI)
- FIGURE 11-5. DECAL INSTALLATION (ISO)
- FIGURE 11-6. DECAL INSTALLATION
- FIGURE 11-7. DECAL INSTALLATION (ENGLISH/SPANISH)
- FIGURE 11-8. CAPACITY CHART (ANSI) - 1055
- FIGURE 11-9. CAPACITY CHART (ANSI) - 1255
- FIGURE 11-10. CAPACITY CHART (METRIC) - 1055
- FIGURE 11-11. CAPACITY CHART (METRIC) - 1255
- FIGURE 11-12. DECAL INSTALLATION
- FIGURE 11-13. REVERSE SENSOR SYSTEM DECAL (ENGLISH)
- FIGURE 11-14. REVERSE SENSOR SYSTEM DECAL
- FIGURE 11-15. REVERSE SENSING SYSTEM DECAL, (ENGLISH/FRENCH)
- FIGURE 11-16. REVERSE SENSOR SYSTEM DECAL (ENGLISH/SPANISH)
- FIGURE 11-17. CLEARSKY DECAL INSTALLATION
- SECTION 12 - RECOMMENDED SPARE PARTS
Inside this manual
Real pages from this parts manual (1,278 pages). Open the sample pages (PDF, 562 KB)
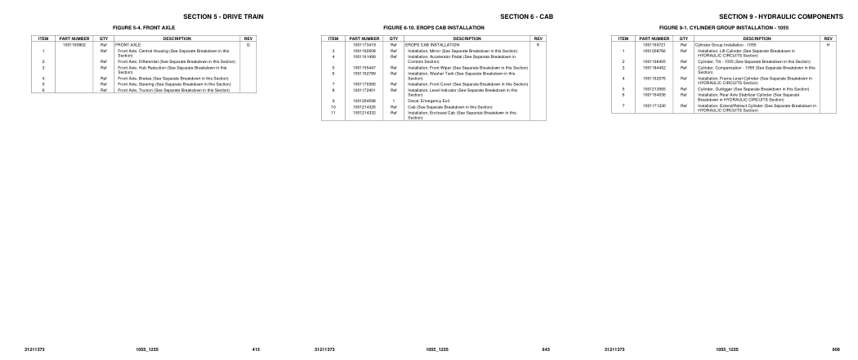
- Parts illustration, page 415: SECTION 5 - DRIVE TRAIN
- Parts illustration, page 643: SECTION 6 - CAB
- Parts illustration, page 909: SECTION 9 - HYDRAULIC COMPONENTS
Other manuals for this machine
Save 10% on 2 manuals, 15% on 3 or more. Other manuals for the 1055, 1255 are listed below. Editions cover different serial number ranges: check the serial coverage and tick only the ones that match your machine.
Added to your cart. View cart
This is a parts manual
Here's how it compares to the other manual types.
Service manual
Factory repair procedures and technical information such as specifications, troubleshooting, and wiring and hydraulic diagrams, for the models and systems the manual covers. See What's inside for its topics.
Operator's manual
Safe operation, controls, maintenance schedules, lubrication points, inspections, and basic checks. Repair procedures are in the service manual.
Parts manual
Illustrated diagrams with factory part numbers for identifying components and ordering parts. Repair procedures are in the service manual.
What it's used for
Factory manual for in-house farm and construction shop use. Straightforward, complete, and easy to follow. It contains the OEM information dealership service departments and parts counters use to diagnose problems, identify components, and perform maintenance or repairs correctly.
Service shops and owner/operators who repair their own equipment
Identifying correct parts and seeing how assemblies come apart and go back together
Keeping equipment running with less downtime
Factory manual, 1,278 pages
Quantity one is the manual described above.
Fast free USA shipping
Ships in 1 business day.
60-day returns
Free if the mistake is ours. A manual ordered in error must come back unopened in its shrink-wrap; you pay return shipping and a 20% restocking fee applies. Return policy
Binder not included
Manuals over about 300 pages may need a standard 3-ring binder, which you can buy locally to keep the pages organized for shop use.
Other editions and similar models
Questions about model, serial number, engine coverage or contents? Contact us before purchasing and we'll help confirm it's the right manual. Please verify the manual type, machine model, serial number range and engine coverage before purchasing: manuals ordered in error carry a 20% restocking fee (return policy).