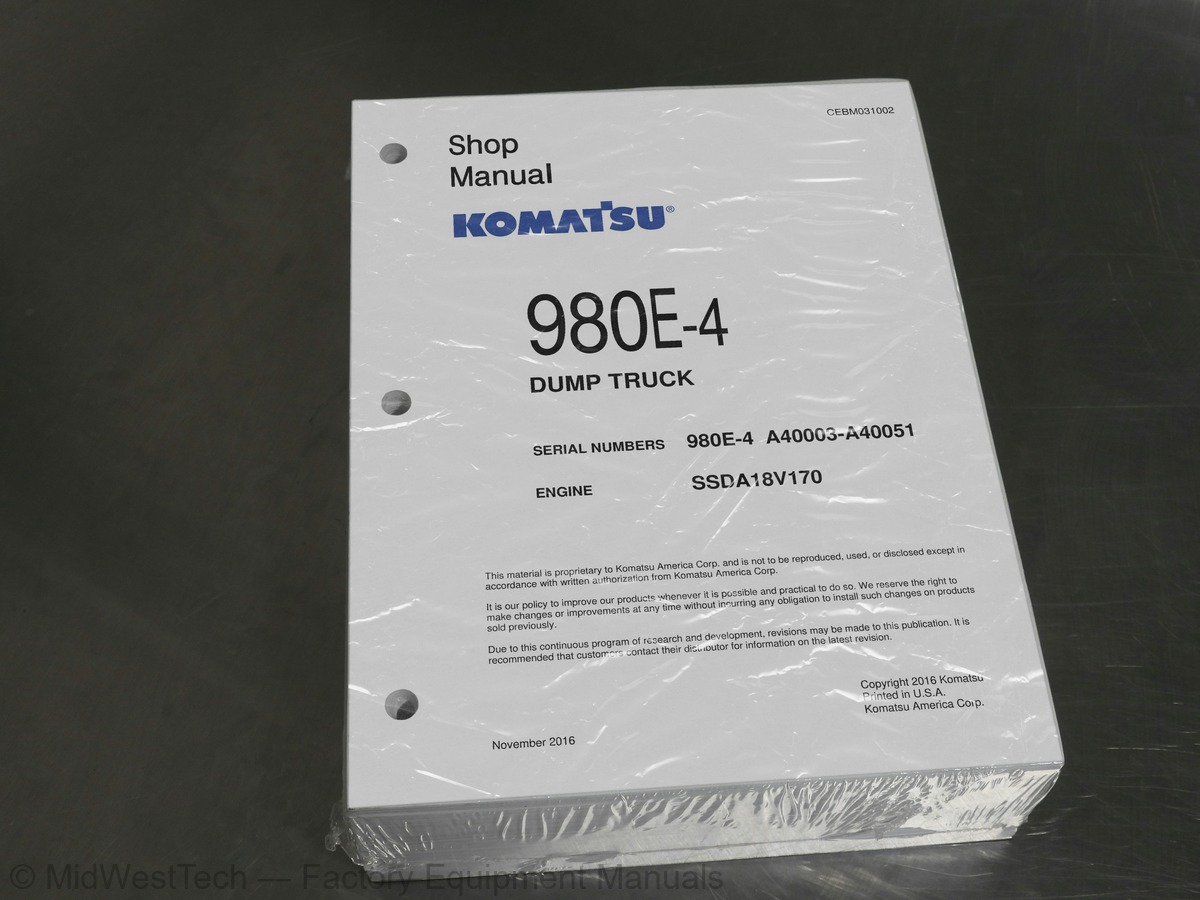
Komatsu 930E-4 with SSDA18V170 Engine Dump Truck Service Manual
1,071 pages · Publication CEBM031002
Added to your cart. View cart
- Models
- 930E-4 with SSDA18V170 Engine
- Serial coverage
- A40003-A40051
- Manual type
- Service Manual
- Pages
- 1,071
- Publication
- CEBM031002
- Condition
- Brand new
What's inside
From the manual's own table of contents: 195 sections, 374 entries. See sample pages (PDF, 933 KB)
Show all 195 sections
Normal engine shutdown procedure35 topics
- Specification drawing
- Specifications
- Weight table
- Fuel, coolant and lubricants
- Steering circuit operation
- Steering circuit components
- Steering/brake pump operation
- Hoist circuit operation
- Hoist circuit components
- Hoist pilot valve operation
- General information
- Service brake circuit operation
- Secondary braking
- Automatic brake application (Auto apply)
- Parking brake circuit operation
- Wheel brake lock circuit operation
- Brake warning circuit operation
- Brake assembly wear data
- Battery supply system
- Engine starting system with prelube
- Auxiliary control cabinet components
- Body-up switch
- Hoist limit switch
- General system operation
- System components
- DSC software functions
- Alternator field control
- Event detection and processing
- Event logging and storage
- Abnormal conditions/overriding functions
- AC drive system component table
- Electronic accelerator and retarder pedals
- Principles of refrigeration
- Air conditioning system components
- Air conditioning system electrical circuit
Interface module checkout procedures35 topics
- KOMTRAX Plus software and tools
- KOMTRAX Plus controller setup procedure
- KOMTRAX Plus initialization form
- Precautions when replacing the KOMTRAX Plus controller
- KOMTRAX Plus controller checkout procedure
- Payload meter IV software and tools
- Payload meter IV system configuration
- Payload meter IV software installation
- Payload meter IV checkout procedure
- PLM IV system checkout data sheet
- Checks prior to self load engine test (loadbox)
- Engine running tests
- Diagnostic information display (DID) panel
- Viewing event and statistical data
- Logic screens
- Datalogger function
- Uploading data
- Service tools and equipment
- Detecting leaks
- System performance test
- Checking system oil
- System flushing
- Installing the manifold gauge set
- Recovering and recycling refrigerant
- Evacuating the air conditioning system
- Charging the air conditioning system
- Vehicle Electrical Center (VEC-89)
- Vehicle Electrical Center (VEC-90)
- Vehicle Electrical Center (VEC-91)
- Vehicle Electrical Center (RTMR1)
- DID panel fault code tables
- Fault Code A001: Left front suspension pressure sensor signal high
- Fault Code A002: Left front suspension pressure sensor signal low
- Fault Code A003: Right front suspension pressure sensor signal high
- Fault Code A004: Right front suspension pressure sensor signal low
Fault Code A173: Right front hydraulic oil temperature sensor is high36 topics
- Fault Code A184: J1939 data link is not connected
- Fault Code A190: Auto lube control has detected an incomplete lube cycle
- Fault Code A194: Left front hydraulic oil temperature is high
- Fault Code A195: Right front hydraulic oil temperature is high
- Fault Code A196: Left rear hydraulic oil temperature is high
- Fault Code A197: Right rear hydraulic oil temperature is high
- Fault Code A198: Hoist pressure 1 sensor is high
- Fault Code A199: Hoist pressure 2 sensor is high
- Fault Code A200: Steering pressure sensor is high
- Fault Code A201: Brake pressure sensor is high
- Fault Code A202: Hoist pressure 1 sensor is low
- Fault Code A203: Hoist pressure 2 sensor is low
- Fault Code A204: Steering pressure sensor is low
- Fault Code A205: Brake pressure sensor is low
- Fault Code A206: Ambient temperature sensor is high
- Fault Code A207: Ambient temperature sensor is low
- Fault Code A212: Bad truck speed signal
- applied
- released
- Fault Code A215: Brake auto apply valve circuit is defective
- command valve circuit
- attempted
- Fault Code A230: Parking brake has been requested while truck still moving
- Fault Code A231: The body is up with engine running and brakes not on
- Fault Code A235: Steering accumulator is in the process of being bled down
- seconds
- Fault Code A237: The CAN/RPC connection to the display is open
- Fault Code A240: The key switch input to the interface module is open
- Fault Code A242: Fuel gauge within the dash display panel is defective
- defective
- Fault Code A246: Payload meter reports truck overload
- Fault Code A247: Low steering pressure warning
- Fault Code A248: Status module within the dash display panel is defective
- Fault Code A249: Red warning lamp within the dash display (driven by IM) is shorted
- Fault Code A250: Battery voltage is low with the truck parked
- to ground
Fault Code A313: DCDC converter 12 volt circuit sensing is producing high readings36 topics
- Fault Code A315: DCDC converter 12 volt circuit is low
- Fault Code A316: Starter engagement has been attempted with engine running
- Fault Code A317: Operation of brake auto apply valve without a detected response
- Fault Code A318: Unexpected power loss to interface module
- does not
- wired input does not
- Fault Code A323: Data link reports GE reduced retard level fault but wired input does not
- Fault Code A324: Data link reports DC link voltage but wired input does not
- Fault Code A325: Data link reports GE no propel/retard fault but wired input does not
- Fault Code A326: Data link reports GE no propel fault but wired input does not
- Fault Code A327: Data link reports GE at rest but wired input does not
- Fault Code A328: Drive system not powered up
- Fault Code A329: Data link reports the body is not down but wired input says it is
- Fault Code A332: Seat belt not buckled
- Fault Code A333: The hydraulic ladder controller has declared a ladder fault
- Fault Code A334: Shift lever not in park when propel was either not ready or at rest
- Fault Code A350: Overload on output 1B
- Fault Code A351: Overload on output 1E
- Fault Code A352: Overload on output 1H
- Fault Code A353: Overload on output 1J
- Fault Code A354: Overload on output 1K
- Fault Code A355: Overload on output 1L
- Fault Code A356: Overload on output 1M
- Fault Code A357: Overload on output 1N
- Fault Code A358: Overload on output 1P
- Fault Code A359: Overload on output 1R
- Fault Code A360: Overload on output 1S
- Fault Code A361: Overload on output 1T
- Fault Code A362: Overload on output 1U
- Fault Code A363: Overload on output 1X
- Fault Code A364: Overload on output 1Y
- Fault Code A365: Overload on output 1Z
- Orbcomm satellite connection
- Preliminary checks
- Diagnosis of gauge readings and system performance
- Troubleshooting by manifold gauge set readings
Disassembly and assembly of steering/brake pump37 topics
- Removal and installation of piston steering accumulator
- Disassembly and assembly of piston steering accumulator
- Removal and installation of front suspension
- Disassembly and assembly of front suspension
- Removal and installation of rear suspension
- Disassembly and assembly of rear suspension
- Removal and installation of hoist pump
- Disassembly and assembly of hoist pump
- Removal and installation of hoist valve
- Disassembly and assembly of hoist valve
- Overcenter manifold service
- Removal and installation of hoist pilot valve
- Disassembly and assembly of hoist pilot valve
- Removal and installation of hoist cylinders
- Disassembly and assembly of hoist cylinders
- Removal and installation of dump body
- Removal and installation of body pads
- Removal and installation of diagonal ladder/hood and grille assembly
- Removal and installation of RH deck
- Removal and installation of LH deck
- Removal and installation of fuel tank
- Removal and installation of fuel gauge sender
- Removal and installation of hydraulic tank
- Removal and installation of hydraulic tank strainers
- Removal and installation of operator cab
- Removal and installation of cab door
- Disassembly and assembly of cab door
- Adjustment of cab door
- Removal and installation of side window glass
- Removal and installation of windshield and rear window glass
- Removal and installation of windshield wiper motor
- Removal and installation of windshield wiper arm
- Removal and installation of windshield wiper linkage
- Removal and installation of optional seats
- Removal and installation of seat belts (optional seats)
- Removal and installation of electronic accelerator and retard pedals
- Replacement of air conditioning system components
Inside this manual
Real pages from this service manual (1,071 pages). Open the sample pages (PDF, 932 KB)

- Diagram, page 61: 00 Index and foreword
- Specifications, page 109: 01 Specification
- Troubleshooting, page 637: Fault Code A355: Overload on output 1L
- Color page, page 656: 40 Troubleshooting
- Color page, page 327: 30 Testing and adjusting
- Foldout diagram (color), page 1,041: CIRCUIT 11 (BATTERY DIRECT) FUSES & BREAKERS
This is a service manual
Here's how it compares to the other manual types.
Service manual
Factory repair procedures and technical information such as specifications, troubleshooting, and wiring and hydraulic diagrams, for the models and systems the manual covers. See What's inside for its topics.
Operator's manual
Safe operation, controls, maintenance schedules, lubrication points, inspections, and basic checks. Repair procedures are in the service manual.
Parts manual
Illustrated diagrams with factory part numbers for identifying components and ordering parts. Repair procedures are in the service manual.
Engine service manuals are sometimes sold separately, since certain machine models were offered with more than one engine option.
What it's used for
Factory manual for in-house farm and construction shop use. Straightforward, complete, and easy to follow. It contains the OEM information dealership service departments and parts counters use to diagnose problems, identify components, and perform maintenance or repairs correctly.
Service shops and owner/operators who repair their own equipment
Identifying correct parts and seeing how assemblies come apart and go back together
Keeping equipment running with less downtime
Factory manual, 1,071 pages
Quantity one is the manual described above.
Fast free USA shipping
Ships in 1 business day.
60-day returns
Free if the mistake is ours. A manual ordered in error must come back unopened in its shrink-wrap; you pay return shipping and a 20% restocking fee applies. Return policy
Binder not included
Manuals over about 300 pages may need a standard 3-ring binder, which you can buy locally to keep the pages organized for shop use.
Other editions and similar models
Questions about model, serial number, engine coverage or contents? Contact us before purchasing and we'll help confirm it's the right manual. Please verify the manual type, machine model, serial number range and engine coverage before purchasing: manuals ordered in error carry a 20% restocking fee (return policy).