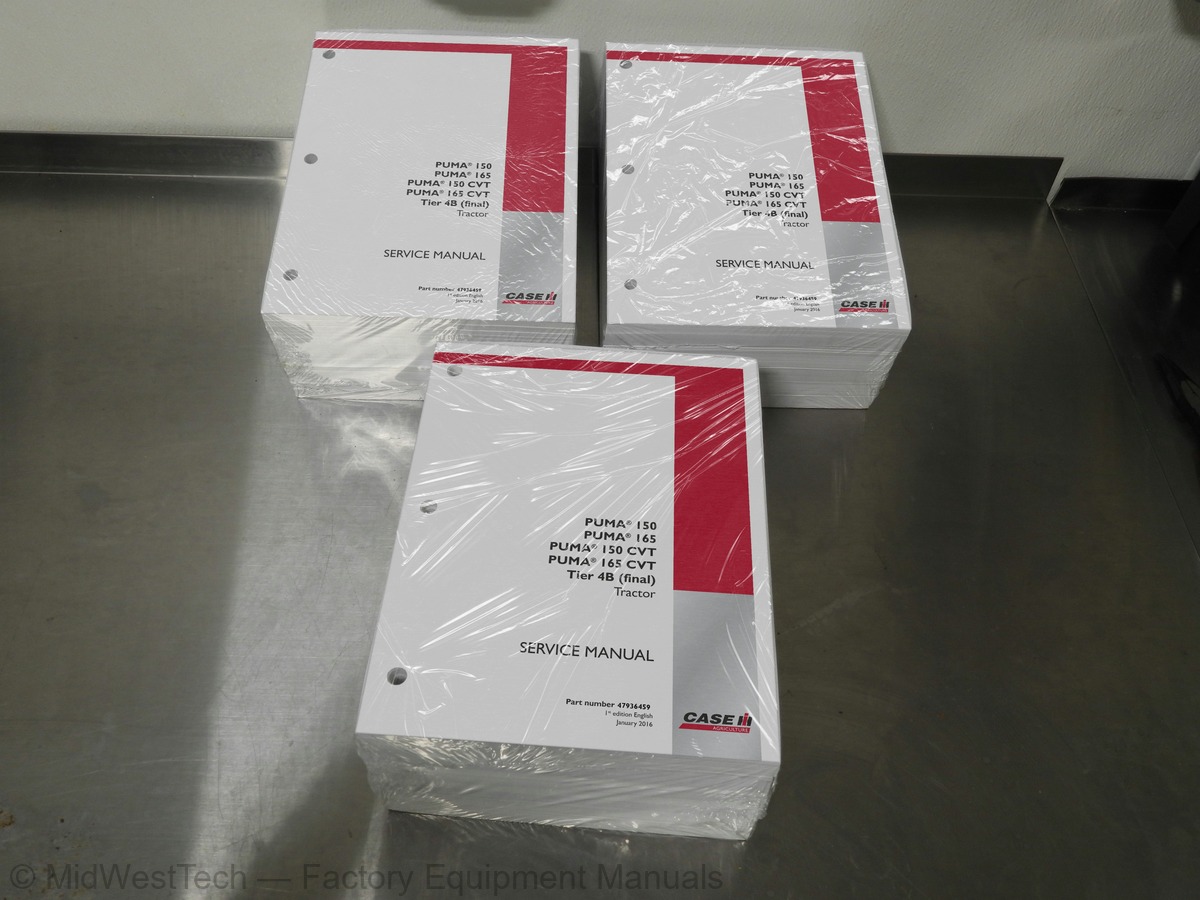
Case Puma 150, 165, 150, 165 CVT Tier 4B Tractor Service Manual
5,382 pages · Publication 47936459
Added to your cart. View cart
- Models
- Puma 150, 165, 150, 165 CVT Tier 4B
- Manual type
- Service Manual
- Pages
- 5,382
- Publication
- 47936459
- Condition
- Brand new
What's inside
From the manual's own table of contents: 1 sections, 370 entries. See sample pages (PDF, 658 KB)
General10 topics
- Foreword - Important notice regarding equipment servicing
- Foreword - How to use and navigate through this manual
- Safety rules
- Safety rules - Ecology and the environment
- Basic instructions
- Torque
- Conversion factors
- Hydraulic contamination
- Consumables Lubrications and coolants
- Capacities
INTRODUCTION359 topics
- ENGINE - Engine and crankcase - General specification (10.001 - D.40.A.10)
- ENGINE - Engine and crankcase - Dynamic description (10.001 - C.30.A.10)
- ENGINE - Engine and crankcase - Remove (10.001 -F.10.A.10)
- ENGINE - Engine and crankcase - Troubleshooting (10.001 - G.40.A.10)
- Engine and crankcase
- Cylinder heads
- Fuel tanks
- Lift pump and lines
- Fuel injection system
- Air cleaners and lines
- Turbocharger and lines
- Intake and exhaust manifolds and muffler
- Selective Catalytic Reduction (SCR) exhaust treatment
- Engine cooling system
- Fan and drive
- Oil cooler and lines
- Disconnect
- Connect
- Remove
- Install
- Tighten - Sequence
- Overview
- Service instruction
- General specification
- Static description
- Dynamic description
- Filling
- Drain fluid
- Static description Reversible fan
- Viscous coupler - Remove
- Viscous coupler - Install
- Remove Fan
- Install Fan
- Fan system valve - Remove
- Fan system valve - Install
- Semi-Powershift transmission
- Semi-Powershift transmission external controls
- Semi-Powershift transmission lubrication system
- Semi-Powershift transmission internal components
- Powershift transmission
- Continuously Variable Transmission (CVT)
- Continuously Variable Transmission (CVT) external controls
- Continuously Variable Transmission (CVT) lubrication system
- Continuously Variable Transmission (CVT) internal components
- Creeper
- Overdrive
- Sectional view
- Test
- Disassemble
- Assemble
- Adjust
- Pressure test
- Master clutch valve - Remove
- Master clutch valve - Disassemble
- Master clutch valve - Install
- Master clutch valve - Assemble
- Master clutch - Remove
- Master clutch - Disassemble
- Speed clutch - Disassemble
- Master clutch - Assemble
- Speed clutch - Assemble
- Master clutch - Install
- Special tools
- Overhaul
- Leakage test
- Torque – Locking and sealing material
- Dynamic description “Electronic park lock
- Functional diagram
- Exploded view (Transmission input)
- Exploded view (Transmission output)
- Exploded view (Solenoid valves, sensors, Hydraulic pipes)
- Overview (Safety valve)
- Overview (Solenoid valves)
- Replace (Safety valve, clutch "A", clutch "B")
- Replace (Shift cylinder)
- Hydraulic schema
- Remove (A and B)
- Disassemble (A and B)
- Assemble (A and B)
- Install (A and B)
- Static description 50 km/h Clutch
- Troubleshooting
- Remove - 4WD Clutch removal without splitting the transmission
- Install 4WD Clutch Installation Procedure
- Remove (Suspended axle)
- Remove (All wheel drive shaft, transmission casing)
- Install (Suspended axle)
- Install (drive shaft, transmission casing)
- Install (All wheel drive shaft, transmission casing)
- Powered front axle
- Front bevel gear set and differential
- Final drive hub, steering knuckles, and shafts
- Axle suspension control
- External view
- Remove (Standard Axle)
- Install Suspended axle
- Install (Standard Axle)
- Preload
- Exploded view
- Install (Class 3+ Axle)
- Overhaul (Class 3 Axle)
- Backlash (Class 3 Axle) with Multi plate clutch
- Backlash (Class 4 Axle)
- Backlash (Class 3 Axle) with Dog clutch
- Preload (Class 3 Axle) with Dog clutch
- Preload (Suspended Class 3 Axle)
- Preload (Supersteer™Class 4 Axle)
- Preload (Supersteer™Class 3 Axle)
- Preload (Class 3 Axle) with Multi plate clutch
- Preload (Standard Class 4 Axle)
- Preload (Standard Class 3 Axle)
- Preload (Suspended Class 4 Axle)
- Assemble (Class 4 Axle)
- Disassemble (Class 3 Axle)
- Disassemble (Class 4 Axle)
- Backlash (Class 3 Axle)
- Clearance (Class 3 Axle)
- Input shaft assembly - Remove
- Remove Four Wheel Drive Axle With Brakes
- Install Four Wheel Drive Axle With Brakes
- Overhaul Four Wheel Drive Axle
- Powered rear axle
- Rear bevel gear set and differential
- Planetary and final drives
- Spur gear and final drives
- Multi-plate clutch - Overhaul
- Rear mechanical control
- Rear electro-hydraulic control
- Two-speed rear Power Take-Off (PTO)
- Three-speed rear Power Take-Off (PTO)
- Front Power Take-Off (PTO)
- Adjust Ground Speed PTO
- Hydraulic service brakes
- Pneumatic service brakes
- Parking brake or parking lock
- Trailer brake hydraulic control
- Trailer brake pneumatic control
- Bleed
- Two-way control valve - Remove
- Testing
- Remove Relief valve/filter drier
- Install Relief valve/filter drier
- Hydraulic systems
- Reservoir, cooler, and filters
- Variable displacement pump
- Charge pump
- Auxiliary hydraulic pump
- Regulated/Low pressure system
- Remote control valves
- Three-point hitch control valve
- Front hitch controls and lines
- Front hitch cylinders and lines
- Flow test
- Pressure test Using DATAR Equipment
- Replace
- Bypass valve - Pressure test
- Pressure test Low and high pressure standby
- Priority/Regulator valve - General specification
- Restrictor valve - Dynamic description
- Restrictor valve - Exploded view
- Priority/Regulator valve - Static description
- Closed center mechanical remote valve - Torque
- Closed center mechanical remote valve - Static description
- Closed center mechanical remote valve - Dynamic description
- Electrohydraulic remote valve - Static description
- Closed center mechanical remote valve - Disassemble
- Closed center mechanical remote valve - Assemble
- Electrohydraulic remote valve - Remove
- Electrohydraulic remote valve - Install
- Electrohydraulic remote valve - Disassemble
- Electrohydraulic remote valve - Assemble
- Air regulator - Remove
- Air regulator - Install
- Exploded view Control Valve
- Remove Right Hand Link
- Install Right Hand Link
- Overhaul Right hand Link
- Torque (Front support)
- Clearance (Front support)
- Steering control
- Tie rods
- Hydraulic control components
- Cylinders
- Autoguidance steering
- Remove Steering Wheel with Turn Assist
- Remove Steering Wheel - Standard
- Install Steering Wheel - Standard
- Install Steering Wheel with Turn Assist
- Visual inspection
- Static description Auto guidance system
- Autoguidance steering - Dynamic description Autoguidance system
- Hydraulic schema Autoguidance system
- Magnetic clutch - Overview
- Decontaminating
- Discharging
- Charging
- Evacuate
- Electrical system
- Harnesses and connectors
- Engine control system
- Alternator
- Battery
- Fuel tank system
- Fuel injection system
- Selective Catalytic Reduction (SCR) electrical system
- Electronic modules
- Cab transmission controls
- Transmission speed sensors
- Transmission pressure sensors
- Transmission temperature sensors
- Transmission position sensors
- Ground speed control
- Front axle control system
- Rear Power Take-Off (PTO) control system
- Service brake electrical system
- Static description – Circuit components
- Electrical test – Usage of a digital multimeter
- Electrical test
- Electrical schema – Symbols
- Electrical schema index
- Electrical schematic sheet 01 – POWER DISTRIBUTION (MAXI fuses 1 - 6)
- Electrical schematic sheet 02 – POWER DISTRIBUTION (fuses 1 - 14)
- Electrical schematic sheet 03 – POWER DISTRIBUTION (fuses 15 - 21)
- Electrical schematic sheet 04 – POWER DISTRIBUTION (fuses 22 - 30)
- Electrical schematic sheet 05 – POWER DISTRIBUTION (fuses 31 - 45)
- Electrical schematic sheet 06 – POWER DISTRIBUTION (fuses 47 - 54)
- Electrical schematic sheet 07 – POWER DISTRIBUTION (fuses 55 - 60 / 81 - 84 / 92)
- Electrical schematic sheet 08 – POWER DISTRIBUTION (fuses 61 - 70)
- Electrical schematic sheet 09 – GROUND DISTRIBUTION
- Electrical schematic sheet 10 – STARTING/CHARGING
- Electrical schematic sheet 11 – STARTING, POWER DISTRIBUTION and FUSES
- Electrical schematic sheet 12 – ENGINE CONTROL UNIT 1
- Electrical schematic sheet 13 – ENGINE CONTROL UNIT 2
- Electrical schematic sheet 14 – ENGINE CONTROL UNIT 3 (exhaust emission control)
- Electrical schematic sheet 16 – CONTROL UNIT (transmission 2)
- Electrical schematic sheet 17 – CONTROL UNIT (electronic draft control)
- Electrical schematic sheet 18 – CONTROL UNIT (5V sensor supply, seat, backup alarm)
- Electrical schematic sheet 19 – CONTROL UNIT (rear power take-off)
- Electrical schematic sheet 21 – CONTROL UNIT (front hitch & front power take-off)
- Electrical schematic sheet 22 – FAST STEERING CONTROL
- Electrical schematic sheet 23 – INSTRUMENT CLUSTER 1
- Electrical schematic sheet 24 – INSTRUMENT CLUSTER 2
- Preliminary test
- Testing – Visual check
- Testing – Heavy load discharge test
- Testing – State of charge test (open circuit voltage)
- Testing – State of charge test (specific gravity)
- Testing – Charging overview
- Filter - Remove Main Filter
- Filter - Install Main Filter
- Remove Inline Filter
- Install Inline Filter
- Configure H-Menu Overview
- Overview – Fault finding
- Fault code index
- Armrest control unit (ARU) - Electronic schema
- Instrument control unit - Electronic schema
- Universal controller - Electronic schema
- Instrument control unit - H4 - View software revision level
- Instrument control unit - H5 - Switch operation test
- Instrument control unit - H3 - Configurations and options
- Instrument control unit - H8 - Clear stored calibration information (EEPROM)
- Instrument control unit - H9 - Voltmeter diagnostic
- Instrument control unit - HB - Display stored fault codes
- Instrument control unit - HC - Clear all stored fault codes
- Instrument control unit - HE - Display frequency inputs
- Instrument control unit - HF - View controller hardware information
- Armrest control unit (ARU) - H4 - View software revision level
- Armrest control unit (ARU) - H5 - Switch operation test
- Armrest control unit (ARU) - H9 - Voltmeter diagnostic
- Armrest control unit (ARU) - HB - Display stored fault codes
- Armrest control unit (ARU) - HC - Clear all stored fault codes
- Armrest control unit (ARU) - HF - View controller hardware information
- Overview – Medium range
- Overview – Clutch C, D, E
- Overview – Ring gear speed sensor
- Continuously Variable Transmission (CVT) - Overview – Transmission output speed sensor 1
- Continuously Variable Transmission (CVT) - Overview – Transmission output speed sensor 2
- Semi-Powershift - Overview
- Powershift - Overview
- Replace – Speed sensor for the ring gear
- Continuously Variable Transmission (CVT) system - Overview (p1)
- Continuously Variable Transmission (CVT) charge pressure sensor - Overview
- Continuously Variable Transmission (CVT) charge pressure sensor - Overview (Hydrostat)
- Continuously Variable Transmission (CVT) - Overview (Clutch A)
- Continuously Variable Transmission (CVT) - Overview (Clutch B)
- Continuously Variable Transmission (CVT) system - Replace
- Continuously Variable Transmission (CVT) charge pressure sensor - Replace
- Continuously Variable Transmission (CVT) charge pressure sensor - Replace (Hydrostat)
- Continuously Variable Transmission (CVT) - Replace (Clutch A)
- Continuously Variable Transmission (CVT) - Replace (Clutch B)
- Electronic schema
- H1 - Calibration procedures
- H2 - View stored calibration values
- H3 - Configurations and options
- H4 - View software revision level
- H5 - Switch operation test
- H8 - Clear stored calibration information (EEPROM)
- H9 - Voltmeter diagnostic
- HB - Display stored fault codes
- HC - Clear all stored fault codes
- HF - View controller hardware information
- Temperature control potentiometer - Overview
- Temperature control potentiometer - Remove
- Temperature control potentiometer - Install
- Remove – Operating mode switch
- Install – Operating mode switch
- Remove – Fan speed switch
- Install – Fan speed switch
- Overview (Air-conditioning system – Pressure switch)
- Low pressure - Overview
- Overview – Cab temperature
- Overview – Outside temperature
- Overview (Outlet temperature sensor)
- Evaporator temperature sensor - Overview
- Remove – Air-conditioning system – Pressure switch
- Install – Air-conditioning system – Pressure switch
- Digital instrument cluster - Static description – ICU3
- Digital instrument cluster - Dynamic description – Acoustic and visual warnings
- Digital instrument cluster - Detailed view – Brake
- Digital instrument cluster - Detailed view – Transmission
- Digital instrument cluster - Detailed view – Steering
- Digital instrument cluster - Detailed view – Engine
- Digital instrument cluster - Detailed view – Charging system
- Digital instrument cluster - Detailed view – Auxiliary control units
- Digital instrument cluster - Detailed view – CAN bus system
- Digital instrument cluster - Detailed view – Service
- Digital instrument cluster - Detailed view – Lighting system
- 1002-Radar disconnected [UCM]
- 1003-Speed sensor error [UCM]
- 1004-Wheel speed sensor - signal too high [UCM]
- 1006-Slip control potentiometer error [UCM]
- 1008-Raise/work switch failure (command arm) [UCM]
- 1009-Both external switches operated at the same time or at key on [UCM]
- 1010-Height limit control potentiometer error [UCM]
- 1012-Drop rate control potentiometer error [UCM]
- 1014-Right-hand load sensing pin - signal too low [UCM]
- 1015-Right-hand load sensing pin - signal too high [UCM]
- 1016-Left-hand load sensing pin - signal too low [UCM]
- 1017-Left-hand load sensing pin - signal too high [UCM]
- 1018-Both load sensing pins disconnected [UCM]
- 1019-Load sensing pin 8V reference - voltage too low [UCM]
- 1020-Load sensing pin 8V reference - voltage too high [UCM]
- 1021-Draft sensitivity control potentiometer error [UCM]
- 1024-Perform the hydraulic lift calibration [UCM]
- 1025-Position control potentiometer error [UCM]
- 1027-Lift arm position sensor - voltage too low [UCM]
- 1028-Lift arm position sensor - voltage too high [UCM]
- 1029-Hydraulic control valve disconnected [UCM]
- 1031-Chassis harness disconnected [UCM]
- 1033-Draft control potentiometer error [UCM]
- 1049-Wheel speed sensor open circuit [UCM]
- 1053-5 Volt reference - short to +12V [UCM]
- 1054-5 Volt reference - short to ground [UCM]
- 1063-Hydraulic valve lower solenoid - open circuit [UCM]
- 1064-Hydraulic valve raise solenoid - open circuit [UCM]
- 1065-Hydraulic valve lower solenoid - short circuit [UCM]
- 1066-Hydraulic valve raise solenoid - short circuit [UCM]
- 1067-Hydraulic valve supply voltage - voltage too low [UCM]
Inside this manual
Real pages from this service manual (5,382 pages). Open the sample pages (PDF, 657 KB)

- Specifications, page 2,459: Electrical systems - Harnesses and connectors
- Diagram, page 3,040: Electrical systems - Harnesses and connectors
- Troubleshooting, page 4,783: 12054-Fault on power supply voltage reading
- Color page, page 580: Transmission - Powershift transmission
- Color page, page 3,174: Electrical systems - Fuel injection system
- Foldout diagram (color), page 636: Transmission - Continuously Variable Transmission (CVT)
Other manuals for this machine
Save 10% on 2 manuals, 15% on 3 or more. Other manuals for the 150 are listed below. Editions cover different serial number ranges: check the serial coverage and tick only the ones that match your machine.
Added to your cart. View cart
This is a service manual
Here's how it compares to the other manual types.
Service manual
Factory repair procedures and technical information such as specifications, troubleshooting, and wiring and hydraulic diagrams, for the models and systems the manual covers. See What's inside for its topics.
Operator's manual
Safe operation, controls, maintenance schedules, lubrication points, inspections, and basic checks. Repair procedures are in the service manual.
Parts manual
Illustrated diagrams with factory part numbers for identifying components and ordering parts. Repair procedures are in the service manual.
Engine service manuals are sometimes sold separately, since certain machine models were offered with more than one engine option.
What it's used for
Factory manual for in-house farm and construction shop use. Straightforward, complete, and easy to follow. It contains the OEM information dealership service departments and parts counters use to diagnose problems, identify components, and perform maintenance or repairs correctly.
Service shops and owner/operators who repair their own equipment
Identifying correct parts and seeing how assemblies come apart and go back together
Keeping equipment running with less downtime
Factory manual, 5,382 pages
Quantity one is the manual described above.
Fast free USA shipping
Ships in 1 business day.
60-day returns
Free if the mistake is ours. A manual ordered in error must come back unopened in its shrink-wrap; you pay return shipping and a 20% restocking fee applies. Return policy
Binder not included
Manuals over about 300 pages may need a standard 3-ring binder, which you can buy locally to keep the pages organized for shop use.
Other editions and similar models
Questions about model, serial number, engine coverage or contents? Contact us before purchasing and we'll help confirm it's the right manual. Please verify the manual type, machine model, serial number range and engine coverage before purchasing: manuals ordered in error carry a 20% restocking fee (return policy).