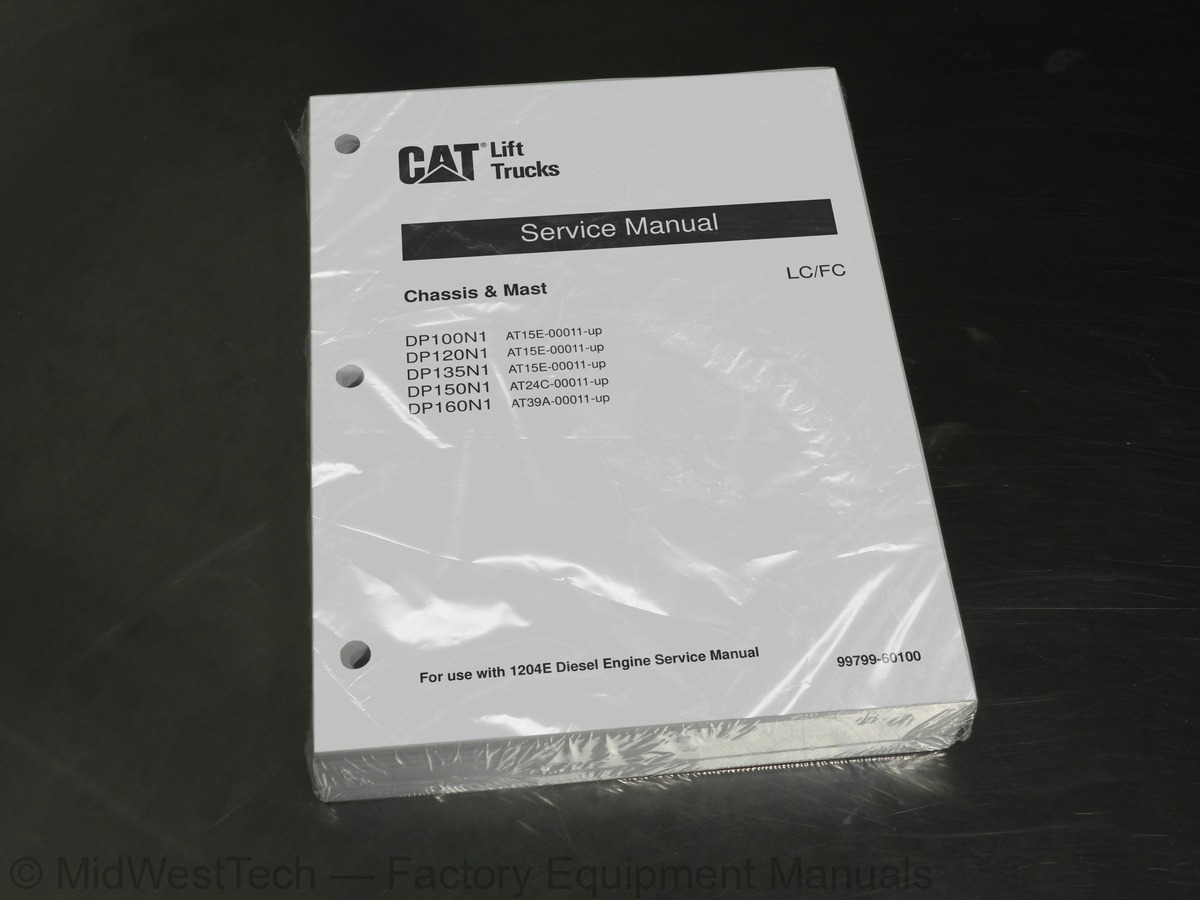
Caterpillar DP100N1, DP120N1, DP135N1, DP150N1, DP160N1 Forklift Service Manual
687 pages · Publication 99799-60100
Added to your cart. View cart
What's inside
From the manual's own table of contents: 413 topics. See sample pages (PDF, 352 KB)
- Model View
- Applicable Lift Truck Models
- Serial Number Locations
- Specifications
- Dimensions
- Performance
- Structure
- Removing Cooling System
- Preparation
- Removal Sequence of Expansion Tank and Radiator
- Removal Sequence of Intercooler and Oil Cooler
- Removal Sequence of Cooling Fan
- Suggestions for Removal
- Inspecting and Adjusting Radiator and Intercooler
- Intercooler
- Inspecting Fan Belt
- Radiator
- Antifreeze and Cooling Water
- Installing Cooling System
- Suggestions for Installation
- Troubleshooting
- Service Data
- Fan Belt
- Expansion Tank
Show all 413 topics
- Oil Cooler
- Chassis Electrical Components and Wiring Outline
- Electrical Components and Wiring Diagram of Each System
- Console Box
- Outline of Console Box
- Removing Meter Panel
- Installing Meter Panel
- Main Electrical Components
- Meter Panel
- Select Switch
- Brake Warning Icon
- Key Switch (Anti-Restart Switch)
- Light Switch and Turn Signal Switch
- Direction (FNR) Switch
- Horn
- Fuel Tank Unit
- Stop Light Switch
- Thermo Switch (T/C Oil)
- Speed Sensor
- Fuse Box
- Relay Box
- Adjusting Procedure for Accelerator Pedal
- Low Air Pressure Switch
- List of Lights
- Battery and Maintenance
- Battery Specific Gravity Condition and Adjustment
- Relationship Between Electrolyte Specific Gravity and State of Charge 3-34
- Precautions for Battery Charging
- Meter Panel Layout
- Basic Display
- Basic Operation
- When a Warning Occurs
- When Several Warnings Occur Simultaneously
- Warning Symbols
- Warning Icons
- Optional Features
- Hour Meter
- Wire Color
- List of Wire Color Codes
- Engine Startup Problem
- Gauge-Related Problems
- Light-Related Problems
- Warning Device Problems
- Battery-Related Problems
- Outline
- System Configuration
- Color Coding
- Controller External View
- Service Tool Functions
- Menu Structure
- Input Monitor and Output Monitor
- Truck Status
- Truck History
- Diagnostic Code List
- General Precautions
- VCM-7 Memory Check Warning (F01)
- VCM-7 Battery Voltage Warning (F02)
- VCM-7 Communication Warning (F03)
- Meter Panel Communication Warning (F07)
- Lift Lever Neutral Warning (F10)
- Tilt Lever Neutral Warning (F11)
- Attachment 1 Lever Neutral Warning (F12)
- Attachment 2 Lever Neutral Warning (F13)
- Attachment 3 Lever Neutral Warning (F14)
- ECM Communication Warning (F15)
- Direction Lever Warning (F16)
- Vehicle Speed Warning (F17)
- Lift Lever Warning (F20)
- Tilt Lever Warning (F22)
- Attachment 1 Lever Warning (F24)
- Attachment 2 Lever Warning (F26)
- Attachment 3 Lever Warning (F28)
- Joystick Duplicate Warning (F29)
- Vehicle Speed Sensor Warning (F34)
- Output Unit Warning (F41)
- Output Unit Supply Voltage Warning (F44)
- Output Unit Communication Warning (F45)
- Input Unit Warning (F46)
- Input Unit Communication Warning (F49)
- Lift up Solenoid Warning (F50)
- Lift Down Solenoid Warning (F52)
- Lift Solenoid Leak (F54)
- Tilt Forward Solenoid Warning (F55)
- Tilt Backward Solenoid Warning (F57)
- Tilt Solenoid Leak (F59)
- Attachment 1A Solenoid Warning (F60)
- Attachment 1B Solenoid Warning (F62)
- Attachment 1 Solenoid Leak (F64)
- Attachment 2A Solenoid Warning (F65)
- Attachment 2B Solenoid Warning (F67)
- Attachment 2 Solenoid Leak (F69)
- Attachment 3A Solenoid Warning (F70)
- Attachment 3B Solenoid Warning (F72)
- Attachment 3 Solenoid Leak (F74)
- Unload Solenoid Warning (F75)
- Unload Solenoid Leak (F79)
- Transmission Forward Solenoid Warning (F85)
- Transmission Reverse Solenoid Warning (F87)
- Transmission Solenoid Leak (F89)
- VCM-7 Speed Change Solenoid 1 Warning (F93)
- VCM-7 Speed Change Solenoid 2 Warning (F94)
- VCM-7 Speed Change Solenoid Leak (F95)
- VCM-7 Setting Warning (F96)
- Reduction Ratio
- Removing and Installing Engine and Transmission Unit
- Removing Overhead Guard, Covers, and Air Cleaner Element
- Removing Harnesses
- Disconnecting Pipes and Hoses
- Preparation for Removing Engine and Transmission Unit
- Removing Engine and Transmission Unit
- Installing Engine and Transmission Unit
- Capacity and Brand of Oils and Cooling Water
- Torque Converter
- Transmission
- Power Flow - Forward
- Power Flow - Reverse
- Control Valve
- Main Regulator Valve
- Speed Transmission Hydraulic Lines
- Automatic 3 Speed Shift Mechanism
- Torque Converter Drive Control
- Removing Transmission
- Removing Torque Converter
- Installing Transmission
- Disassembling Torque Converter
- Disassembly Sequence
- Suggestions for Disassembly
- Inspecting and Repairing Torque Converter
- Assembling Torque Converter
- Assembly Sequence
- Suggestions for Assembling Torque Converter
- Disassembling Transmission
- Disassembly Sequence of Control Valve and External Parts
- Reverse Clutch, and Input Shafts
- Suggestions for Disassembling Transmission
- Disassembly Sequence of Stator Shaft and Oil Pump
- Suggestions for Disassembling Oil Pump
- Disassembly Sequence of Forward Clutch Shaft Assembly
- Suggestions for Disassembling Forward Clutch Shaft Assembly
- Disassembly Sequence of 1st/3rd Speed Clutch Shaft Assembly
- Suggestions for Disassembling 1st/3rd Clutch Shaft Assembly
- Disassembly Sequence of Reverse Clutch Shaft Assembly
- Suggestions for Disassembling Reverse Clutch Shaft Assembly
- Inspecting and Repairing Transmission
- Assembling Transmission
- (1st/3rd Clutch Shaft Assembly) (Reverse Clutch Shaft Assembly)
- Assembly Sequence of Stator Shaft and Oil Pump
- Suggestions for Assembling Stator Shaft and Oil Pump
- Reverse Clutch, Output Shafts, and Transmission Cover
- Assembly Sequence of Control Valve and External Parts
- Disassembling Control Valve
- Inspecting and Repairing Control Valve
- Assembling Control Valve
- Suggestions for Assembling Control Valve
- Disassembling Main Regulator Valve
- Inspecting and Repairing Main Regulator Valve
- Assembling Main Regulator Valve
- Suggestions for Assembly
- Adjustment
- Adjusting Brake Pedal and Inching Pedal
- Checking Oil Pressure
- Stall Speed Measurement
- m Start Acceleration Test
- Testing Automatic 3 Speed Transmission Functions
- Stall Speed and Oil Pressure
- Pump Boss
- Pilot Boss
- Oil Pump
- Stator
- Flexible Plate
- Clutches
- Backlash of Gears
- Control Valve
- Main Regulator Valve
- Inching Pedal Control
- General Description (DP100N1 to DP150N1)
- General Description (DP160N1)
- Reduction Differential
- Removing Front Wheels
- Removal Sequence
- Installing Front Wheels
- Removing Front Axle and Reduction Differential
- Installing Front Axle and Reduction Differential
- Removing Reduction Differential
- Installing Reduction Differential
- Disassembling Hub Reduction (DP100N1 to DP150N1)
- Preparation (On-Truck Condition)
- Disassembly Sequence of Hub Reduction
- Suggestions for Disassembling Hub Reduction
- Disassembly Sequence of Wheel Brake
- Suggestions for Disassembling Wheel Brake
- Inspecting and Repairing Hub Reduction (DP100N1 to DP150N1) 7-21
- Assembly Sequence of Wheel Brake
- Suggestions for Assembling Wheel Brake
- Assembly Sequence of Hub Reduction
- Suggestions for Assembling Hub Reduction
- Disassembling Hub Reduction (DP160N1)
- Inspecting and Repairing Hub Reduction (DP160N1)
- Assembly Sequence of Plates in Wheel Brake and Brake Cover
- Suggestions for Assembling Plates in Wheel Brake and Brake Cover
- Suggestions for Assembling Hub Reduction Assembly
- Disassembling Reduction Differential
- Disassembly Sequence of Differential Gear Assembly
- Suggestions for Disassembling Differential Gear Assembly
- Disassembly Sequence of Reduction and Parking Brake Assembly
- Suggestions for Disassembling Reduction and Parking Brake Assembly 7-44
- Inspecting and Repairing Reduction and Parking Brake Assembly
- Assembling Reduction Differential
- Assembly Sequence of Differential Gear Assembly
- Suggestions for Assembling Differential Gear Assembly
- Adjusting Preload of Reduction Pinion
- Adjusting the Contact Between Gear and Pinion Teeth
- Assembly Sequence of Reduction and Parking Brake Assembly
- Assembling Reduction and Parking Brake Assembly
- Assembly Sequence of Reduction Differential
- Suggestions for Assembling Reduction Differential
- Front Axle (DP160N1)
- Rear Axle
- Power Steering Cylinder
- Removing Rear Wheel
- Installing Rear Wheel
- Removing Rear Axle
- Installing Rear Axle
- Disassembling Rear Axle Assembly
- Assembling Rear Axle
- Disassembling Power Steering Cylinder
- Inspecting and Adjusting Power Steering Cylinder
- Assembling Power Steering Cylinder
- Measuring Minimum Turning Radius
- Dry Brake System
- Wet Brake System
- Outline of Wheel Brake System (Dry Brake System)
- Outline of Wheel Brake System (Wet Brake System)
- Structure of Oil Cooled Braking System
- Air Dryer
- Relay Valve
- Brake Control Valve
- Air Master (Dry Brake System)
- Booster (Wet Brake System)
- Wheel Brake (Dry Brake System)
- Parking Brake System
- Parking Brake Lever
- Parking Brake
- Removing Wheel Brake
- Removal Sequence (Dry Brake System)
- Suggestions for Removal (Dry Brake System)
- Installing Wheel Brake
- Suggestions for Installation (Dry Brake System)
- Disassembling Wheel Brake (Dry Brake System)
- Inspecting and Repairing Wheel Brake (Dry Brake System)
- Assembling Wheel Brake (Dry Brake System)
- Disassembling Wheel Cylinder (Dry Brake System)
- Inspecting and Repairing Wheel Cylinder (Dry Brake System)
- Assembling Wheel Cylinder
- Disassembling Air Master (Dry Brake System)
- Assembling Air Master (Dry Brake System)
- Disassembling Booster (Wet Brake System)
- Assembling Booster (Dry Brake System)
- Disassembling Parking Brake
- Inspecting and Repairing Parking Brake
- Assembling Parking Brake
- Disassembling Brake Control Valve
- Assembling Brake Control Valve
- Disassembling Air Dryer
- Inspecting and Repairing Air Dryer
- Scheduled Inspection of Air Dryer
- Inspecting and Adjusting Air Dryer After Assembly
- Assembling Air Dryer
- Adjusting and Testing Actuation
- Inspecting Wheel Brake
- Inspecting Booster (Wet Brake System)
- Bleeding Brake System
- Bleeding Brake Pedal
- Inspecting Brake Control Valve
- Adjusting Parking Brake
- Replacing Brake Cooling Oil
- Flushing Brake Cooling Oil System
- Wheel Brake
- Brake Pedal
- Wheel Cylinder (Dry Brake System)
- Parking Brake Drum
- Steering System
- Steering Valve
- Steering Column
- Removing and Installing Steering Valve Piping
- Main Components
- Suggestions for Disassembly and Assembly
- Lever
- Removing Steering Wheel
- Installing Steering Wheel
- Inspecting Steering Wheel After Installation
- Removing Steering Valve
- Disassembling Tilt Lock Lever
- Assembling Tilt Lock Lever
- Disassembling Steering Valve
- Suggestions for Disassembling Steering Valve
- Inspecting Steering Valve after Disassembly
- Assembling Steering Valve
- Hydraulic Line
- Hydraulic Tank
- Gear Pump
- Priority Valve
- Lift and Tilt Cylinders
- Flow Regulator Valve
- Removing Control Valve
- Removing Lift Cylinders
- Installing Lift Cylinders
- Removing Tilt Cylinders
- Removing Gear Pump
- Disassembling Gear Pump
- Inspecting and Repairing Gear Pump
- Assembling Gear Pump
- Installing Gear Pump
- Disassembling Priority Valve
- Assembling Priority Valve
- Disassembling and Assembling Control Valve
- Disassembling Inlet Valve Assembly
- Cleaning and Inspecting Inlet Valve Assembly
- Assembling Inlet Valve Assembly
- Disassembling and Assembling Tilt Valve Assembly
- Cleaning and Inspecting Tilt Valve Assembly
- Assembling Tilt Valve Assembly
- Disassembling and Assembling Attachment Valve Assembly
- Cleaning and Inspecting Attachment Valve Assembly
- Assembling Attachment Valve Assembly
- Disassembling Flow Regulator Valve
- Inspecting and Repairing Flow Regulator Valve
- Assembling Flow Regulator Valve
- Disassembling Lift Cylinder
- Inspecting Lift Cylinder
- Assembling Lift Cylinders
- Disassembling Tilt Cylinder
- Inspecting and Repairing Tilt Cylinder
- Assembling Tilt Cylinder
- Inspecting and Adjusting Hydraulic System
- Hydraulic Oil
- Test Operation of Gear Pump
- Adjusting Main Relief Valve
- Checking Priority Valve Function
- Drift Test
- Loaded Drift Test
- Tilt Drift Test
- Lift Cylinder
- Tilt Cylinder
- Mast
- Forks
- Removing Mast and Lift Bracket
- Disassembling Mast Assembly
- Inspecting and Repairing Mast Assembly
- Assembling Mast Assembly
- Adjusting Mast Assembly
- Applicable Attachment Models
- Applicable Forks
- Side Shifter
- Side Shifter With Fork Positioner
- Removing Main Roller and Side Roller From Lift Bracket
- Adjusting Lift Bracket Clearance
- Installing Main Roller and Side Roller
- Disassembling Side Shifter Cylinder
- Assembling Side Shifter Cylinder
- Inspecting and Adjusting Side Shifter Cylinder
- Fork Positioner
- Maintenance Schedule
- Tightening Torques for Standard Bolts and Nuts
- Metric Fine Thread
- Metric Coarse Thread
- Periodic Replacement Parts
- Location of Periodic Replacement Parts
- Lubrication Schedule
- Lubrication Chart
- Fuel and Lubricant Specifications
- Adjustment Value and Oil Capacity
- Weight of Major Devices
- Special Tools
- Description of Circuit Diagrams
- Circuit Diagrams
- Connector Diagrams
- How to Read Circuit Diagrams
- Symbols
- Sheet Symbol
- Connecting Lines
- Equipment
- Relay Contactor and Coil
- Connectors
- Indication of Connecting Line
- Indication of GND (Earth)
- Indication of Another Specification
- How to Read Connector Diagrams
- Abbreviation
Inside this manual
Real pages from this service manual (687 pages). Open the sample pages (PDF, 351 KB)
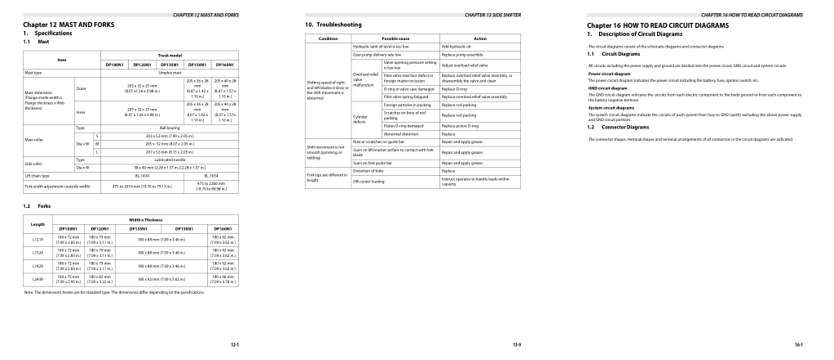
- Specifications, page 570: CHAPTER 12 MAST AND FORKS
- Troubleshooting, page 600: CHAPTER 13 SIDE SHIFTER
- Diagram, page 630: CHAPTER 16 HOW TO READ CIRCUIT DIAGRAMS
Other manuals for this machine
Save 10% on 2 manuals, 15% on 3 or more. Other manuals for the DP100N1, DP120N1, DP135N1, DP150N1, DP160N1 are listed below. Editions cover different serial number ranges: check the serial coverage and tick only the ones that match your machine.
Added to your cart. View cart
This is a service manual
Here's how it compares to the other manual types.
Service manual
Factory repair procedures and technical information such as specifications, troubleshooting, and wiring and hydraulic diagrams, for the models and systems the manual covers. See What's inside for its topics.
Operator's manual
Safe operation, controls, maintenance schedules, lubrication points, inspections, and basic checks. Repair procedures are in the service manual.
Parts manual
Illustrated diagrams with factory part numbers for identifying components and ordering parts. Repair procedures are in the service manual.
Engine service manuals are sometimes sold separately, since certain machine models were offered with more than one engine option.
What it's used for
Factory manual for in-house farm and construction shop use. Straightforward, complete, and easy to follow. It contains the OEM information dealership service departments and parts counters use to diagnose problems, identify components, and perform maintenance or repairs correctly.
Service shops and owner/operators who repair their own equipment
Identifying correct parts and seeing how assemblies come apart and go back together
Keeping equipment running with less downtime
Factory manual, 687 pages
Quantity one is the manual described above.
Fast free USA shipping
Ships in 1 business day.
60-day returns
Free if the mistake is ours. A manual ordered in error must come back unopened in its shrink-wrap; you pay return shipping and a 20% restocking fee applies. Return policy
Binder not included
Manuals over about 300 pages may need a standard 3-ring binder, which you can buy locally to keep the pages organized for shop use.
Questions about model, serial number, engine coverage or contents? Contact us before purchasing and we'll help confirm it's the right manual. Please verify the manual type, machine model, serial number range and engine coverage before purchasing: manuals ordered in error carry a 20% restocking fee (return policy).