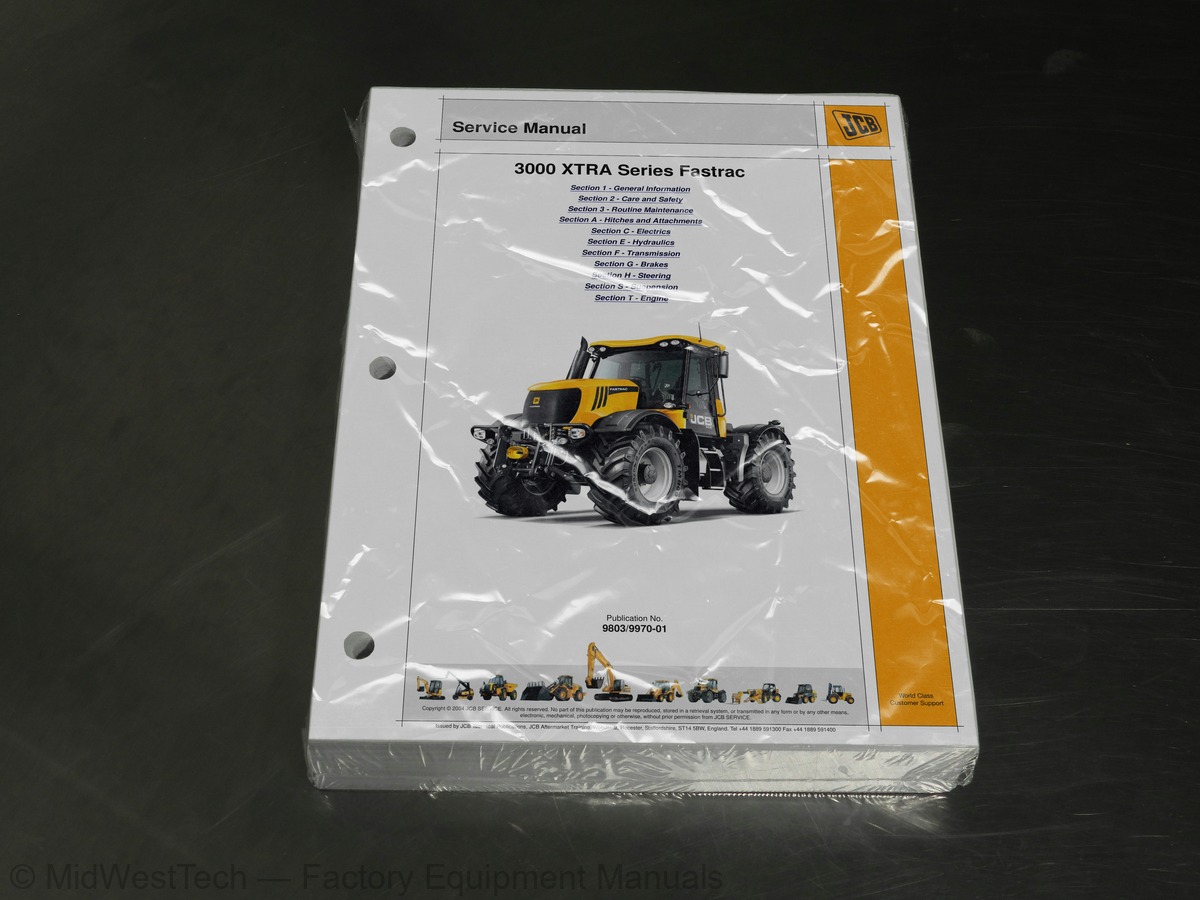
JCB 3200, 3230 XTRA Fastrac Tractor Service Manual
724 pages · Publication 9803-9970-01
Added to your cart. View cart
- Models
- 3200, 3230 XTRA Fastrac
- Manual type
- Service Manual
- Pages
- 724
- Publication
- 9803-9970-01
- Condition
- Brand new
What's inside
From the manual's own table of contents: 4 sections, 257 entries. See sample pages (PDF, 409 KB)
General73 topics
- Introduction
- Scope
- Format
- Left and Right Sides
- Hydraulic Schematic Codes
- Identifying your Machine
- Zinc Plated Fasteners and Dacromet Fasteners
- Hydraulic Connections
- `Positional Type' Hydraulic Adaptors
- Numerical List
- Tool Detail Reference
- Sealing and Retaining Compounds
- Important Information
- Safety Check List
- Health and Safety
- Parking the Machine and Making it Safe
- Releasing the Hydraulic Pressure
- Carrying Tools onto the Machine
- Connecting/Disconnecting Hydraulic Hoses
- Quick Release Couplings
- Hydraulic Contamination
- Battery Disconnection/Connection
- Removing and Replacing Components
- Battery Charging System Precautions
- Hydraulic Rams
- Service Requirements
- Owner/Operator Support
- Service/Maintenance Agreements
- Initial Service and Inspection
- Obtaining Replacement Parts
- Service Schedules
- How to Use the Service Schedules
- Calendar Equivalents
- Pre-start Cold Checks, Service Points and Fluid Levels
- Functional Test and Final Inspection
- Fluids, Lubricants and Capacities, Fuel
- Coolant Mixtures
- Fuel
- Cleaning the Machine
- Preparing the Machine for Cleaning
- Checking for Damage
- Check the Machine Body and Structure
- Check the Tyres
- Check the Seat and Seat Belt
- Check the Hydraulic Hoses and Fittings
- Checking the ROPS Structure
- Greasing
- Drive Shafts
- Front Axle Steering Swivels
- Agricultural Front 3-Point Linkage (Optional)
- Steering Column Universal Joints
- Rear Suspension Cylinder Pivots
- Hydraulic Lift and 3-Point Linkage
- Rear PTO Drive Shaft Bearing
- Automatic Trailer Coupling (if fitted)
- Access Panels
- Opening the Engine Cover
- Closing the Engine Cover
- Air Conditioning and Heater
- Air Conditioning Filters
- Cleaning the Heater Filter
- Brakes
- Checking the Foot Brake Fluid Level
- Checking the Trailer Air Tank
- Checking the Air Tank Warning Lights
- Checking and Renewing Foot Brake Pads
- Testing the Park Brake
- Checking the Park Brake Pads
- Electrical
- Battery
- Jump-starting the Engine
- Checking the Beam Alignment
- Fuses and Relays
Section 3 - Routine Maintenance76 topics
- Engine
- Checking the Oil Level
- Changing the Oil and Filter
- Checking the Coolant Level
- Draining and Refilling the Coolant
- Fan Belt
- Changing the Air Filter Elements
- Fuel System
- Draining the Fuel Pre-Filter
- Changing the Fuel Pre-Filter Element
- Changing the Fuel Filter Element
- Bleeding the Fuel System
- Hydraulic System
- Checking the Fluid Level
- Changing the Filter Element
- Changing the Hydraulic Fluid and Cleaning the Suction Strainers
- Coupling Drains
- Transmission
- Checking the Transmission Oil Level
- Changing the Transmission Oil Filter
- Changing the Transmission Oil and Cleaning the Strainer
- Front Axle
- Rear Axle
- Tyres and Wheels
- General
- Tyre Inflation
- Wheel Nut Torques
- Adjustable Track Width
- Lock Stops
- Checking and Adjusting the Front Wheel Alignment
- Fender Adjustment
- Windscreen Washer
- Checking Fluid Level
- Automatic Trailer Coupling (Optional)
- Checking for Wear
- Operation Overview
- Fault Finding
- Position Sensor Removal and Replacement
- Position Sensor Calibration
- Draft Pins Removal and Replacement
- Fuses
- Relays
- All Machines
- Drawings and Interconnection
- System Overview
- Engine Control ECU
- Dashboard ECU (EMS)
- Central Control ECU (ECU1)
- Transmission Control ECU (TECU)
- Draft Control ECU (EHR-Z)
- ABS Control ECU
- Auxiliary Controls ECU (ACE)
- Touch Screen ECU (DECU)
- Calibration
- Why Use Service Master?
- What is Service Master?
- How to Set Up Service Master
- Connect Service Master to the Machine CANbus
- Service Master Tools
- Fault Codes
- Technical Data
- Electrical Operation and Schematics
- Test Procedures
- Specifications
- Access
- Maintenance
- Removal and Replacement
- Introduction to Hydraulic Schematic Symbols
- Complete Machine Circuit with Power Beyond Service
- Pressure Testing
- Configuration
- Calibration - Auxiliary and Hitch Control Parameters
- Dismantle and Assemble
- Dismantling and Assembly
- Gear Pump (Suspension and Steering)
- Testing
Section F - i50 topics
- Flow Rate and Pressures
- Transmission Technical Data Checklist
- Component Identification
- External Components
- Internal Components
- Hydraulic Circuit
- Electrical and Electronic Network
- Ratio and Drive Control
- Joystick Controller
- Column Switch
- Touch Screen Control
- Master Clutch Control
- Clutch Pedal Position Sensor
- PTO Control
- Speed Change Lever Control
- Drive Paths
- Solenoid Identification
- Clutch Packs - Identification
- Forward/First + High Range
- Forward/Second + Medium Range
- Forward/Third + Low Range
- Forward/Fourth + Extra Low Range
- Forward/Fifth + Low Range
- Forward/Sixth - Medium Range
- Reverse/First - High Range
- Complete Transmission
- Wet Master Clutch
- Power Take Off Clutches
- 4/2 Wheel Drive
- Gearbox Pressure Test Procedure
- Charge Pump
- Removal
- Replacement
- Dismantling
- Control Valve
- P.T.O. Position Sensors
- Gearbox
- Removal and Replacement - Differential Oil Seal
- Dismantling and Assembly - Hub and Drive Shaft
- Assembly
- Removal and Replacement - Drive Head
- Dismantling and Assembly - Drive Head
- Pinion Depth
- Solid Spacer Installation
- Crown Wheel and Pinion Adjustment
- Dismantling and Assembly - Differential
- Dismantling and Assembly - Rear PTO Drive Shaft
- When Dismantling
- Installation - Rear PTO Output Shaft
- Fitting
Section G - i19 topics
- Service Tools
- Air Pipes - Colour Codes
- Air Compression
- Front Brake Circuit
- Rear Brake Circuit
- Trailer/Parking Brake Circuit
- Parking Brake Circuit
- Tractor Services Circuit
- Hydraulic Trailer Brakes (if fitted)
- Bleeding
- Techinical Data
- Tractor ABS
- Dismantling and Assembling
- Bench Testing
- Cleaning and Inspection
- When Assembling
- Bench Tests
- When Removing
- When Replacing
Section H - i35 topics
- Hydraulic Operation and Schematics
- Fault Finding Tables
- Pressure Testing - Steering Pump
- Limit Valve Setting
- Wheel Alignment
- Fitting the Input Shaft Nut and Star Nut
- Inspection
- Universal Joints and Phasing
- Intermediate Shafts and Bearings
- Bulkhead Shaft
- Removal and Replacement - Shock Absorber (D)
- Removal and Replacement - Control Arm (A)
- Outer Control Arms
- Centre Control Arm
- Control Arm Bosses (View Y)
- Removal and Replacement - Panhard Rod (B)
- Removal and Replacement - Anti Roll Bar (E)
- Removal and Replacement - Coil Spring and Microcellular Spring
- Primary System
- Ride Height Control
- Ride Height Calibration
- Pressure Maintenance Valve
- Accumulator and Gas Spring
- Discharging the Hydraulic Pressure
- Removal and Replacement - Potentiometer
- After Replacement
- Removal and Replacement - Accumulator (A), Gas Spring (G)
- Removal and Replacement - Anti-roll Bar
- Removal and Replacement - Control Arm (J)
- Removal and Replacement - ‘V’ Link
- Dismantling and Assembly - Ball Joint
- Removal and Replacement - Suspension Cylinder (S)
- Dismantling and Assembly - Suspension Cylinder
- Gland Fitting Procedure
- Removal and Replacement - Flywheel Damper
Inside this manual
Real pages from this service manual (724 pages). Open the sample pages (PDF, 408 KB)
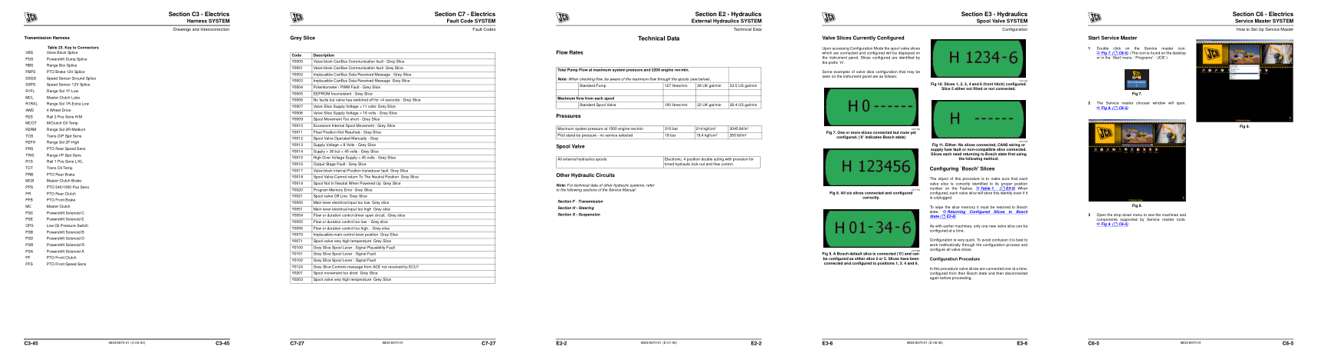
- Diagram, page 273: Section C3 - Electrics
- Troubleshooting, page 361: Section C7 - Electrics
- Specifications, page 394: Section E2 - Hydraulics
- Color page, page 403: Section E3 - Hydraulics
- Color page, page 327: Section C6 - Electrics
This is a service manual
Here's how it compares to the other manual types.
Service manual
Factory repair procedures and technical information such as specifications, troubleshooting, and wiring and hydraulic diagrams, for the models and systems the manual covers. See What's inside for its topics.
Operator's manual
Safe operation, controls, maintenance schedules, lubrication points, inspections, and basic checks. Repair procedures are in the service manual.
Parts manual
Illustrated diagrams with factory part numbers for identifying components and ordering parts. Repair procedures are in the service manual.
Engine service manuals are sometimes sold separately, since certain machine models were offered with more than one engine option.
What it's used for
Factory manual for in-house farm and construction shop use. Straightforward, complete, and easy to follow. It contains the OEM information dealership service departments and parts counters use to diagnose problems, identify components, and perform maintenance or repairs correctly.
Service shops and owner/operators who repair their own equipment
Identifying correct parts and seeing how assemblies come apart and go back together
Keeping equipment running with less downtime
Factory manual, 724 pages
Quantity one is the manual described above.
Fast free USA shipping
Ships in 1 business day.
60-day returns
Free if the mistake is ours. A manual ordered in error must come back unopened in its shrink-wrap; you pay return shipping and a 20% restocking fee applies. Return policy
Binder not included
Manuals over about 300 pages may need a standard 3-ring binder, which you can buy locally to keep the pages organized for shop use.
Other editions and similar models
Questions about model, serial number, engine coverage or contents? Contact us before purchasing and we'll help confirm it's the right manual. Please verify the manual type, machine model, serial number range and engine coverage before purchasing: manuals ordered in error carry a 20% restocking fee (return policy).